HP Scitex LX600 HP Scitex LX Printer Family - Maintenance and troubleshooting - Page 42
Move the printer
 |
View all HP Scitex LX600 manuals
Add to My Manuals
Save this manual to your list of manuals |
Page 42 highlights
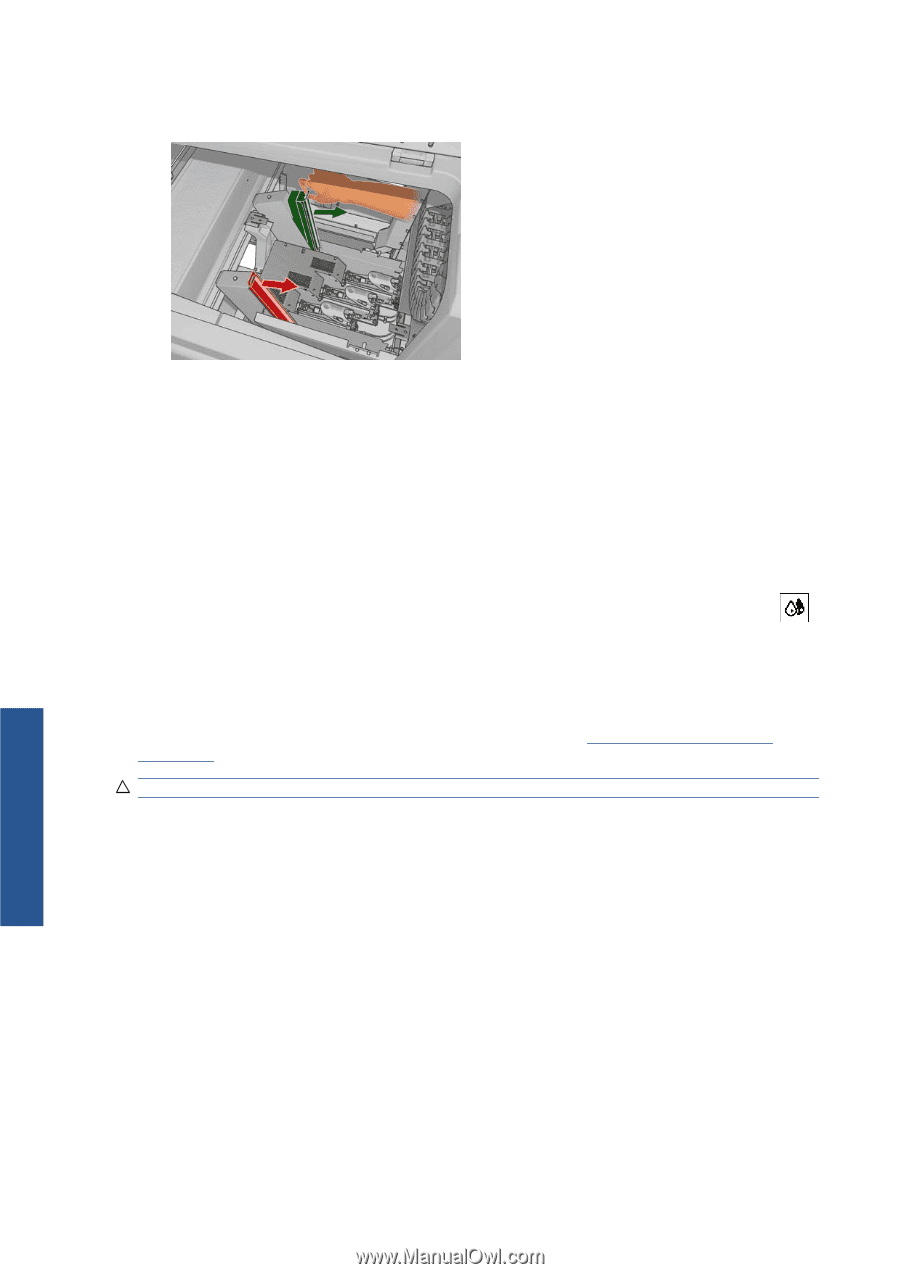
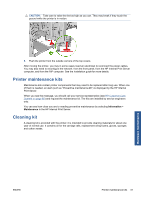
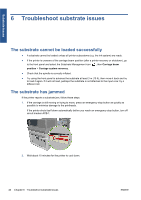
4. Pull the old filter out of the bottom of its container and dispose of it according to the instructions provided with the new filter. Hardware maintenance 5. Unpack the new filters and ensure that the blue tabs at each end of each filter are at right angles to the filter. 6. Insert the new filter into the container. 7. Ensure that the blue tabs on the filters are correctly engaged with the hooks on the containers, otherwise the containers may not close completely. 8. Lower the container into position. 9. Lower the carriage cover and close the door. Press the OK key on the front panel. 10. If you forgot to select Replace cleaner roll before replacing the printhead cleaning roll, you should now go to the front panel and select Check cleaner roll from the Ink System menu . Move the printer If you wish to move the printer a short distance on the same site, across a horizontal floor with no steps and no slopes of more than 5% inclination, see the following instructions. For more difficult movement operations, please call your service representative (see HP Customer Care Centers on page 68). CAUTION: Slopes steeper than 5% may cause serious damage to the printer. 1. Turn off the printer. 2. Disconnect all power and network cables from the printer. 3. Disconnect all ink cartridges and remove them from the printer. Hold the cartridge connectors in position with adhesive tape. 4. Raise the feet so that the wheels (A) touch the ground. To raise a foot: a. Use a 30 mm (1.18 in) wrench to unlock the nut at the top of the foot. b. Rotate the nut manually down the bolt. Leave about 2 cm (0.8 in) clearance at the bottom between nut and foot. c. Use a 15 mm (0.59 in) wrench to rotate the foot upwards. Use the flat faces at the bottom of the bolt to fit the wrench. d. Raise the foot as far as the bolt allows. e. Use the 30 mm (1.18 in) wrench to relock the nut. 36 Chapter 4 Hardware maintenance ENWW
-
 1
1 -
2
-
3
-
4
-
5
-
6
-
7
-
8
-
9
-
10
-
11
-
12
-
13
-
14
-
15
-
16
-
17
-
18
-
19
-
20
-
21
-
22
-
23
-
24
-
25
-
26
-
27
-
28
-
29
-
30
-
31
-
32
-
33
-
34
-
35
-
36
-
 37
37 -
 38
38 -
 39
39 -
 40
40 -
 41
41 -
 42
42 -
 43
43 -
 44
44 -
 45
45 -
 46
46 -
 47
47 -
48
-
49
-
50
-
51
-
52
-
53
-
54
-
55
-
56
-
57
-
58
-
59
-
60
-
61
-
62
-
63
-
64
-
65
-
66
-
67
-
68
-
69
-
70
-
71
-
72
-
73
-
74
-
75
-
76
-
77
-
78
 |
 |