Kyocera TASKalfa 3051ci Printing System (11),(12),(13),(14) Printing Guide (Fi - Page 37
Installing printer drivers from the User Software DVD
 |
View all Kyocera TASKalfa 3051ci manuals
Add to My Manuals
Save this manual to your list of manuals |
Page 37 highlights
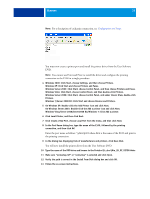
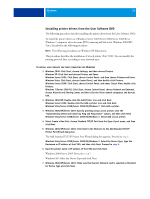
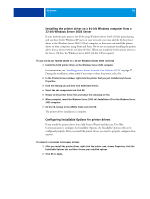
WINDOWS 37 Installing printer drivers from the User Software DVD The following procedures describe installing the printer driver from the User Software DVD. To install the printer driver on a Windows Server 2003/Server 2008/Server 2008 R2 or Windows 7 computer, select the same PPD (oemsetup.inf ) file as for Windows 2000/XP/ Vista, described in the following procedure. NOTE: The following procedures use Windows XP illustrations. This procedure describes the installation of a local printer (Port 9100). You can modify the printing protocol later, according to your network type. TO INSTALL AND COMPLETE THE PRINT CONNECTION FOR WINDOWS 1 Windows 2000: Click Start, choose Settings, and then choose Printers. Windows XP: Click Start and choose Printers and Faxes. Windows Server 2003: Click Start, choose Control Panel, and then choose Printers and Faxes. Windows Vista: Click Start, choose Control Panel, and then double-click Printers. Windows Server 2008: Click Start, choose Control Panel, and under Classic View, double-click Printers. Windows 7/Server 2008 R2: Click Start, choose Control Panel, choose Network and Internet, choose Network and Sharing Center, and then click the View network computers and devices link. 2 Windows 2000/XP: Double-click the Add Printer icon and click Next. Windows Server 2003: Double-click the Add a printer icon and click Next. Windows Vista/Server 2008/Server 2008 R2/Windows 7: Click Add a printer. 3 Windows 2000/XP/Server 2003: Specify printing using a Local printer, clear the "Automatically detect and install my Plug and Play printer" option, and then click Next. Windows Vista/Server 2008/Server 2008 R2/Windows 7: Select Add a local printer. 4 Select Create a New Port, choose Standard TCP/IP Port from the Type of port menu, and then click Next. 5 Windows 2000/XP/Server 2003: Click Next in the Welcome to the Add Standard TCP/IP Printer Port Wizard dialog box. The Add Standard TCP/IP Printer Port Wizard dialog box appears. Proceed to step 6. Windows Vista/Server 2008/Server 2008 R2/Windows 7: Select the Device Type, type the Hostname or IP address of the E100, and then click Next. Proceed to step 9. 6 Type the printer name or IP address of the E100 and click Next. Windows 2000/Server 2003: Proceed to step 7. Windows XP: Select the Device Type and click Next. 7 Windows 2000/XP/Server 2003: Make sure that Generic Network Card is selected as Standard for Device Type and click Next.
-
 1
1 -
2
-
3
-
4
-
5
-
6
-
7
-
8
-
9
-
10
-
11
-
12
-
13
-
14
-
15
-
16
-
17
-
18
-
19
-
20
-
21
-
22
-
23
-
24
-
25
-
26
-
27
-
28
-
29
-
30
-
31
-
 32
32 -
 33
33 -
 34
34 -
 35
35 -
 36
36 -
 37
37 -
 38
38 -
 39
39 -
 40
40 -
 41
41 -
 42
42 -
43
-
44
-
45
-
46
-
47
-
48
-
49
-
50
-
51
-
52
-
53
-
54
-
55
-
56
-
57
-
58
-
59
-
60
-
61
-
62
-
63
-
64
-
65
-
66
-
67
-
68
-
69
-
70
-
71
-
72
-
73
-
74
-
75
-
76
-
77
-
78
-
79
-
80
-
81
-
82
-
83
-
84
-
85
-
86
-
87
-
88
-
89
-
90
-
91
-
92
-
93
-
94
-
95
-
96
-
97
-
98
-
99
-
100
-
101
-
102
-
103
-
104
-
105
-
106
-
107
-
108
-
109
-
110
 |
 |