Kyocera TASKalfa 3051ci Printing System (11),(12),(13),(14) Printing Guide (Fi - Page 38
To set up Standard TCP/IP Port Raw or LPR for, Windows, WebTools
 |
View all Kyocera TASKalfa 3051ci manuals
Add to My Manuals
Save this manual to your list of manuals |
Page 38 highlights
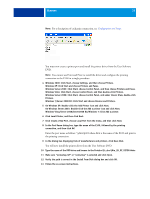
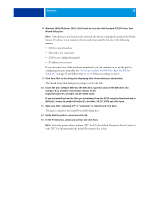
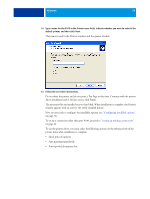
WINDOWS 38 8 Windows 2000/XP/Server 2003: Click Finish to close the Add Standard TCP/IP Printer Port Wizard dialog box. NOTE: If the device is not found on the network, the device is displayed instead of the Finish button. If a device is not found on the network, that could be for one of the following reasons: • E100 is not powered on • Network is not connected • E100 is not configured properly • IP address is not correct If you encounter one of the situations mentioned, you can continue to set up the port by configuring the port manually. See "To set up Standard TCP/IP Port (Raw or LPR) for Windows" on page 45 and follow steps 11 to 14 before proceeding to step 9. 9 Click Have Disk in the dialog box displaying lists of manufacturers and printers. The Install From Disk dialog box prompts you for the disk. 10 Insert the User Software DVD into the DVD drive, type the name of the DVD drive (for example, D:\), and then click Browse. Browse to the English\Prntdrvr\Ps_drvr\Win_2K_XP_VISTA folder. If you are installing from the files you downloaded from the E100 using the Downloads tab in WebTools, browse to prntdrvr\Prntdrvr\Ps_drvr\Win_2K_XP_VISTA and click Open. 11 Make sure that "oemsetup.inf" or "oemsetup" is selected and click Open. The path is copied to the Install From Disk dialog box. 12 Verify that the path is correct and click OK. 13 In the Printers box, select your printer and click Next. NOTE: Select the printer driver without "EU" for US (the default Document Size is Letter) or with "EU" for International (the default Document Size is A4).
-
 1
1 -
2
-
3
-
4
-
5
-
6
-
7
-
8
-
9
-
10
-
11
-
12
-
13
-
14
-
15
-
16
-
17
-
18
-
19
-
20
-
21
-
22
-
23
-
24
-
25
-
26
-
27
-
28
-
29
-
30
-
31
-
32
-
 33
33 -
 34
34 -
 35
35 -
 36
36 -
 37
37 -
 38
38 -
 39
39 -
 40
40 -
 41
41 -
 42
42 -
 43
43 -
44
-
45
-
46
-
47
-
48
-
49
-
50
-
51
-
52
-
53
-
54
-
55
-
56
-
57
-
58
-
59
-
60
-
61
-
62
-
63
-
64
-
65
-
66
-
67
-
68
-
69
-
70
-
71
-
72
-
73
-
74
-
75
-
76
-
77
-
78
-
79
-
80
-
81
-
82
-
83
-
84
-
85
-
86
-
87
-
88
-
89
-
90
-
91
-
92
-
93
-
94
-
95
-
96
-
97
-
98
-
99
-
100
-
101
-
102
-
103
-
104
-
105
-
106
-
107
-
108
-
109
-
110
 |
 |
