Kyocera TASKalfa 3051ci Printing System (11),(12),(13),(14) Printing Guide (Fi - Page 40
Installing the printer driver on a 64-bit Windows computer from a 32-bit Windows Server 2003 Server
 |
View all Kyocera TASKalfa 3051ci manuals
Add to My Manuals
Save this manual to your list of manuals |
Page 40 highlights
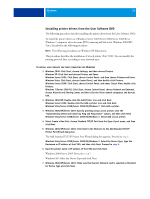
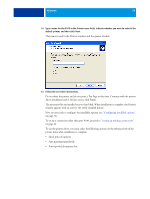
WINDOWS 40 Installing the printer driver on a 64-bit Windows computer from a 32-bit Windows Server 2003 Server If your network users print to the E100 using Windows Server 2003 (32-bit) print sharing, and you have 64-bit Windows XP users on your network, you must add the 64-bit printer driver to the Windows Server 2003 (32-bit) computer, so that users can install the printer driver on their computers using Point and Print. We do not recommend installing the printer driver from a Server (32-bit) to Client (64-bit). When you install the 64-bit printer driver to the Server (32-bit), the Windows Server 2003 (64-bit) CD is required. TO ADD THE 64-BIT PRINTER DRIVER TO A 32-BIT WINDOWS SERVER 2003 COMPUTER 1 Install the E100 printer driver on the Windows Server 2003 computer. For instructions, see "Installing printer drivers from the User Software DVD" on page 37. During the installation, when asked if you want to share the printer, select Yes. 2 In the Printer & Faxes window, right-click the printer that you just installed and choose Properties. 3 Click the Sharing tab and then click Additional Drivers. 4 Select the x64 components and click OK. 5 Browse to the printer driver files and select the oemsetup.inf file. 6 When prompted, insert the Windows Server 2003 x64 Installation CD on the Windows Server 2003 computer. 7 On the CD, browse to the AMD64 folder and click OK. The printer driver installation is complete. Configuring Installable Options for printer drivers If you install the printer driver from Add Printer Wizard and then use Two-Way Communication to configure the Installable Options, the Installable Options will not be configured properly. After you install the printer driver, you need to properly configure these options. TO CORRECTLY CONFIGURE INSTALLABLE OPTIONS 1 After you install the printer driver, right-click the printer icon, choose Properties, click the Installable Options tab, and then choose your installed options. 2 Click OK or Apply.
-
 1
1 -
2
-
3
-
4
-
5
-
6
-
7
-
8
-
9
-
10
-
11
-
12
-
13
-
14
-
15
-
16
-
17
-
18
-
19
-
20
-
21
-
22
-
23
-
24
-
25
-
26
-
27
-
28
-
29
-
30
-
31
-
32
-
33
-
34
-
 35
35 -
 36
36 -
 37
37 -
 38
38 -
 39
39 -
 40
40 -
 41
41 -
 42
42 -
 43
43 -
 44
44 -
 45
45 -
46
-
47
-
48
-
49
-
50
-
51
-
52
-
53
-
54
-
55
-
56
-
57
-
58
-
59
-
60
-
61
-
62
-
63
-
64
-
65
-
66
-
67
-
68
-
69
-
70
-
71
-
72
-
73
-
74
-
75
-
76
-
77
-
78
-
79
-
80
-
81
-
82
-
83
-
84
-
85
-
86
-
87
-
88
-
89
-
90
-
91
-
92
-
93
-
94
-
95
-
96
-
97
-
98
-
99
-
100
-
101
-
102
-
103
-
104
-
105
-
106
-
107
-
108
-
109
-
110
 |
 |
