Kyocera TASKalfa 3051ci Printing System (11),(12),(13),(14) Printing Guide (Fi - Page 39
To use the printer driver, you must select the following options on the Advanced tab of
 |
View all Kyocera TASKalfa 3051ci manuals
Add to My Manuals
Save this manual to your list of manuals |
Page 39 highlights
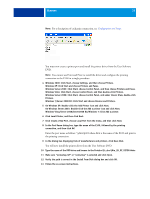
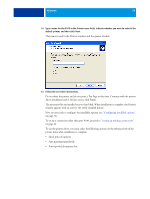
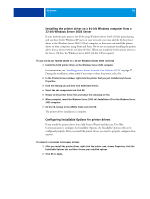
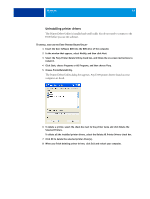
WINDOWS 39 14 Type a name for the E100 in the Printer name field, indicate whether you want to make it the default printer, and then click Next. This name is used in the Printers window and the queues window. 15 Follow the on-screen instructions. Do not share the printer and do not print a Test Page at this time. Continue with the printer driver installation and at the last screen, click Finish. The necessary files are installed on your hard disk. When installation is complete, the Printers window appears with an icon for the newly installed printer. Now you are ready to configure the installable options (see "Configuring installable options" on page 51). To set up a connection other than port 9100, proceed to "Setting up printing connections" on page 44. To use the printer driver, you must select the following options on the Advanced tab of the printer driver after installation is complete: • Spool print documents • Start printing immediately • Print spooled documents first
-
 1
1 -
2
-
3
-
4
-
5
-
6
-
7
-
8
-
9
-
10
-
11
-
12
-
13
-
14
-
15
-
16
-
17
-
18
-
19
-
20
-
21
-
22
-
23
-
24
-
25
-
26
-
27
-
28
-
29
-
30
-
31
-
32
-
33
-
 34
34 -
 35
35 -
 36
36 -
 37
37 -
 38
38 -
 39
39 -
 40
40 -
 41
41 -
 42
42 -
 43
43 -
 44
44 -
45
-
46
-
47
-
48
-
49
-
50
-
51
-
52
-
53
-
54
-
55
-
56
-
57
-
58
-
59
-
60
-
61
-
62
-
63
-
64
-
65
-
66
-
67
-
68
-
69
-
70
-
71
-
72
-
73
-
74
-
75
-
76
-
77
-
78
-
79
-
80
-
81
-
82
-
83
-
84
-
85
-
86
-
87
-
88
-
89
-
90
-
91
-
92
-
93
-
94
-
95
-
96
-
97
-
98
-
99
-
100
-
101
-
102
-
103
-
104
-
105
-
106
-
107
-
108
-
109
-
110
 |
 |
