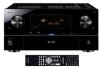
Pioneer SC-27 Owner's Manual
Pioneer SC-27 - SC27 - Elite 7.1 Channels A/V THX Receiver Manual
 |
UPC - 012562957487
View all Pioneer SC-27 manuals
Add to My Manuals
Save this manual to your list of manuals |
Pioneer SC-27 manual content summary:
- Pioneer SC-27 | Owner's Manual - Page 1
Operating Instructions audio/video multi-channel receiver - Pioneer SC-27 | Owner's Manual - Page 2
MULTI-CHANNEL RECEIVER Model Number: SC-27 / SC-25 Responsible Party Name: PIONEER ELECTRONICS SERVICE with the instructions, may °F); less than 85 %RH (cooling vents not blocked) Do not install User Alterations or modifications carried out without appropriate authorization may invalidate the user - Pioneer SC-27 | Owner's Manual - Page 3
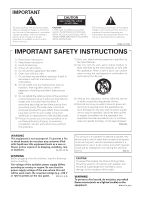
COVER (OR BACK). NO USER-SERVICEABLE PARTS INSIDE. REFER SERVICING TO QUALIFIED SERVICE PERSONNEL. The exclamation point within an equilateral triangle is intended to alert the user to the presence of important operating and maintenance (servicing) instructions in the literature accompanying the - Pioneer SC-27 | Owner's Manual - Page 4
use, the plug must be removed and appropriate one fitted. Replacement and mounting of an AC plug on the power supply cord of this unit should be performed only by qualified service personnel. If connected to an AC outlet, the cut-off plug can cause severe electrical shock. Make sure it is - Pioneer SC-27 | Owner's Manual - Page 5
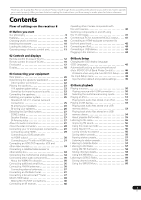
11 02 Controls and displays Remote control (In case of SC-27 12 Remote control (In case of SC-25 15 Front panel 17 Display 18 03 Connecting your equipment Rear panel 20 Determining the speakers' application 22 Other speaker connection 22 Placing the speakers 23 THX speaker system setup 23 - Pioneer SC-27 | Owner's Manual - Page 6
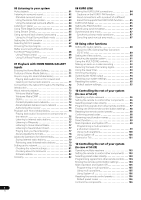
In case of SC-27) Operating multiple receivers 96 Setting the remote to control other components . . . . 96 Selecting preset codes directly 96 Programming signals from other remote controls . . . 97 Erasing one of the remote control button settings . . . 98 Resetting the remote control presets 98 - Pioneer SC-27 | Owner's Manual - Page 7
128 Multi Channel Input Setup 128 ZONE Audio Setup 129 Power ON Level Setup 129 Volume Limit Setup 129 Remote Control Mode Setup 130 Flicker Reduction Setup 130 13 Additional information Speaker Setting Guide 131 Positional relationship between speakers and monitor 132 Troubleshooting 132 - Pioneer SC-27 | Owner's Manual - Page 8
and the other setup (page 123) 14 Making maximum use of the remote control • SC-27 - Operating multiple receivers (page 96) • SC-27 - Setting the remote to control other components (page 96) • SC-25 - Operating multiple receivers (page 103) • SC-25 - Setting the remote to control other components - Pioneer SC-27 | Owner's Manual - Page 9
numerous MCACC preset memories, standing wave control and microphone measurements from a series of reference points, your home theater experience can be truly customized for optimal surround sound. • THX certified design (In case of SC-27) This receiver bears the THX Ultra2 Plus logo, which means it - Pioneer SC-27 | Owner's Manual - Page 10
that you've received the following supplied accessories: • Setup microphone (cable: 5 m (16.4 ft.)) • Remote control unit • Dry cell batteries x2 • AM loop antenna • FM wire antenna • iPod cable • Power cord • Warranty card • These operating instructions Installing the receiver • When installing - Pioneer SC-27 | Owner's Manual - Page 11
SC-27 In case of SC-25 Operating range of remote control unit The remote control may not work properly if: • There are obstacles between the remote control and the receiver's remote please comply with governmental regulations or environmental public instruction's rules that apply in your country or - Pioneer SC-27 | Owner's Manual - Page 12
and displays Chapter 2: Controls and displays Remote control (In case of SC-27) 1 RECEIVER MAIN SOURCE 2 ZONE2 3 12 3 MULTI OPERATION DVD BD TV DVR HOME MEDIA VIDEO1 VIDEO2 HDMI GALLERY 4 USB iPod CD CD-R TUNER MULTI CH PHONO IN XM SIRIUS INPUT SELECT 5 13 6 7 8 9 10 11 - Pioneer SC-27 | Owner's Manual - Page 13
a CD, DVD, etc. ENTER can be used to enter commands for TV or DTV. After set the remote control operation switch to RECEIVER: SIGNAL SEL - Use to select an input signal (page 68). SLEEP - Use to put the receiver in sleep mode and select the amount of time before sleep (page 93). DIMMER - Dims or - Pioneer SC-27 | Owner's Manual - Page 14
Remote control operation selector switch Set to RECEIVER to operate the receiver, TV or SOURCE to operate the TV or the source device. When this switch is set to RECEIVER, the receiver can be controlled channels for DVD/DVR units. Note 1 Press and hold in the remote control remote control - Pioneer SC-27 | Owner's Manual - Page 15
THX PHASE CTRL STATUS ANT MPX PQLS MEMORY AUDIO INFO CH DISP MULTI OPE TV CTRL RECEIVER REMOTE SETUP ZONE 2 ZONE 3 MAIN 13 14 15 16 17 RECEIVER The remote has been conveniently color-coded according to component control using the following system: • White - Receiver control, TV Control - Pioneer SC-27 | Owner's Manual - Page 16
DISP - Switches between named station presets and radio frequencies. CH +/- - Use to select channels for DVD/DVR units. 9 REMOTE SETUP Use to input the preset code when making remote control settings and to set the remote control mode (page 103). 10 TV CTRL Use this button to set preset code of your - Pioneer SC-27 | Owner's Manual - Page 17
SURR/ALC/ HOME STANDARD ADVANCED STEREO MULTI-ZONE SPEAKERS (PRESET) ENTER (PRESET) 7 STREAM DIRECT THX SURROUND SURROUND iPod iPhone (TUNE) HOME MENU RETURN HDMI 4 USB VIDEO CAMERA MCACC SETUP MIC PHONES 16 17 18 1 STANDBY/ON Switches the receiver between on and standby. Power - Pioneer SC-27 | Owner's Manual - Page 18
and Front Stage Surround Advance modes (page 65). 14 MULTI-ZONE controls If you've made MULTI-ZONE connections (see MULTIZONE setup on page 38) use these controls to control the sub zone from the main zone (see Using the MULTI-ZONE controls on page 91). 15 SPEAKERS Use to change the speaker - Pioneer SC-27 | Owner's Manual - Page 19
"+12dB" indicates the maximum level. 16 Input function indicators Light to indicate the input function you have selected. 17 Scroll indicators . 23 Remote control mode indicator Lights to indicate the receiver's remote control mode setting. (Not displayed when set to 1.) (SC-27: page 96, SC-25: - Pioneer SC-27 | Owner's Manual - Page 20
on page 37. 4 Coaxial digital audio inputs (x3 (SC-27), x2 (SC-25)) Use for digital audio sources, including DVD players/ recorders, digital satellite receivers, CD players, etc. See also The Input Setup menu on page 48 to assign the inputs. 5 Optical digital audio inputs (x4)/outputs (x2) Use the - Pioneer SC-27 | Owner's Manual - Page 21
™ tuner on page 37. 8 Remote inputs/output Use for connection to an external remote control sensor for use in a MULTI-ZONE setup, for example. See Connecting an IR receiver on page 40. 9 Control input/output Use to connect other Pioneer components so that you can control all your equipment from - Pioneer SC-27 | Owner's Manual - Page 22
Surr Back system on page 27). [1] 7.1ch surround connection (Multi Zone) With these connections you can simultaneously enjoy 5.1-channel surround sound in the main zone with stereo playback on another component in ZONE 2. (The selection of input Control) on page 46. Surround left - Pioneer SC-27 | Owner's Manual - Page 23
Surround Back Surround right 7.1 channel surround system: Front left Center Subwoofer Front right 90° Surround left 90° Surround right Surround back 60° Surround back left right THX speaker system setup If you are using a THX certified subwoofer use the THX INPUT jack on the subwoofer - Pioneer SC-27 | Owner's Manual - Page 24
Each speaker connection on the receiver comprises a positive (+) and disconnecting the speaker cables, disconnect the power cord before touching any uninsulated parts. • Make end of the speaker terminal. Important • Please refer to the manual that came with your speakers for details on how to connect - Pioneer SC-27 | Owner's Manual - Page 25
channel surround connections Subwoofer Center Front left LINE LEVEL INPUT MAX) SIRIUS IN IR IN 1 IN 2 OUT IN CONTROL OUT 1 IN 1 IN 2 IN 3 (DVD) 2 MULTI CH IN FRONT CENTER SURROUND SURROUND BACK L R SPEAKERS Class 2 Wiring R SURROUND BACK/ B L (Single) SELECTABLE SEE INSTRUCTION MANUAL - Pioneer SC-27 | Owner's Manual - Page 26
IN FRONT CENTER SURROUND SURROUND BACK (Single) L PRE OUT R SUBWOOFER MULTI CH IN FRONT CENTER SURROUND SURROUND BACK L R SPEAKERS Class 2 Wiring R SURROUND BACK/ B L (Single) SELECTABLE SEE INSTRUCTION MANUAL CAUTION: SPEAKER IMPEDANCE 6 Ω - 16 Ω . ATTENTION: ENCEINTE D'IMPEDANCE DE 6 Ω - 16 - Pioneer SC-27 | Owner's Manual - Page 27
to do this. Bi-Amping setup Bi-amping connection of the front speakers for high sound quality with 5.1-channel surround sound. 1 Connect Bi-amp are several types of audio input and output terminals on this receiver. The receiver selects the first available signal in the following order corners. 27 en - Pioneer SC-27 | Owner's Manual - Page 28
Input Setup menu on page 48), the converter gives priority to HDMI, component, S-Video, then composite (in that order). Source device Terminal for connection with source device INPUT SELECTOR STANDBY/ON PHASE CONTROL ADVANCED MCACC PQLS HDMI MASTER VOLUME This receiver , THX recommends - Pioneer SC-27 | Owner's Manual - Page 29
with no HDMI output on page 30). • If your Blu-ray disc player offers multi-channel analog audio outputs, see Connecting the multichannel analog inputs on page 34. • The sound of the TV cannot be heard over the receiver if the TV is connected using an HDMI cable. If you want to listen to - Pioneer SC-27 | Owner's Manual - Page 30
delivers a very stable, flicker-free picture. See the manuals that came with your TV and source component to check whether they are compatible with progressive-scan video. • If your DVD player offers multi-channel analog audio outputs, see Connecting the multichannel analog inputs on page 34. 30 en - Pioneer SC-27 | Owner's Manual - Page 31
) SELECTABLE SEE INSTRUCTION MANUAL CAUTION: SPEAKER IMPEDANCE 6 Ω - 16 Ω . ATTENTION: ENCEINTE D'IMPEDANCE DE 6 Ω - 16 Ω . SELECTABLE VOIR LE MODE D'EMPLOI RS-232C • Connect using an HDMI cable to listen to HD audio on the receiver. Do not use an HDMI cable to input video signals. Depending - Pioneer SC-27 | Owner's Manual - Page 32
(HDMI™) technology. This receiver supports the functions described below through HDMI connections. • Digital transfer of uncompressed video (contents protected by HDCP (1080p/24, 1080p/60, etc.)) • Deep Color signal transfer2 • x.v.Color signal transfer2 • Input of multi-channel linear PCM digital - Pioneer SC-27 | Owner's Manual - Page 33
receiver you'll need to tell the receiver which input you connected the recorder to (see also The Input Setup AM LOOP FRON IR IN 1 IN 2 OUT IN CONTROL OUT VIDEO ZONE 2 ZONE 3 PHONO CD OUT OUT SURROUND BACK/ B L (Single) SELECTABLE SEE INSTRUCTION MANUAL CAUTION: SPEAKER IMPEDANCE 6 Ω - 16 - Pioneer SC-27 | Owner's Manual - Page 34
the receiver which input you connected the set-top box to (see The Input Setup menu on page 48). STB Connecting the multichannel analog inputs For DVD Audio and SACD playback, your DVD player may have 5.1, 6.1 or 7.1 channel analog outputs (depending on whether your player supports surround back - Pioneer SC-27 | Owner's Manual - Page 35
that most turntables require. Most digital components also have analog connections. When you set up the receiver you'll need to tell the receiver which input you connected the component to (see also The Input Setup menu on page 48). CD-R, MD, DAT, etc. Select one AUDIO OUT DIGITAL OUT R ANALOG - Pioneer SC-27 | Owner's Manual - Page 36
MULTI CH IN FRONT CENTER SURROUND SURROUND BACK L R SUBWOOFER AR FRONT L CENTER ANALOG INPUT L R Surround back channel amplifier ANALOG INPUT to OFF, or simply disconnect any speakers that are connected directly to the receiver. If you're not using a subwoofer, change the front speaker setting - Pioneer SC-27 | Owner's Manual - Page 37
sold separately), you will also need to activate the XM Radio service to begin receiving broadcasts. 75 Ω coaxial cable ANTENNA FM UNBAL 75 AM LOOP IN 1 IN 2 OUT IN CONTROL OUT VIDEO ZONE 2 ZONE 3 OUT OUT L R SPEAKERS SELECTABLE SEE INSTRUCTION MANUAL CAUTIO SPEAKER I ATTEN ENCEINTE - Pioneer SC-27 | Owner's Manual - Page 38
IN 2 OUT IN CONTROL OUT VIDEO ZONE 2 ZONE 3 PH OUT OUT L R SPEAKERS SELECTABLE SEE INSTRUCTION MANUAL CAUTION: SPEAKER IMPEDA MULTI CH IN and PHONO inputs.) b.JPEG files cannot be played with the input set to USB input. c.The COMPONENT VIDEO ZONE 2 OUT jack is only provided on the SC-27 - Pioneer SC-27 | Owner's Manual - Page 39
Y ZONE 2 OUT P SIRIUS IN IR IN 1 IN 2 OUT IN CONTROL OUT VIDEO ZONE 2 ZONE 3 OUT OUT L R SPEAKERS SELECTABLE SEE INSTRUCTION MANUAL CAUTION SPEAKER IMPE ATTENTIO ENCEINTE D'IM SELECTABLE VOIR LE MOD D'EMPLOI RS-232C Note 1 SC-27 only: COMPONENT VIDEO ZONE 2 OUT can be used to output - Pioneer SC-27 | Owner's Manual - Page 40
IR IN IN 1 IN 2 OUT IN CONTROL OUT Pioneer S component RS-232C CONTROL OUT IN IR receiver 2 Connect the IR IN jack of another component to the IR OUT jack on the rear of this receiver to link it to the IR receiver. Please see the manual supplied with your IR receiver for the type of cable - Pioneer SC-27 | Owner's Manual - Page 41
on the back panel of this receiver (the cable must be cross type, female-female). The software to output the results is available from the support area of the Pioneer website (http:// www.pioneerelectronics.com/PUSA/ Home+Entertainment+Custom+Install). Instructions for using the software are also - Pioneer SC-27 | Owner's Manual - Page 42
, INPUT SELECT (remote) or the INPUT SELECTOR dial (front panel) to select HDMI 4. CONTROL ON/OFF TUNER EDIT BAND AUTO SURR/ALC/ HOME STANDARD ADVANCED STEREO STREAM DIRECT THX SURROUND SURROUND HDMI 4 VIDEO CAMERA iPod iPhone USB MULTI-ZONE SPEAKERS MCACC SETUP MIC PHONES This receiver RS - Pioneer SC-27 | Owner's Manual - Page 43
instructions on playing the USB device, see Playing a USB device on page 53. CONTROL ON/OFF TUNER EDIT BAND AUTO SURR/ALC/ HOME STANDARD ADVANCED STEREO STREAM DIRECT THX SURROUND SURROUND HDMI 4 VIDEO CAMERA iPod iPhone USB MULTI-ZONE SPEAKERS MCACC SETUP MIC PHONES This receiver CONTROL - Pioneer SC-27 | Owner's Manual - Page 44
damaged, ask your nearest Pioneer authorized independent service company for a replacement. • Do not use any power cord other than the one supplied with this unit. • Do not use the supplied power cord for any purpose other than that described below. • The receiver should be disconnected by removing - Pioneer SC-27 | Owner's Manual - Page 45
operating instructions are for when English is selected for the GUI screen. SC-27: RECEIVER MAIN ZONE2 SOURCE 3 MULTI OPERATION DVD BD TV DVR HOME MEDIA VIDEO1 VIDEO2 HDMI GALLERY USB iPod CD CD-R TUNER MULTI CH PHONO IN XM SIRIUS SC-25: SOURCE TV RECEIVER CH VOL VOL TV CONTROL INPUT - Pioneer SC-27 | Owner's Manual - Page 46
used in the Auto MCACC Setup are output at high volume. SC-27: RECEIVER MAIN ZONE2 SOURCE 3 MULTI OPERATION DVD BD TV DVR HOME MEDIA VIDEO1 VIDEO2 HDMI GALLERY USB iPod CD CD-R TUNER MULTI CH PHONO IN XM SIRIUS SC-25: TV SOURCE RECEIVER CH VOL VOL TV CONTROL INPUT AUDIO PARAMETER LIST TOP - Pioneer SC-27 | Owner's Manual - Page 47
be a problem, you can power cord, receiver settings for Channel Level, Speaker Distance, Standing Wave, Acoustic Cal EQ and Full Band Phase Control. Again, try to be as quiet as possible while this is happening. It may take 3 to 10 minutes. 8 The Auto MCACC Setup manually using the Manual speaker setup - Pioneer SC-27 | Owner's Manual - Page 48
on the remote control correspond to the components you've connected. SC-27: RECEIVER MAIN ZONE2 SOURCE 3 MULTI OPERATION DVD BD TV DVR HOME MEDIA VIDEO1 VIDEO2 HDMI GALLERY USB iPod CD CD-R TUNER MULTI CH PHONO IN XM SIRIUS SC-25: TV SOURCE RECEIVER CH VOL VOL TV CONTROL INPUT AUDIO - Pioneer SC-27 | Owner's Manual - Page 49
. 4b.Input Setup A/V RECEIVER Input Input Name Input Skip : DVD : Rename : OFF Digital In : HDMI Input : Component MULTI CH IN a SIRIUS a.With KURO LINK set to ON, assignments cannot be made (see KURO LINK on page 84). b.This assignment is fixed and cannot be changed. c.SC-27 - Pioneer SC-27 | Owner's Manual - Page 50
the remote control to the receiver operation mode" is indicated in these instructions, use the respective procedure described above. Playing a source Here are the basic instructions for playing a source (such as a DVD disc) with your home theater system. SC-27: RECEIVER MAIN ZONE2 SOURCE 3 MULTI - Pioneer SC-27 | Owner's Manual - Page 51
, the output level of the subwoofer can be increased by 10 dB in the Multi Ch In Setup in Other Setup. For details, see Multi Channel Input Setup on page 128. Playing an iPod This receiver has a dedicated iPod terminal that will allow you to control playback of audio content from your iPod using the - Pioneer SC-27 | Owner's Manual - Page 52
. Switching the iPod controls2 You can switch over the iPod controls between the iPod and the receiver. 1 Press iPod CTRL to switch the iPod controls.3 This enables operation and display on your iPod, and this receiver's remote control and GUI screen become inactive. 2 Press iPod CTRL again to - Pioneer SC-27 | Owner's Manual - Page 53
receiver. 1 Switch on the receiver and your TV. See Connecting a USB device on page 43.2 2 SC-27 only: Set the remote control operation selector switch to SOURCE. 3 Press iPod USB on the remote control to switch the receiver for USB playback. • Pioneer cannot guarantee compatibility (operation and - Pioneer SC-27 | Owner's Manual - Page 54
controls The following table shows the basic playback controls for your USB memory device. Press iPod USB to switch the remote control / to select 'Photos' from the USB Top menu. USB Top A/V RECEIVER Music Photos Slideshow Setup 2/3 2 Use / to select a folder, then press ENTER to browse - Pioneer SC-27 | Owner's Manual - Page 55
receiver supports Channel Bitrate VBR/CBR Sampling frequency Quantization bitrate Channel Sampling frequency Quantization bitrate Channel Bitrate VBR/CBR 8 kHz to 48 kHz 16 bit 2 ch 8 kbps to 320 kbps Supported/Supported parts of the specification are not supported; specifically, Pro, Lossless, - Pioneer SC-27 | Owner's Manual - Page 56
BAND T.EDIT GUIDE PRESET ENTER PRESET CATEGORY HOME MENU TUNE iPod CTRL RETURN DIRECT PGM HDD THX STEREO STANDARD ADV SURR DVD PHASE CTRL STATUS ANT MPX PQLS MEMORY AUDIO INFO CH DISP MULTI OPE TV CTRL RECEIVER REMOTE SETUP 1 SC-27 only: Set the remote control operation selector - Pioneer SC-27 | Owner's Manual - Page 57
1 SC-27 only: Set the remote control operation receiver. Satellite Radio is available to residents of the US (except Alaska and Hawaii) and Canada service. Easy to follow installation and setup instructions are provided with the satellite tuners. Whichever service the XM RADIO input. For best - Pioneer SC-27 | Owner's Manual - Page 58
The Blend Preset A1 Preset Number 25 Channel Number Category : Hits Channel Guide A/V RECEIVER 0 RADIO ID 1 Preview 2 Highway 4 America 5 Hank's Place 6 Fifties (50's) 7 Sixties (60's) 8 Seventies (70's) Category Exit 1 SC-27 only: Set the remote control operation selector switch to SOURCE - Pioneer SC-27 | Owner's Manual - Page 59
Set the remote control operation selector switch to SOURCE (SC-27 only), then press TOP MENU. 2 Use / to select a menu item, then press ENTER. Choose from the following menu items: • Channel Skip/Add - Use / and ENTER to select channels you would like to remove/restore from/to the channel guide - Pioneer SC-27 | Owner's Manual - Page 60
A1 Preset Number 123 Channel Number Category : Decades Composer : Chuck Berry Channel Guide A/V RECEIVER 184 Weather 185 TWN 186 Hardcore Sports 187 InfoPlus 188 RCI Plus 192 Rock Velours 193 energie2 198 Playboy Category Exit 1 SC-27 only: Set the remote control operation selector switch to - Pioneer SC-27 | Owner's Manual - Page 61
remote controls included with the SC-27 and SC-25. For the SC-27's remote control, set the remote control operation selector switch to RECEIVER. For the SC-25's remote control, press the RECEIVER button. When "set the remote control to the receiver operation mode" is indicated in these instructions - Pioneer SC-27 | Owner's Manual - Page 62
SEL SLEEP DIMMER AUDIO SC-25: TV CONTROL A.ATT SBch MCACC INFO DISP AUTO/ALC/ MENU DIRECT STEREO STANDARD ADV SURR PGM HDD DVD THX PHASE CTRL STATUS ANT MPX PQLS MEMORY AUDIO INFO CH DISP MULTI OPE TV CTRL RECEIVER REMOTE SETUP 1 Set the remote control to the receiver operation mode - Pioneer SC-27 | Owner's Manual - Page 63
SC-25: TV CONTROL SIGNAL SEL SLEEP DIMMER AUDIO PGM HDD THX DVD PHASE CTRL STATUS ANT MPX PQLS MEMORY AUDIO INFO CH DISP MULTI OPE TV CTRL RECEIVER REMOTE SETUP 1 Set the remote control to the receiver operation mode. 2 Press THX (HOME THX) to select a listening mode.1 With two channel - Pioneer SC-27 | Owner's Manual - Page 64
SC-25: TV CONTROL A.ATT SBch MCACC INFO AUTO/ALC/ MENU DIRECT STEREO STANDARD ADV SURR PGM HDD DVD THX PHASE CTRL STATUS ANT MPX PQLS MEMORY AUDIO INFO CH DISP MULTI OPE TV CTRL RECEIVER REMOTE SETUP 1 Set the remote control to the receiver cases: - When MULTI CH IN input is selected. - Pioneer SC-27 | Owner's Manual - Page 65
SC-25: TV CONTROL A.ATT SBch MCACC INFO AUTO/ALC/ MENU DIRECT STEREO STANDARD ADV SURR PGM HDD DVD THX PHASE CTRL STATUS ANT MPX PQLS MEMORY AUDIO INFO CH DISP MULTI OPE TV CTRL RECEIVER REMOTE SETUP 1 Set the remote control to the receiver in. - When MULTI CH IN input is selected. - - Pioneer SC-27 | Owner's Manual - Page 66
LEVEL /CLR 0 CLASS ENTER INPUT MASTER VOLUME ANT MPX PQLS MEMORY AUDIO INFO CH DISP MULTI OPE TV CTRL RECEIVER REMOTE SETUP ZONE 2 ZONE 3 MAIN 1 Set the remote control to the receiver operation mode. 2 Press SBch repeatedly to cycle the surround back channel options. Each press cycles - Pioneer SC-27 | Owner's Manual - Page 67
and where you're sitting (for example, watching movies from a sofa, or playing a video game close to the TV). SC-27: PGM MENU SOURCE TV RECEIVER CH VOL VOL SC-25: TV CONTROL INPUT SELECT 12 HDMI OUT 3 SIGNAL SEL MCACC 45 SLEEP 6 SBch A.ATT DIMMER 789 D.ACCESS CH LEVEL /CLR 0 CLASS - Pioneer SC-27 | Owner's Manual - Page 68
48). CH VOL VOL SC-25: TV CONTROL A.ATT SBch MCACC INFO DISP HDMI OUT INPUT SELECT 12 HDMI OUT 3 SIGNAL SEL MCACC 45 SLEEP 6 SBch A.ATT DIMMER 789 D.ACCESS CH LEVEL /CLR 0 CLASS ENTER ANT MPX PQLS MEMORY AUDIO INFO CH DISP MULTI OPE TV CTRL RECEIVER REMOTE SETUP ZONE 2 ZONE - Pioneer SC-27 | Owner's Manual - Page 69
CONTROL SC-25: PGM HDD THX DVD PHASE CTRL STATUS ANT MPX PQLS MEMORY AUDIO INFO CH DISP MULTI OPE TV CTRL RECEIVER REMOTE SETUP Using Full Band Phase Control The Full Band Phase Control enhanced frequency-phase characteristics between channels ensure better surround sound integration for - Pioneer SC-27 | Owner's Manual - Page 70
/ DIRECT STEREO STANDARD ADV SURR PGM MENU PGM HDD THX DVD PHASE CTRL STATUS ANT MPX PQLS MEMORY AUDIO INFO CH DISP MULTI OPE TV CTRL RECEIVER REMOTE SETUP 1 Set the remote control to the receiver operation mode. 2 Press PHASE CTRL (PHASE CONTROL) to select FULLBAND PHASE.1 Both the Phase - Pioneer SC-27 | Owner's Manual - Page 71
setup, and playback procedures required to enjoy these features. It is advisory that you also refer to the operation manual supplied with your network component. Features of Home Media Gallery This receiver by the vTuner database service exclusively for use with the Pioneer products. See Playback - Pioneer SC-27 | Owner's Manual - Page 72
with HOME MEDIA GALLERY inputs Connecting to the network through LAN interface Caution • Before making or changing the connections, switch off the power and disconnect the power cord from the power outlet. Plugging in should be the final step. • Illustration shows the SC-27, however connections for - Pioneer SC-27 | Owner's Manual - Page 73
to the PC. If not, please authorize this receiver manually on the PC. The authorization (or permission) method for access varies depending on the type of server currently being connected. For more information on authorizing this receiver, refer to the instruction manual of your server. 73 en - Pioneer SC-27 | Owner's Manual - Page 74
Home Media Gallery SC-27: RECEIVER MAIN ZONE2 SOURCE 3 MULTI OPERATION DVD BD TV DVR HOME MEDIA VIDEO1 VIDEO2 HDMI GALLERY USB iPod CD CD-R TUNER MULTI CH PHONO IN XM SIRIUS INPUT SELECT SC-25: SOURCE TV RECEIVER CH VOL VOL TV CONTROL INPUT MUTE MUTE TV CONTROL INPUT MUTE AUDIO - Pioneer SC-27 | Owner's Manual - Page 75
inputs 07 • In case of Internet radio Top Menu Folder1 Folder2 Folder3 Folder4 Music1 Music2 Music3 Music4 5 / 32 Internet Radio A/V RECEIVER Return Top Menu PLAY Track Title 3:02 -2:02 Artist Name Channel For detailed operating instructions, refer to the remote control of this receiver - Pioneer SC-27 | Owner's Manual - Page 76
-2:02 Track title Play mode Playing time Artist name Channel name About list of Internet radio The list of Internet radio stations on this receiver is created, edited, and managed by the vTuner database service exclusively for use with this receiver. For details about vTuner, see vTuner on page 82 - Pioneer SC-27 | Owner's Manual - Page 77
with HOME MEDIA GALLERY inputs 07 4 Access the special Pioneer Internet radio site from your computer and perform the registration process. http://www.radio-pioneer.com Access the above site and use the access code in step 3 to perform user registration, following the instructions on the screen - Pioneer SC-27 | Owner's Manual - Page 78
07 Playback with HOME MEDIA GALLERY inputs About playable file formats The Home Media Gallery feature of this receiver supports the following file formats. Note that some file formats are not available for playback although they are listed as playable file formats. Also, the compatibility - Pioneer SC-27 | Owner's Manual - Page 79
inputs 07 Advanced operations for Internet radio SC-27: SOURCE TV RECEIVER CH VOL VOL TV CONTROL SC-25: INPUT AUDIO PARAMETER LIST TOP MENU BAND PRESET MUTE TUNE MUTE VIDEO PARAMETER TOOLS ENTER T.EDIT GUIDE steps. 1 SC-27 only: Set the remote control operation selector switch - Pioneer SC-27 | Owner's Manual - Page 80
screen. SC-27: HOME MEDIA VIDEO1 VIDEO2 HDMI GALLERY USB iPod CD CD-R TUNER MULTI CH PHONO IN XM SIRIUS INPUT SELECT SOURCE TV RECEIVER CH VOL SC-25: TV CONTROL INPUT MUTE AUDIO PARAMETER LIST TUNE MUTE VIDEO PARAMETER TOOLS TOP MENU BAND PRESET ENTER T.EDIT GUIDE PRESET CATEGORY - Pioneer SC-27 | Owner's Manual - Page 81
setup procedure. The Top Menu screen appears. 15 Switch off the receiver. Use RECEIVER Firmware Version (for the Home Media Gallery of this receiver) screen appears. Top Menu Firmware Version A/V RECEIVER product, we recommend you reset it to delete the data. See Resetting the system on page 95 - Pioneer SC-27 | Owner's Manual - Page 82
inputs Software update Information on software updates may be posted on the Pioneer for local area networks (LANs). This player supports 100BASE-TX and 10BASE-T. FLAC FLAC (Free on IEEE 802.11 Wi-Fi technology. MAC (Media Access Control) address An address attached to the port of any network device - Pioneer SC-27 | Owner's Manual - Page 83
GALLERY inputs 07 Neural the official Microsoft website. vTuner vTuner is a paid online database service that allows you to listen to radio and TV can control how that content is used. The WMDRM-protected content can only be played back on a component supporting the WMDRM service. Windows - Pioneer SC-27 | Owner's Manual - Page 84
remote controls included with the SC-27 and SC-25. For the SC-27's remote control, set the remote control operation selector switch to RECEIVER. For the SC-25's remote control, press the RECEIVER button. When "set the remote control to the receiver operation mode" is indicated in these instructions - Pioneer SC-27 | Owner's Manual - Page 85
instructions for each component. SC-27: RECEIVER MAIN ZONE2 SOURCE 3 MULTI OPERATION DVD BD TV DVR HOME MEDIA VIDEO1 VIDEO2 HDMI GALLERY USB iPod CD CD-R TUNER MULTI CH PHONO IN XM SIRIUS INPUT SELECT SC-25: SOURCE TV RECEIVER CH VOL VOL TV CONTROL INPUT MUTE MUTE TV CONTROL INPUT - Pioneer SC-27 | Owner's Manual - Page 86
VOL DIRECT STEREO STANDARD ADV SURR VOL PGM MENU SC-25: TV CONTROL SIGNAL SEL SLEEP DIMMER AUDIO THX PHASE CTRL STATUS ANT MPX PQLS MEMORY AUDIO INFO CH DISP MULTI OPE TV CTRL RECEIVER REMOTE SETUP 1 Set the remote control to the receiver operation mode, then press PQLS to select PQLS - Pioneer SC-27 | Owner's Manual - Page 87
be muted using the TV's remote control. • When the TV's power is set to standby, the receiver's power is also set to standby. (Only when the input for a component connected to the receiver by HDMI connection is selected or when watching the TV) • The receiver's input switches automatically when the - Pioneer SC-27 | Owner's Manual - Page 88
remote controls included with the SC-27 and SC-25. For the SC-27's remote control, set the remote control operation selector switch to RECEIVER. For the SC-25's remote control, press the RECEIVER button. When "set the remote control to the receiver operation mode" is indicated in these instructions - Pioneer SC-27 | Owner's Manual - Page 89
input signals from the TV with the receiver's power in the standby mode. See Synchronized amp mode on page 87. h.This feature is only available when the connected display supports to 2-channel sources in Neo:6 MUSIC/CINEMA mode. About the SRC (Sampling Rate Converter) (SC-27 only) The SC-27 is - Pioneer SC-27 | Owner's Manual - Page 90
, it is unavailable due to the current source, setting and status of the receiver. • These functions do not affect inputs other than DVD, TV/SAT, DVR, VIDEO1, and VIDEO2. 1 Set the remote control to the receiver operation mode, then press VIDEO PARAMETER. 2 Use / to select the setting you want - Pioneer SC-27 | Owner's Manual - Page 91
DIRECT THX SURROUND SURROUND RETURN HDMI 4 VIDEO CAMERA iPod iPhone USB MULTI-ZONE SPEAKERS MCACC SETUP MIC PHONES Using the MULTI-ZONE controls The following steps use the front panel controls to adjust the sub zone volume and select sources. See MULTIZONE remote controls on page 92. INPUT - Pioneer SC-27 | Owner's Manual - Page 92
SC-27: MULTI OPERATION DVD BD TV DVR HOME MEDIA VIDEO1 VIDEO2 HDMI GALLERY USB iPod CD CD-R TUNER MULTI CH PHONO IN XM SIRIUS INPUT SELECT SC-25: TV SOURCE RECEIVER CH VOL VOL TV CONTROL INPUT MUTE MUTE THX DISP MULTI OPE TV CTRL RECEIVER INPUT SELECT 12 HDMI OUT 3 REMOTE SETUP SIGNAL - Pioneer SC-27 | Owner's Manual - Page 93
's instruction manual if remote control to set the sleep timer. SC-27: THX MPX PQLS MEMORY SOURCE TV RECEIVER AUTO/ALC/ DIRECT STEREO STANDARD ADV SURR PGM MENU SIGNAL SEL SLEEP DIMMER AUDIO CH VOL VOL SC-25: TV CONTROL A.ATT SBch MCACC INFO DISP HDMI OUT ANT MPX PQLS MEMORY INPUT - Pioneer SC-27 | Owner's Manual - Page 94
SC-25: SELECT 12 HDMI OUT 3 SIGNAL SEL MCACC 45 SLEEP 6 SBch A.ATT DIMMER 789 D.ACCESS CH LEVEL /CLR 0 CLASS ENTER INPUT MASTER VOLUME ANT MPX PQLS MEMORY AUDIO INFO CH DISP MULTI OPE TV CTRL RECEIVER REMOTE SETUP ZONE 2 ZONE 3 MAIN • Set the remote control to the receiver - Pioneer SC-27 | Owner's Manual - Page 95
the system Use this procedure to reset all the receiver's settings to the factory default. Use the front panel controls to do this. Set MULTI-ZONE to OFF. • Disconnect the iPod and USB memory device from the receiver beforehand. 1 Switch the receiver into standby. 2 While holding down ENTER - Pioneer SC-27 | Owner's Manual - Page 96
SOURCE TV RECEIVER CH VOL VOL TV CONTROL INPUT MUTE AUDIO MUTE VIDEO TOP MENU BAND PRESET ENTER T.EDIT GUIDE PRESET CATEGORY HOME MENU iPod CTRL TUNE STATUS PHASE CTRL RETURN CH LEVEL THX MPX PQLS MEMORY 1 While pressing MULTI OPERATION, press HOME MENU. The remote LCD - Pioneer SC-27 | Owner's Manual - Page 97
CH PHONO IN XM SIRIUS INPUT SELECT SOURCE 3 MULTI OPERATION TV CONTROL TV AUDIO PARAMETER LIST RECEIVER MAIN ZONE2 INPUT CH 5 Press the corresponding button on the other remote control that is sending (teaching) the signal to this receiver's remote control. For example, if you want to learn - Pioneer SC-27 | Owner's Manual - Page 98
SC-27) 6 To program additional signals for the current component repeat steps 4 and 5. To program signals for another component, exit and repeat steps 1 through 5. 7 Press and hold MULTI OPERATION for a couple of seconds to exit and store the operation(s). Erasing one of the remote control button - Pioneer SC-27 | Owner's Manual - Page 99
(using the input function buttons) will be selected by both the receiver and the remote control. When you turn direct function off, you can operate the remote control without affecting the receiver. 1 While pressing MULTI OPERATION, press HOME MENU. The remote LCD display shows SETUP. 2 Use / to - Pioneer SC-27 | Owner's Manual - Page 100
10 Controlling the rest of your system (In case of SC-27) RECEIVER MAIN ZONE2 SOURCE 3 MULTI OPERATION DVD BD TV DVR HOME MEDIA VIDEO1 VIDEO2 HDMI GALLERY USB iPod CD CD-R TUNER MULTI CH PHONO IN XM SIRIUS INPUT SELECT AUDIO PARAMETER LIST TOP MENU BAND PRESET TUNE VIDEO PARAMETER TOOLS - Pioneer SC-27 | Owner's Manual - Page 101
SC-27) 10 Controls for TVs This remote control can control components after entering the proper codes or teaching the receiver the commands (see Operating multiple receivers on page 103 for more on this). Set the remote control GUIDE USER MENU TOOLSa GUIDE - GUIDE Blue - AUTO SETUP FREEZE - - - Pioneer SC-27 | Owner's Manual - Page 102
10 Controlling the rest of your system (In case of SC-27) Button(s) SOURCE Number buttons • AUDIO DISP AUDIO DISPLAY/INFO a.Controls for MD. b.Controls for SACD. c.Controls for DAT. LEGATO LINKb - - SACD SETUPb - PROGRAM REPEAT SHUFFLE PURE AUDIOa TIMEa - - Pioneer SC-27 | Owner's Manual - Page 103
• This section includes explanations for the SC-25's remote control. For instructions for the SC-27's remote control, see Controlling the rest of your system (In case of SC-27) on page 96. Operating multiple receivers The remote control included with this receiver can be used to operate up to - Pioneer SC-27 | Owner's Manual - Page 104
CH LEVEL /CLR 0 CLASS ENTER INPUT MASTER VOLUME HOME MENU TUNE iPod CTRL AUTO/ALC/ MENU DIRECT STEREO STANDARD ADV SURR PGM HDD DVD THX PHASE CTRL STATUS ANT MPX PQLS MEMORY AUDIO INFO CH DISP MULTI OPE TV CTRL RECEIVER TV CONTROL REMOTE SETUP CH AUDIO VOL MUTE VIDEO ZONE - Pioneer SC-27 | Owner's Manual - Page 105
HDD DVD THX PHASE CTRL STATUS ANT MPX PQLS MEMORY AUDIO INFO CH DISP MULTI OPE TV CTRL RECEIVER TV CONTROL REMOTE SETUP CH VOL MUTE ZONE 2 ZONE 3 MAIN AUDIO VIDEO • You don't need to program the receiver to switch on or off. This is done automatically. With Pioneer components - Pioneer SC-27 | Owner's Manual - Page 106
AUDIO INFO CH DISP MULTI OPE TV CTRL RECEIVER REMOTE SETUP ZONE 2 ZONE 3 MAIN 1 Press MULTI OPE. 2 Press SOURCE. The command sequence you programmed will run, then all Pioneer components will switch off1, followed by this receiver. Resetting the remote control presets This will erase - Pioneer SC-27 | Owner's Manual - Page 107
Controlling the rest of your system (In case of SC-25) 10 Button(s) SOURCE Number buttons • (dot) ENTER (CLASS) TV POWER ON/OFF numerics • (dot) CH ENTER EXIT/INFO TOOLS/GUIDE TV (Monitor) POWER ON/OFF numerics KURO LINK CH ENTER EXIT USER Green Yellow Blue - AUTO SETUP FREEZE - - AV SELECTION - Pioneer SC-27 | Owner's Manual - Page 108
10 Controlling the rest of your system (In case of SC-25) Button(s) SOURCE AUDIO AUDIO PURE AUDIOa - - DISP DISPLAY/INFO TIMEa - - a. Controls for SACD. b. Controls for MD. Button(s) TV (Projector) SOURCE POWER ON 1 MOVIE 2 STANDARD - Pioneer SC-27 | Owner's Manual - Page 109
"set the remote control to the receiver operation mode" is indicated in these instructions, use the respective procedure described above. Making receiver settings from the Advanced MCACC menu The Advanced MCACC (Multi Channel ACoustic Calibration) system was developed in Pioneer's laboratories with - Pioneer SC-27 | Owner's Manual - Page 110
Full Band Phase Control) on page 46, you can customize your setup options below. RECEIVER a. Full Auto MCACC b. Auto MCACC c. Manual MCACC d. Demo 1b.Auto MCACC A/V RECEIVER ALL SYMMETRY : M1.MEMORY 1 ALL CH ADJ : M2.MEMORY 2 FRONT ALIGH : M3.MEMORY 3 THX Speaker : NO Speaker Setting Channel - Pioneer SC-27 | Owner's Manual - Page 111
CONTROL ON/OFF (PRESET) ENTER (TUNE) HOME MENU (PRESET) TUNER EDIT BAND AUTO SURR/ALC/ HOME STANDARD ADVANCED STEREO STREAM DIRECT THX SURROUND SURROUND RETURN HDMI 4 VIDEO CAMERA iPod iPhone USB MULTI-ZONE SPEAKERS MCACC SETUP instructions .Auto MCACC A/V RECEIVER YES YES YES problem with - Pioneer SC-27 | Owner's Manual - Page 112
RETURN to go back to the HOME MENU. Be sure to disconnect the microphone from this receiver upon completion of the Auto MCACC Setup. Manual MCACC setup You can use the settings in the Manual MCACC setup menu to make detailed adjustments when you're more familiar with the system. Before making these - Pioneer SC-27 | Owner's Manual - Page 113
a. Full Auto MCACC b. Auto MCACC c. Manual MCACC d. Demo 1c.Manual MCACC A/V RECEIVER 1. Fine Channel Level 2. Fine SP Distance 3. Standing Wave 4. EQ Adjust 5. EQ Professional 6. Precision Distance Exit Return Exit Return Precision Distance is only for SC-27. 2 Select the setting you want to - Pioneer SC-27 | Owner's Manual - Page 114
Wave Control for each of your MCACC presets.3 1 Select 'Standing Wave' from the Manual MCACC setup menu. 1c.Manual MCACC A/V RECEIVER 1. Fine Channel Level 2. Fine SP Distance 3. Standing Wave 4. EQ Adjust 5. EQ Professional 6. Precision Distance Exit Return Precision Distance is only for SC-27 - Pioneer SC-27 | Owner's Manual - Page 115
Select 'EQ Adjust' from the Manual MCACC setup menu. 1c.Manual MCACC A/V RECEIVER 1. Fine Channel Level 2. Fine SP Distance 3. Standing Wave 4. EQ Adjust 5. EQ Professional 6. Precision Distance Exit Return Precision Distance is only for SC-27. 2 Select the channel(s) you want and adjust to your - Pioneer SC-27 | Owner's Manual - Page 116
channel frequencies/sounds. Setting Acoustic Calibration EQ Professional according to your room characteristics Using the manual setup furniture, and the dimensions of the room. 1c.Manual MCACC A/V RECEIVER 1. Fine Channel only for SC-27. Return is not a problem (i.e. excessive reverb controlled - Pioneer SC-27 | Owner's Manual - Page 117
troubleshooting information. 4 If you selected 'Reverb View', you can check the reverb characteristics for each channel. Press RETURN when you're done. 1c5b.Reverb View A/V RECEIVER Channel Precision Distance (SC-27 only) Before using this function, perform the Full Auto MCACC Setup procedure (see - Pioneer SC-27 | Owner's Manual - Page 118
after fine-adjusting at Manual MCACC setup on page 112, you can check your calibrated settings using the GUI screen or, if a computer is connected, on the computer's screen. 1 Set the remote control to the receiver operation mode, then press HOME MENU. A Graphical User Interface (GUI) screen appears - Pioneer SC-27 | Owner's Manual - Page 119
Wave' from the MCACC Data Check menu. Filter Channel 2d.Standing Wave A/V RECEIVER Filter 1 Filter 2 Filter 3 Freq Q ATT Channel' is highlighted, use / to select the channel for which you want to check standing wave control. The standing wave related calibration value for the selected channel - Pioneer SC-27 | Owner's Manual - Page 120
Control on page 69 for more on this. 1 Select 'Group Delay' from the MCACC Data Check menu. Channel : Calibration : 2f.Group Delay A/V RECEIVER PC A/V RECEIVER Start the MCACC application on your PC. Exit Cancel 2 Start the MCACC application on your computer. Follow the instructions provided - Pioneer SC-27 | Owner's Manual - Page 121
you don't need. 1 Set the remote control to the receiver operation mode, then press HOME MENU. A Graphical User Interface (GUI) screen appears on your Data Management setup menu. Copying MCACC preset data If you want to manually adjust the Acoustic Calibration EQ (see Manual MCACC setup on page - Pioneer SC-27 | Owner's Manual - Page 122
settings of that preset. 1 Select 'MCACC Memory Clear' from the Data Management setup menu. 3.Data Management A/V RECEIVER a. Memory Rename b. MCACC Memory Copy c. MCACC Memory Clear Clear 3c.MCACC Memory Clear A/V RECEIVER : M1.MEMORY 1 OK Exit Return Exit Cancel 2 Select the MCACC preset - Pioneer SC-27 | Owner's Manual - Page 123
these instructions, use the respective procedure described above. Making receiver settings from the System Setup menu The following section describes how to change the speaker-related settings manually and make various other settings (input selection, OSD language selection, etc.). SC-27: RECEIVER - Pioneer SC-27 | Owner's Manual - Page 124
not already at this screen. 4.System Setup A/V RECEIVER a.Manual SP Setup b. Input Setup c. OSD Language d. Other Setup 4a.Manual SP Setup A/V RECEIVER 1. Surr Back System 2. Speaker Setting 3. Channel Level 4. Speaker Distance 5. X-Curve 6. THX Audio Setting Exit Return Exit Return 2 Select - Pioneer SC-27 | Owner's Manual - Page 125
Channel Level' from the Manual SP Setup menu. 4a.Manual SP Setup A/V RECEIVER 1. Surr Back System 2. Speaker Setting 3. Channel Level 4. Speaker Distance 5. X-Curve 6. THX Audio Setting 4a3.Channel Level A/V RECEIVER which sounds best. If you're having problems, the easiest option is to route all - Pioneer SC-27 | Owner's Manual - Page 126
're finished, press RETURN. You will return to the Manual SP Setup menu. Tip • You can change the channel levels by set the remote control to the receiver operation mode, then press CH LEVEL, and then using / on the remote control.2 Speaker Distance For good sound depth and separation from your - Pioneer SC-27 | Owner's Manual - Page 127
Position, THX Ultra2/Select21 Subwoofer (on/off), and Boundary Gain Control. Please see page 145 for a details regarding these THX features. 1 Select 'THX Audio Setting' from the Manual SP setup menu. 4a.Manual SP Setup A/V RECEIVER 1. Surr Back System 2. Speaker Setting 3. Channel Level 4. Speaker - Pioneer SC-27 | Owner's Manual - Page 128
the Multi Channel Input Setup, you can assign a video input to the multichannel input. 1 Select 'Multi Ch In Setup' from the Other Setup menu. 4d.Other Setup A/V RECEIVER 1. KURO LINK Setup 2. Multi Ch In Setup 3. ZONE Audio Setup 4. Power ON Level Setup 5. Volume Limit Setup 6. Remote Control Mode - Pioneer SC-27 | Owner's Manual - Page 129
1 Select 'ZONE Audio Setup' from the Other Setup menu. 4d.Other Setup A/V RECEIVER 1. KURO LINK Setup 2. Multi Ch In Setup 3. ZONE Audio Setup 4. Power ON Level Setup 5. Volume Limit Setup 6. Remote Control Mode Setup 7. Flicker Reduction Setup 4d3.ZONE Audio Setup A/V RECEIVER ZONE 2 Volume Level - Pioneer SC-27 | Owner's Manual - Page 130
Mode Setup A/V RECEIVER Remote Control Mode : 1 OK Exit Return Exit Cancel 2 Select the Remote Control Mode setting you want. 3 Select "OK" to change the remote control mode. 4 Follow the instructions on the screen to change the remote control's setting. See Operating multiple receivers (SC-27 - Pioneer SC-27 | Owner's Manual - Page 131
will seem cramped. Testing by the Pioneer Multi-channel Research Group has shown that a control function (page 119). Step 5: Default settings with the Auto MCACC Setup (auto sound field correction) function It is more effective to perform the Auto MCACC Setup (page 46) (and Precision Distance (SC-27 - Pioneer SC-27 | Owner's Manual - Page 132
blinks. • The receiver may have a serious problem. Disconnect from the power and call a Pioneer authorized independent service company. During loud playback the power suddenly switches off. • Turn down the volume. • Lower the 63 Hz and 125 Hz equalizer levels in the Manual MCACC setup on page - Pioneer SC-27 | Owner's Manual - Page 133
is a problem with the receiver's power unit. The receiver may have a serious problem. Unplug the receiver from the wall and call a Pioneer authorized independent service company. AMP OVERHEAT (or OVERHEAT) and the power indicator flash and the power turns off. • Allow the unit to cool down in - Pioneer SC-27 | Owner's Manual - Page 134
are selected (see Selecting the multichannel analog appears to be downmixed to 2 inputs on page 51). channels during playback. Noise is output when scanning • This is not a malfunction of the receiver. The scan function of your player alters the digital a DTS CD. information, making it unreadable - Pioneer SC-27 | Owner's Manual - Page 135
the function is set to ON at the Input Skip function on the Input Setup menu cannot be selected using the (page 48). INPUT SELECTOR on the front • Make sure that HDMI Input on the Input Setup menu is set to OFF (page 48). dial or INPUT SELECT on remote control. Video Symptom Remedy No image is - Pioneer SC-27 | Owner's Manual - Page 136
when using the Auto MCACC Setup on page 48). If the noise level cannot be kept low enough, you will have to set up the surround sound manually (page 124). • When using only one surround back speaker, connect it to the SURROUND BACK L (Single) terminals. • To use a 5.1-channel speaker set, use the - Pioneer SC-27 | Owner's Manual - Page 137
EQ adjustments made using the Manual MCACC setup on page 112 do not receiver. • Make sure that the receiver is set to AUTO or DIGITAL (see Choosing the input signal on page 68). • If a two channel back channel processing on page 66), then switch SBch AUTO setting, EX or ES to the THX Surround - Pioneer SC-27 | Owner's Manual - Page 138
't be operated with the system remote. Remedy • SC-27 - Set the remote control mode properly (see Operating multiple receivers on page 96). • SC-25 - Set a 5-digit preset code corresponding to the receiver to be operated in the remote control (see Operating multiple receivers on page 103). • Check - Pioneer SC-27 | Owner's Manual - Page 139
see KURO LINK Setup on page 85). • Turn the TV's power on before turning on this receiver's power. the receiver. See the operating instructions for channels for a monitor with stereo audio limitations). • If you want to switch the input function, you'll have to switch functions on both the receiver - Pioneer SC-27 | Owner's Manual - Page 140
Refer to the operation manual supplied with your server. format playable on this receiver. format supported by this receiver. Check whether the folder and consult with your network service provider if necessary (page this receiver (page 75 and 141). The Home Media Gallery The remote control is - Pioneer SC-27 | Owner's Manual - Page 141
with the mass storage class specifications are not played back on this receiver (page 53). Connect the USB memory device and switch on this receiver (page 43). A USB hub is currently being used. This receiver does not support a USB hub (page 53). This receiver recognizes the USB memory device - Pioneer SC-27 | Owner's Manual - Page 142
back later. CH Unauthorized You selected an XM channel that is blocked or cannot be received with your XM subscription package. Consult the latest channel guide at www.xmradio.com for the current list of channels. For information on receiving this channel, visit www.xmradio.com or contact XM - Pioneer SC-27 | Owner's Manual - Page 143
channel. exist. Firmware Updating The SiriusConnect™ tuner's firmware is being updated. Wait for updating to finish. If the problem is not solved after the troubleshooting above, if the screen freezes unexpectedly or if the buttons on the remote control made on the receiver may be cleared.) - Pioneer SC-27 | Owner's Manual - Page 144
, Dolby Digital Plus was designed for the nextgeneration A/V receivers but remains fully compatible with all current A/V receivers. Dolby Digital Plus delivers multi-channel audio programs of up to 7.1 channels (*) and supports multiple programs in a single encoded bitstream with the maximum - Pioneer SC-27 | Owner's Manual - Page 145
bit 7.1-channel audio SC-27 Windows Media and the Windows logo are trademarks or registered trademarks of Microsoft Corporation in the United States and/or other countries. In case of SC-25 About iPod "Made for iPod" means that an electronic accessory has been designed to connect specifically - Pioneer SC-27 | Owner's Manual - Page 146
. Only amplifier and controller products bearing the THX Surround EX logo, when in the THX Surround EX mode, THX Ultra2/Select2™ specifications. • THX Music For the replay of multi-channel music the THX MusicMode should be selected. In this mode THX ASA processing is applied to the surround channels - Pioneer SC-27 | Owner's Manual - Page 147
manually select the THX Surround EX playback mode, otherwise THX Ultra2/Select2 Cinema mode will apply ASA processing to provide optimum replay. • THX Ultra2/Select2 Music For the playback of multi-channel music the THX Ultra2 Corporation and THX Ltd. PIONEER Corporation hereby grants the user a non- - Pioneer SC-27 | Owner's Manual - Page 148
SIRIUS tuners (each sold separately) are required to receive the SIRIUS or XM satellite radio service. All programming and fees subject to change. It used to endorse or promote products derived from this software without specific prior written permission. THIS SOFTWARE IS PROVIDED BY THE COPYRIGHT - Pioneer SC-27 | Owner's Manual - Page 149
channel) signal formats Input channel sources/6.1 channel flagged) DTS sources (5.1 channel encoding) DTS-HD sources Other 6.1/7.1 channel sources Other 5.1 channel sources Surround Back speaker(s): Not connected DVD-A sources/Multi-ch PCM SACD sources (5.1 channel encoding) Other 5.1/6.1/7.1 channel - Pioneer SC-27 | Owner's Manual - Page 150
Parts Number MCACC Setup microphone (APM7009 1 Remote control unit (SC-27: AXD7539/SC-25: AXD7542). . . 1 AA/IEC R6 dry cell batteries 2 iPod cable (ADE7129 1 AM loop antenna 1 FM wire antenna 1 Power cord (ADG7111 1 Warranty card 1 These operating instructions Note • Specifications and the - Pioneer SC-27 | Owner's Manual - Page 151
Video Conversion 90 Dimension 89 Display 18, 93, 137 Dolby 62, 143 DTS 62, 144 Dual Mono 88 M Manual MCACC 112 Manual speaker setup 124 MCACC Data 118 MCACC preset 67, 88, 121 Midnight 88 Multi Zone 22, 25, 27, 38-39, 91, 124, 129 Multichannel analog input 34, 51, 128 N Neural THX 56, 147 151 - Pioneer SC-27 | Owner's Manual - Page 152
Standing Wave 88, 114 Status 94 Stream direct 65, 149 Streo 64 Surround back channel processing 66 Surround back speaker 124 Synchronized amp mode 87 System Setup 123 T THX 23, 110, 127, 145 Home THX 63 Tone Control 88 Treble 88 Troubleshooting 132 152 en Tuner 36, 56-57 U Up Mix 66 USB 43, 53-55 - Pioneer SC-27 | Owner's Manual - Page 153
your hearing. Guard against this by setting your equipment at a safe level BEFORE your hearing adapts. To establish a safe level: • Start your volume control at a low setting. • Slowly increase the sound until you can hear it comfortably and clearly, and without distortion. Once you have established - Pioneer SC-27 | Owner's Manual - Page 154
replacement parts, operating instructions, service manuals, or accessories, please call the number shown below. Si ce produit doit être réparé au Canada, veuillez vous adresser à un distributeur autorisé Pioneer du Canada pour obtenir le nom du Centre de Service Autorisé Pioneer le plus près de
-
 1
1 -
 2
2 -
 3
3 -
 4
4 -
 5
5 -
 6
6 -
 7
7 -
8
-
9
-
10
-
11
-
12
-
13
-
14
-
15
-
16
-
17
-
18
-
19
-
20
-
21
-
22
-
23
-
24
-
25
-
26
-
27
-
28
-
29
-
30
-
31
-
32
-
33
-
34
-
35
-
36
-
37
-
38
-
39
-
40
-
41
-
42
-
43
-
44
-
45
-
46
-
47
-
48
-
49
-
50
-
51
-
52
-
53
-
54
-
55
-
56
-
57
-
58
-
59
-
60
-
61
-
62
-
63
-
64
-
65
-
66
-
67
-
68
-
69
-
70
-
71
-
72
-
73
-
74
-
75
-
76
-
77
-
78
-
79
-
80
-
81
-
82
-
83
-
84
-
85
-
86
-
87
-
88
-
89
-
90
-
91
-
92
-
93
-
94
-
95
-
96
-
97
-
98
-
99
-
100
-
101
-
102
-
103
-
104
-
105
-
106
-
107
-
108
-
109
-
110
-
111
-
112
-
113
-
114
-
115
-
116
-
117
-
118
-
119
-
120
-
121
-
122
-
123
-
124
-
125
-
126
-
127
-
128
-
129
-
130
-
131
-
132
-
133
-
134
-
135
-
136
-
137
-
138
-
139
-
140
-
141
-
142
-
143
-
144
-
145
-
146
-
147
-
148
-
149
-
150
-
151
-
152
-
153
-
154
 |
 |

Operating Instructions
audio/video multi-channel receiver