Pioneer VSX-49TX Owner's Manual
Pioneer VSX-49TX Manual
 |
View all Pioneer VSX-49TX manuals
Add to My Manuals
Save this manual to your list of manuals |
Pioneer VSX-49TX manual content summary:
- Pioneer VSX-49TX | Owner's Manual - Page 1
can quickly identify the additions. Please use this manual when you have had your receiver modified with an i.LINK connection and the latest Pioneer programming. Operations may differ slightly from the original VSX-49TX manual and this updated version is correct and complete. Operating Instructions - Pioneer VSX-49TX | Owner's Manual - Page 2
Thank you for buying this Pioneer product. Please read through these operating instructions so you will know how to operate your model properly. After you have finished reading the instructions, put them away in a safe place for future reference. IMPORTANT NOTICE H006AEn The serial number for - Pioneer VSX-49TX | Owner's Manual - Page 3
3 - Pioneer VSX-49TX | Owner's Manual - Page 4
in a while. When you find it damaged, ask your nearest PIONEER authorized service center or your dealer for a replacement. ELECTR N• STRIES •A lifetime. We Want You Listening For A Lifetime Used wisely, your new sound equipment will provide a lifetime of fun and enjoyment. Since hearing damage - Pioneer VSX-49TX | Owner's Manual - Page 5
Advanced Multichannel Stereophonic Concept The VSX-49TX receiver is constructed with Pioneer's industry-leading advanced multichannel as possible for users we have created the MCACC system. This unique and convenient way of getting good surround sound from the receiver makes trouble-free setup a - Pioneer VSX-49TX | Owner's Manual - Page 6
Control Battery Alarm 8 The Touch Pen & Lock 9 Remote Control Cushions 9 Operating range of remote control unit 9 Installing the Receiver 9 Opening the Front Panel 9 Setting Up the Remote Control 10 Remote Control Backlight 11 Quick Start Guide Part 1 12 Home Theater: The Basics 12 1) Your - Pioneer VSX-49TX | Owner's Manual - Page 7
System: Operating other PIONEER components 84 Multi Operations 85 Performing multi operations 86 System off 87 Using System off 88 Editing Remote Control Screen Names (ITEM MEMO 89 Editing Buttons Names (KEY LABEL 90 Resetting the Main Unit 92 Resetting the Remote Control 92 Advanced Setup - Pioneer VSX-49TX | Owner's Manual - Page 8
attached to the back of the remote control) Cushion for Remote x 4 U-shaped connectors x 2 (attached to back of receiver) • Operating Instructions Preparing the Remote Control Loading the batteries Load the batteries into the remote control as shown below. The remote control uses a lot of power - Pioneer VSX-49TX | Owner's Manual - Page 9
remote control as shown in the diagram right. Operating range of remote control unit The area in which you can use the remote control to operate the VSX-49TX is fairly large. To use, point the remote control toward the remote space above the receiver. 8 inches (20 cm) Receiver Opening the Front - Pioneer VSX-49TX | Owner's Manual - Page 10
've touched all four cross points the screen will show the word "COMPLETE" and automatically return to the LCD COMMANDER screen. 5 Touch Panel Adjust RECEIVER BACK REMOTE SETUP CD DVD/LD VCR1 /DVR VCR2 TOUCH CROSS POINT CD-R/ TAPE1 TUNER VIDEO VCR3 TV SAT TV CONTROL « Touch Panel Adjust - Pioneer VSX-49TX | Owner's Manual - Page 11
the appropriate button (1,2,3). You can also turn the beep sound off. 7 When you are finished with the adjustments press the BACK button to go back to the Remote Setup screen. Remote Control Backlight 1 LIGHT RECEIVER DVD/LD VCR1 /DVR VCR2 VCR3 TV REMOTE SETUP CD CD-R/ TAPE1 TUNER VIDEO SAT TV - Pioneer VSX-49TX | Owner's Manual - Page 12
theater setup you have in your home. 1) Your Home System The heart of your system is the VSX-49TX receiver and it is very flexible in getting you theater-like surround sound. You can use this receiver with anywhere from two to seven speakers (front left, front right, center, surround left and right - Pioneer VSX-49TX | Owner's Manual - Page 13
GUIDE Quick Start Guide Part1 Before making or changing the connections, switch off the power and disconnect the power cord from the AC outlet. Instruction can buy at your to this receiver. For ) R R SUB W. L LR MULTI CH INPUT SUB W. PRE OUT 2 SURROUND L PB PR IN 2 Y REMOTE IN MULTIROOM & SOURCE Y - Pioneer VSX-49TX | Owner's Manual - Page 14
receiver the center channel is off or when you listen to digital soundtracks you won't hear any dialog. This can be done automatically by following the Auto Surround Sound Setup instructions from page 16 in this Quick Start Guide W. L LR MULTI CH INPUT SUB W. PRE Y REMOTE IN manual for details.) 14 - Pioneer VSX-49TX | Owner's Manual - Page 15
DVD/LD Receiver TONE BASS/ ATREBLE VCR1 /DVR VCR2 VCR3 TV DISPLAY DIMMER STATUS SYSTEM SETUP VIDEO SELECT SPEAKER A/B MAIN SUB EFFECT/ CH SEL. LOUDNESS TAPE 2 MONITOR INPUT ATT. SIGNAL SELECT REMOTE SETUP CD CD-R/ TAPE1 TUNER VIDEO SAT TV CONTROL 4 System Setup [ Auto Surround Setup - Pioneer VSX-49TX | Owner's Manual - Page 16
the ENTER button on the remote control to navigate the on-screen display (OSD) on your TV. 1 Switch on the receiver and your TV. 2 Make sure your TV is set to this receiver as you will use the on-screen displays (OSDs) on your TV to follow these instructions. 2 Hook up the microphone to - Pioneer VSX-49TX | Owner's Manual - Page 17
Next ) [Return] Quick Start Guide Part2 9 Some auto setup instructions will be listed, make sure input the settings manually select ERR=FIX SP problem with the speaker connection. If selecting RETRY doesn't fix the problem, turn off the power and check the speaker connections. 17 QUICK START GUIDE - Pioneer VSX-49TX | Owner's Manual - Page 18
Quick Start Guide Part2 memo • Make sure the room environment follows the the receiver. To locate the LISTENING CH SELECT button, press the RECEIVER button then press MAIN to access the main remote control screen. 4 Press the STANDARD button on the remote control for the basic surround sound - Pioneer VSX-49TX | Owner's Manual - Page 19
CENTER 1 (Single) R R SUB W. L LR MULTI CH INPUT SUB W. PRE OUT 2 SURROUND L SURROUND BACK L ( IN 1 Y PB PR IN 2 Y REMOTE IN MULTIROOM & SOURCE Y MONITOR OUT PB VSX-49TX allows you to hook up your VCR/DVD or any other video player, and/ or your TV tuner with one type of cord to the receiver - Pioneer VSX-49TX | Owner's Manual - Page 20
from the AC outlet. Instructions for using the i.LINK interface as well. See your DVD manual for details. If you L CENTER 1 (Single) R R SUB W. L LR MULTI CH INPUT SUB W. PRE OUT 2 SURROUND L SURROUND BACK L (Single /LD IN 1 Y PB PR IN 2 Y REMOTE IN MULTIROOM & SOURCE Y MONITOR OUT PB PR - Pioneer VSX-49TX | Owner's Manual - Page 21
IN OUT IN DVD /LD IN 1 Y PB PR IN 2 Y REMOTE IN MULTIROOM & SOURCE Y MONITOR OUT PB PR IN 3 Y PB panel input selector as "VIDEO." CLASS TUNER STATION CH MODE (5ch/7ch) MULTI ROOM & SOURCE CONTROL receiver's display. See page 93 for more information on "Assigning the Digital Inputs". - Pioneer VSX-49TX | Owner's Manual - Page 22
AMP R L IN FRONT L R L CENTER 1 (Single) R R SUB W. L LR MULTI CH INPUT SUB W. PRE OUT 2 SURROUND L SURROUND BACK L (Single) CENTER SURROUND BACK L (Single) IN IN OUT IN OUT IN DVD /LD IN 1 Y PB PR IN 2 Y REMOTE IN MULTIROOM & SOURCE Y MONITOR OUT PB PR IN 3 Y PB PB PR PR - Pioneer VSX-49TX | Owner's Manual - Page 23
R L IN FRONT L R L CENTER 1 (Single) R R SUB W. L LR MULTI CH INPUT SUB W. PRE OUT 2 SURROUND L SURROUND BACK L (Single) CENTER SURROUND BACK L (Single . It could damage the equipment. If your turntable has a phono pre-amplifier (most do not) please hook it up to an input other than PHONO - Pioneer VSX-49TX | Owner's Manual - Page 24
the transformer in the receiver. If you experience noise, move the cassette deck farther away from the receiver. Connecting to the Multi R L IN FRONT L R L CENTER 1 (Single) R R SUB W. L LR MULTI CH INPUT SUB W. PRE OUT 2 SURROUND L SURROUND BACK L (Single) CENTER SURROUND BACK L (Single - Pioneer VSX-49TX | Owner's Manual - Page 25
as shown below. The VSX-49TX has three coaxial, five ). Hook up your digital equipment in accordance with this receiver's default settings (see next page) unless you want L R L CENTER 1 (Single) R R SUB W. L LR MULTI CH INPUT SUB W. PRE OUT 2 SURROUND L SURROUND BACK L (Single) CENTER SURROUND - Pioneer VSX-49TX | Owner's Manual - Page 26
to one type of component, they can be used freely. Thus you must tell the receiver what digital component is connected to which jack so your components will be in sync with the names on the remote control buttons and the like. To avoid having to assign the digital inputs you can - Pioneer VSX-49TX | Owner's Manual - Page 27
cases, but connecting outdoor antennas should noticeably improve sound quality. Before making or changing the connections, switch OUT VCR1 MONITOR OUT OUT IN IN IN OUT DVD /LD IN 1 Y PB PR IN 2 Y REMOTE IN MULTIROOM & SOURCE Y MONITOR OUT PB PR IN 3 Y ၻ ANTENNA L AM LOOP ANTENNA FM - Pioneer VSX-49TX | Owner's Manual - Page 28
sound receiver match those on the speakers. Before making or changing the connections, switch off the power and disconnect the power cord from the AC outlet. memo • If you only have one surround back speaker hook it up to the left surround back terminal. • The VSX-49TX LR MULTI CH INPUT SUB REMOTE - Pioneer VSX-49TX | Owner's Manual - Page 29
sound from your system. The diagram and tips given here are just a rough guide, for more information see page 109. Also, it is very important for speaker placement to read the instructions sound quality. Be sure to consult p.109 and your speaker manuals unit. • The receiver should be disconnected by - Pioneer VSX-49TX | Owner's Manual - Page 30
PQLS p.5). See the operating instructions that came with your i.LINK FRONT L R L CENTER 1 (Single) R R SUB W. L LR MULTI CH INPUT SUB W. PRE OUT 2 SURROUND L SURROUND BACK L (Single) CENTER SURROUND BACK comes into contact with metallic parts of the receiver other than the intended connector - Pioneer VSX-49TX | Owner's Manual - Page 31
any connected components. • After connecting an i.LINK-equipped component to the receiver, follow the instructions for both assigning inputs on the receiver (see p.95) and output settings on the component (see the manual that came with the component). • You can connect several i.LINKequipped - Pioneer VSX-49TX | Owner's Manual - Page 32
AMPLIFIER VSX-49TX LISTENING MODE SELECTOR PUSH Remote sensor Receives the signals from the remote control. 5 Display (see p.39) 6 MCACC indicator (see p.56) Lights when the ACOUSTIC CAL EQ is on. (After the Auto Surround Sound CH INPUT indicator lights when a component connected to MULTI CH - Pioneer VSX-49TX | Owner's Manual - Page 33
CH SELECT button (see p.49, 59 & 60) Use this button to select the number of channels used for playback (5.1, 7.1, or AUTO). 17 MULTI-ROOM & SOURCE buttons (see p.80-84) Press to use the multi room feature (requires an optional PIONEER Multi-Room Remote Sensor Unit MR-100 or another IR receiver - Pioneer VSX-49TX | Owner's Manual - Page 34
need to complete "Assigning the Digital Inputs" (see p.93). 3 MULTI CH INPUT terminals (see p.24) Use these terminals to input a multichannel surround terminals to output the (analog) audio signal from this receiver to a different power amplifier (see p.78). Remove the Ushaped connectors only if - Pioneer VSX-49TX | Owner's Manual - Page 35
a video signal to a TV or monitor. 13 MULTI-ROOM & SOURCE REMOTE IN terminals (see p.80) Use these terminals to hook up a sub-system in a secondary room. This hook up requires a separately sold IR receiver and allows you to use the receiver to view and hear different sources in different rooms. 14 - Pioneer VSX-49TX | Owner's Manual - Page 36
LIGHT RECEIVER DVD/LD VCR1 /DVR VCR2 VCR3 TV REMOTE SETUP CD CD-R/ TAPE1 TUNER VIDEO SAT TV CONTROL use lock TV CONTROL FUNCTION CH + CH - SYSTEM OFF button will turn off these components even if they are not PIONEER products. ~ MULTI OPERATION button Use this button to start the MULTI - Pioneer VSX-49TX | Owner's Manual - Page 37
DIRECT THX STANDARD MULTI CH IN 8 8 ADVANCED ADVANCED LISTENING CINEMA CONCERT CH SEL. MIDNIGHT DIGITAL NR ACOUSTIC CAL. 2 3 45 6 7 1 Receiver MAIN button Press this button to select the MAIN receiver screen (above) when the remote control is on the SUB receiver screen. 2 MIDNIGHT button - Pioneer VSX-49TX | Owner's Manual - Page 38
VIDEO DIMMER SELECT EFFECT/ CH SEL. 3 STATUS SPEAKER A/B LOUDNESS INPUT ATT. 0 4 SYSTEM SETUP TAPE 2 SIGNAL MONITOR SELECT 9 567 8 1 Receiver SUB button Press this button to select the SUB receiver screen (above) when the remote control is on the main receiver screen. 2 DISPLAY DIMMER - Pioneer VSX-49TX | Owner's Manual - Page 39
signal is selected. DIGITAL : Lights when a digital signal is selected. 2RF : Lights when an 2 RF signal is selected. AUTO : Lights when the receiver is set to select the input signal automatically. 2 Program Format indicators For Dolby Digital or DTS sources : These indicators change according to - Pioneer VSX-49TX | Owner's Manual - Page 40
/ CH SEL. LOUDNESS TAPE 2 MONITOR INPUT ATT. SIGNAL SELECT REMOTE SETUP CD CD-R/ TAPE1 TUNER VIDEO SAT TV CONTROL 3 4 System Setup [Auto Surround Setup] [1. Input Assign ] [2. Surround Setup ] [3. Expert Setup ] [4. THX Audio Setup ] [Exit] memo For the modified version of the VSX-49TX - Pioneer VSX-49TX | Owner's Manual - Page 41
you connected. Most importantly, you need to decide how to route the sound for all the speakers you connected. To do this select the size of try different possible settings manually. Use the information below to complete the steps that follow and set up the receiver to match the speakers you - Pioneer VSX-49TX | Owner's Manual - Page 42
back from those selected as SMALL. It also decides where the cutoff will be for bass sounds in the LFE channel. If you selected MANUAL THX in step 2 the Crossover Frequency is set to 80Hz and this screen doesn't appear. [Return] 10 Use the 5∞ buttons to select RETURN and press - Pioneer VSX-49TX | Owner's Manual - Page 43
manually and adjust the channel level. SEMI AUTO: in this setting the test tone moves by itself and you set the levels. AUTO: This way of setting the levels is like that described in the Quick Start Guide (p.16-18). The levels are set automatically by the receiver are using a Sound Pressure Level ( - Pioneer VSX-49TX | Owner's Manual - Page 44
Sound 4 2.2. Channel Level Manual LEFT CENTER RIGHT [ +1. 5dB] [ +1. 5dB] [ +2. 0dB] SURROUND R [ -3. 5dB] SURR BACK R [ -1. 5dB] SURR BACK L [ +3. 0dB] SURROUND L [ +2. 0dB] SUB WOOFER [+10. 0dB] [Return] 4 In MANUAL EFFECT CH/ SEL. and +/- buttons on the RECEIVER SUB screen on the remote - Pioneer VSX-49TX | Owner's Manual - Page 45
, complete steps 1-4 in "Setting Up for Surround Sound" (p.40) first. 1 2 2.Surround Setup [ MANUAL: You can choose CUSTOM1 ( ) or CUSTOM2 ( ) and manually adjust each speaker. • Before manually adjusting CUSTOM1 or CUSTOM2 copy the auto Acoustic Calibration EQ setting from ALL CH ADJ or FRONT CH - Pioneer VSX-49TX | Owner's Manual - Page 46
Setting Up for Surround Sound 3 2.4. Acoustic Cal EQ Manual Please Wait Caution!! Test tone is output loudly. [Cancel] AUTO: The frequency balance is set automatically by the receiver (see p.16) and cannot be changed manually. ALL CH ADJ mode (flat curve): All the speakers are set individually ( - Pioneer VSX-49TX | Owner's Manual - Page 47
Up for Surround Sound Data Copy of Acoustic Calibration EQ We recommend that after you have completed AUTO SURROUND SETUP (p.16) or adjusted Acoustic Calibration EQ using the AUTO mode (p.45), copy those settings from either ALL CH ADJ or F ALIGN and adjust CUSTOM1 or CUSTOM2 manually. You can - Pioneer VSX-49TX | Owner's Manual - Page 48
input for your surround sound parameters you can do it following the steps below. 1 3 2 RECEIVER DVD/LD Receiver TONE BASS/ ATREBLE VCR1 screen displays on your TV to follow these instructions. 2 Press the SUB button on the remote control's receiver screen. 3 Press the SYSTEM SETUP button - Pioneer VSX-49TX | Owner's Manual - Page 49
Multichannel Playback The following instructions show you how to play Dolby Digital or DTS sound sources with the VSX-49TX. Before doing so be sure to complete the setup procedures described in the Quick Start Guide (starting on page 16) or "Setting Up for Surround Sound" (starting on p.40). This - Pioneer VSX-49TX | Owner's Manual - Page 50
/DIRECT THX STANDARD (DVD-A /SACD) MULTI CH IN ADVANCED ADVANCED LISTENING CINEMA CONCERT CH SEL. 1 MIDNIGHT DIGITAL NR ACOUSTIC CAL. 1 Press the LISTENING CH SEL. button on the remote control's RECEIVER MAIN screen. Each press switches LISTENING CH SELECT between 5.1, 7.1 and AUTO. memo - Pioneer VSX-49TX | Owner's Manual - Page 51
to hear DOLBY DIGITAL or DTS surround sound material and i.LINK has to be . Receiver MAIN SUB TONE BASS/ TREBLE DISPLAY VIDEO DIMMER SELECT EFFECT/ CH SEL instruction manual supplied with your DVD player. • When using DIGITAL IN terminals the following digital signal formats are supported - Pioneer VSX-49TX | Owner's Manual - Page 52
sound formats This receiver is capable of playing back 96kHz/24bit sound formats (such as DTS 96/24 and PCM 96kHz up to 24bit). In addition, when connected to an i.LINK-equipped component, playback of up to 192kHz, 24-bit sound formats (such as DVD-A) or an SACD is supported the manual that came - Pioneer VSX-49TX | Owner's Manual - Page 53
sources (such as Dolby Digital Surround EX, DTS-ES), this mode provides pure decoding. The receiver selects suitable decode format to reproduce 7.1 channel sound and shows it. When LISTENING CH SELECT is set to AUTO, the EX mode is automatically selected with 6.1 channel playback compatible sources - Pioneer VSX-49TX | Owner's Manual - Page 54
EX You can only choose this mode if you have set up this receiver for use with surround back speaker(s) (see pages 14, 28 & 41-42) and select 7.1 in LISTENING CH SELECT (see p.50). For true 6.1 channel cinema sound, Dolby Digital Surround EX encoded discs should be played with THX Surround EX - Pioneer VSX-49TX | Owner's Manual - Page 55
the acoustic effects of a dance club. Features a strong bass sound. Reflected sound delay time is virtually below 50 msec, for the listener to experience instructions show you how to adjust the amount of effect. 2 2 Receiver MAIN SUB TONE BASS/ TREBLE DISPLAY VIDEO DIMMER SELECT EFFECT/ CH - Pioneer VSX-49TX | Owner's Manual - Page 56
instructions below. For information about each Acoustic Calibration EQ mode, see page 45. MAIN Receiver remote control's RECEIVER MAIN screen or on the front panel. Each press switches acoustic calibration EQ between ALL CH improvement in the quality of the sound. • You can't use the DIGITAL NR - Pioneer VSX-49TX | Owner's Manual - Page 57
LISTENING MODE SURROUND STEREO /DIRECT THX STANDARD (DVD-A /SACD) MULTI CH IN ADVANCED ADVANCED LISTENING CINEMA CONCERT CH SEL. MIDNIGHT DIGITAL NR 1 ACOUSTIC CAL. 1 Press the MIDNIGHT button on the remote control's RECEIVER MAIN screen. Each press switches MIDNIGHT mode on or off. memo - Pioneer VSX-49TX | Owner's Manual - Page 58
you can slow the presentation of the sound to match the presentation of the video. The following instructions show you how to adjust the amount of delay. 2 2 Receiver MAIN SUB TONE BASS/ TREBLE DISPLAY VIDEO DIMMER SELECT EFFECT/ CH SEL. STATUS SPEAKER A/B LOUDNESS INPUT ATT. SYSTEM - Pioneer VSX-49TX | Owner's Manual - Page 59
CH IN 1 ADVANCED ADVANCED LISTENING CINEMA CONCERT CH SEL. 2 MIDNIGHT DIGITAL NR ACOUSTIC CAL. 1 Press MULTI CH IN button on the remote control's RECEIVER apply different sound features (p.56-58). OFF (Normal display): Cancels the MULTI CH IN modes. 12 memo 2 Use the LISTENING CH SEL button - Pioneer VSX-49TX | Owner's Manual - Page 60
lowers the input level of an analog signal when it is too strong, causing distortion in the sound. Receiver MAIN SUB TONE BASS/ TREBLE DISPLAY VIDEO DIMMER SELECT EFFECT/ CH SEL. STATUS SPEAKER A/B LOUDNESS INPUT ATT. 1 SYSTEM SETUP TAPE 2 SIGNAL MONITOR SELECT 1 Use the INPUT ATT - Pioneer VSX-49TX | Owner's Manual - Page 61
source on your TV. The sound source is set in the normal fashion as is explained on p.49 & 50. You then alter the video input with the VIDEO SELECT button. 1 VIDEO SELECT Receiver MAIN SUB TONE BASS/ TREBLE EFFECT/ DISPLAY VIDEO DIMMER SELECT CH SEL. 1 STATUS SPEAKER A/B LOUDNESS INPUT - Pioneer VSX-49TX | Owner's Manual - Page 62
the front panel display. SUB Receiver MAIN SUB TONE BASS/ TREBLE 1 DISPLAY VIDEO DIMMER SELECT EFFECT/ CH SEL. STATUS SPEAKER A/B LOUDNESS INPUT ATT. SYSTEM SETUP TAPE 2 SIGNAL MONITOR SELECT 1 Use the DISPLAY DIMMER button on the SUB screen of the remote - Pioneer VSX-49TX | Owner's Manual - Page 63
lets you see what the status is for most of the settings in this section. 1 1 RECEIVER DVD/LD VCR1 /DVR VCR2 Receiver MAIN SUB REMOTE SETUP LISTENING MODE SURROUND STEREO /DIRECT THX STANDARD (DVD-A /SACD) MULTI CH IN CD CD-R/ TAPE1 TUNER ADVANCED ADVANCED CINEMA CONCERT LISTENING - Pioneer VSX-49TX | Owner's Manual - Page 64
CH + CH - VOL + VOL - FUNCTION 1 ENTER STANDBY/ON MULTI SYSTEM OPERATION OFF MUTING MASTER VOLUME + - 2 1 Press the TUNER. On the remote, this selects the tuner function on the receiver and sets the remote Repeat to locate other stations. For Manual Tuning • To change frequencies one step - Pioneer VSX-49TX | Owner's Manual - Page 65
3 CD CD-R/ TAPE1 6 TUNER VIDEO 9 SAT TV CONTROL FUNCTION CH + CH - VOL + VOL - FUNCTION ENTER STANDBY/ON MULTI SYSTEM OPERATION OFF MUTING MASTER VOLUME + - 1 4 This selects the tuner function on the receiver and sets the remote to the tuner operation mode. 2 Press the BAND button to - Pioneer VSX-49TX | Owner's Manual - Page 66
or MONO). 4 3 2 LIGHT Tuner RECEIVER DVD/LD STATION 12 VCR1/ DVR TUNING 45 VCR2 MPX BAND CLASS 7 8 VCR3 TV TUNER DISP DIRECT EDIT MODE ACCESS 0 use lock REMOTE SETUP TV CONTROL 3 CD CD-R/ TAPE1 6 TUNER 9 VIDEO SAT TV CONTROL FUNCTION CH + CH - VOL + VOL - FUNCTION ENTER - Pioneer VSX-49TX | Owner's Manual - Page 67
than the frequency number, will appear on your display. 3 4 LIGHT Tuner RECEIVER DVD/LD STATION 12 VCR1/ DVR TUNING 45 VCR2 MPX BAND CLASS 7 8 MODE ACCESS 0 use lock REMOTE SETUP TV CONTROL 3 CD CD-R/ TAPE1 6 TUNER 9 VIDEO SAT TV CONTROL FUNCTION CH + CH - VOL + VOL - - Pioneer VSX-49TX | Owner's Manual - Page 68
3 CD CD-R/ TAPE1 6 TUNER 9 VIDEO SAT TV CONTROL FUNCTION CH + CH - VOL + VOL - FUNCTION ENTER STANDBY/ON MULTI SYSTEM OPERATION OFF MUTING MASTER VOLUME + - 1 3 This selects the TUNER function on the receiver and sets the remote to the TUNER operation mode. 2 Press the CLASS button - Pioneer VSX-49TX | Owner's Manual - Page 69
• See "Using the Remote Control with Other Components" on page 73 to operate your other components. 2 1 RECEIVER DVD/LD VCR1 /DVR Remote Setup BACK REMOTE SETUP LCD COMMANDER PRESET For explanation purposes, we'll use PIONEER as an example. memo The TUNER button cannot be assigned. BASIC 69 - Pioneer VSX-49TX | Owner's Manual - Page 70
CONTROL 5 6 RECEIVER DVD/LD VCR1 /DVR VCR2 Preset Recall [DVD/LD] BACK ITEM DVD MAKER PIONEER SELECT NUMBER 12 REMOTE SETUP CD receiver. This method should help you customize the remote control for your system and let you control all of your components with the remote control for the VSX-49TX - Pioneer VSX-49TX | Owner's Manual - Page 71
control of the VSX-49TX all the commands from the other remote control. RECEIVER DVD/LD TV/SAT VCR1 VCR2 ENTER RECEIVER STANDBY/ON DIGITAL MULTI PROCESSING AMPLIFIER REMOTE CONTROL UNIT MUTE FUNCTION TV/VCR ENTER VOLUME DISC 9 6 3 4¢ STATION - + CHANNEL - + GUIDE 3 MENU DTV MENU - Pioneer VSX-49TX | Owner's Manual - Page 72
SAT TV MULTI OPERATION TV CONTROL use lock TV CONTROL INPUT CH + CH - VOL + VOL - INPUT ENTER STANDBY/ON MULTI SYSTEM OPERATION OFF MUTING MASTER VOLUME + 2 Locked symbol LIGHT RECEIVER DVD/LD Remote Setup BACK REMOTE SETUP LCD COMMANDER DIRECT FUNCTION CD CD-R/ TAPE1 VCR1/ DVR - Pioneer VSX-49TX | Owner's Manual - Page 73
receiver's remote control after you program your DVD or TV into it, but some operations may need to be learned separately by the receiver (see "Setting Up the Remote to set the remote to the DVD or Digital TV mode. • For more information on individual commands consult the manual that came with the - Pioneer VSX-49TX | Owner's Manual - Page 74
the external video deck signal is not going through the VSX-49TX. To get around this problem you set the DIRECT FUNCTION for VCR 2 to OFF. Now when you press VCR 2 function button you can control the external video deck with the remote but the receiver does not go into VCR 2 mode. 2 1 1 Press the - Pioneer VSX-49TX | Owner's Manual - Page 75
RECEIVER DVD/LD Receiver TONE BASS/ ATREBLE VCR1 /DVR VCR2 VCR3 TV DISPLAY DIMMER STATUS SYSTEM SETUP VIDEO SELECT SPEAKER A/B MAIN SUB EFFECT/ CH SEL. LOUDNESS TAPE 2 MONITOR INPUT ATT. SIGNAL SELECT REMOTE between the sound of the recording (TAPE 2 indicator on) and the sound of the - Pioneer VSX-49TX | Owner's Manual - Page 76
same audio, it doesn't matter which set (A or B) is powering which part (HI or LOW) of the speaker. ၻ L FRONT R CENTER L amplifier. See your speaker manual for more information. R Bi-wiring your speakers To bi-wire a speaker, connect two speaker cords to each speaker terminal on the receiver - Pioneer VSX-49TX | Owner's Manual - Page 77
speaker system you will use. Receiver MAIN SUB TONE BASS/ TREBLE DISPLAY VIDEO DIMMER SELECT EFFECT/ CH SEL. 1 STATUS SPEAKER A/B See the explanations for a guide to how the sound will be output when you have chosen NORMAL SURROUND (see p.4142). Sound is output from speaker system A - Pioneer VSX-49TX | Owner's Manual - Page 78
Additional Amplifiers This receiver has more than sufficient power for any home use, but it is possible to add additional amplifiers to every R L IN FRONT L R L CENTER 1 (Single) R R SUB W. L LR MULTI CH INPUT SUB W. PRE OUT 2 SURROUND L SURROUND BACK L (Single) CENTER SURROUND BACK L ( - Pioneer VSX-49TX | Owner's Manual - Page 79
receiver. Using a separate power amplifier for main room stereo sound An alternative multi room setup involves using a separate power amplifier 1 (Single) R R SUB W. L LR MULTI CH INPUT SUB W. PRE OUT 2 SURROUND L SURROUND BACK 1 Y PB PR IN 2 Y REMOTE IN MULTIROOM & SOURCE Y MONITOR OUT - Pioneer VSX-49TX | Owner's Manual - Page 80
a problem. While in MULTI ROOM mode the input selector on the front panel of the VSX-49TX is able to change the input even though the receiver is off. MULTI-ROOM connections On the VSX-49TX, connect the IR receiver sensor to the MULTI-ROOM & SOURCE REMOTE IN jack, then connect a separate amplifier - Pioneer VSX-49TX | Owner's Manual - Page 81
or FIXED. If you hook up a just a power amplifier in the sub room the VSX-49TX will act as a pre-amp. In this case choose VARIABLE for the VOLUME LEVEL setting. If you hook up a full integrated amplifier in the sub room (such as another Pioneer VSX receiver) choose FIXED for the VOLUME LEVEL setting - Pioneer VSX-49TX | Owner's Manual - Page 82
Other Functions Controlling the MULTI-ROOM system from the main room 421 3 VSX-47TX 1 Press the MULTI ROOM & SOURCE ON/OFF button to turn on the MULTI ROOM system. The display shown below will illuminate when the receiver is in STANDBY mode. Also, the MULTI ROOM indicator will light. 3 memo - Pioneer VSX-49TX | Owner's Manual - Page 83
using a Pioneer amplifier in the sub-room, cally)) there is a danger of this remote accidently controlling the sub-room amplifier (as well as the VSX-49TX). • Number button (0~9) To prevent this, cover the remote sensor of the sub- room amplifier. Sub Room Main Room EXPERT IR Receiver 83 - Pioneer VSX-49TX | Owner's Manual - Page 84
the IR receiver remote Receiver CONTROL IN OUT LIGHT RECEIVER DVD/LD VCR1 /DVR VCR2 VCR3 TV REMOTE SETUP CD CD-R/ TAPE1 TUNER VIDEO SAT TV CONTROL use lock TV CONTROL FUNCTION CH + CH - VOL + VOL - FUNCTION ENTER STANDBY/ON MULTI SYSTEM OPERATION OFF MUTING MASTER VOLUME + - PIONEER - Pioneer VSX-49TX | Owner's Manual - Page 85
TV CONTROL 5 RECEIVER DVD/LD VCR1 /DVR Multi Operation [DVD/LD] BACK SELECT FUNCTION 1 2 3 REMOTE SETUP CD CD-R/ TAPE1 TUNER VCR2 VCR3 TV VIDEO 4 5 CLEAR SAT SETUP OK TV CONTROL 1 Press the REMOTE SETUP button. 2 Press the MULTI OPERATION button. The next screen will instruct you to - Pioneer VSX-49TX | Owner's Manual - Page 86
LD VCR1 /DVR VCR2 VCR3 TV DVD:Multi Operation BACK 123 SEARCH 4 5 6 MODE TOP 7 8 9 MENU MENU RETURN 10 0 C REMOTE SETUP CD CD-R/ TAPE1 TUNER VIDEO SAT TV CONTROL RECEIVER DVD/LD VCR1 /DVR VCR2 VCR3 TV Multi Operation [DVD/LD] BACK SELECT NUMBER 1 2 3 DVD/LD 4 5 CLEAR SETUP OK - Pioneer VSX-49TX | Owner's Manual - Page 87
the receiver itself. You don't need to program in other the power for PIONEER components, they will go off automatically in this mode. The receiver itself the REMOTE SETUP button. 2 Press the MULTI OPERATION button. The next screen will instruct you to SELECT FUNCTION. 3 Press the RECEIVER button. - Pioneer VSX-49TX | Owner's Manual - Page 88
VOLUME + - 1 1 Press the SYSTEM OFF button. The remote control must be on to be able to use this command but it can be in any mode. All the components programmed into the SYSTEM OFF mode will stop and/or go off. The receiver (and other Pioneer components) will go off as well. 88 - Pioneer VSX-49TX | Owner's Manual - Page 89
then the top line of the screen for the respective component would read something like "DVD PIONEER" . Remote Setup RECEIVER BACK REMOTE SETUP 1 1 Press the REMOTE SETUP. The REMOTE SETUP menu appears on the remote DVD/LD VCR1 /DVR LCD COMMANDER PRESET RECALL DIRECT FUNCTION ITEM MEMO CD CD - Pioneer VSX-49TX | Owner's Manual - Page 90
two pages. For example, you could teach the SEARCH MODE button to be an audio key and the rename it "AUD". RECEIVER DVD/LD VCR1 /DVR Remote Setup BACK REMOTE SETUP LCD COMMANDER PRESET RECALL DIRECT FUNCTION ITEM MEMO CD CD-R/ TAPE1 TUNER VCR2 VCR3 TV LEARNING MULTI OPERATION KEY LABEL - Pioneer VSX-49TX | Owner's Manual - Page 91
to step four to allow you to input names for other functions/components. memo • If you try to input more letters/numbers than possible the remote control will beep twice to let you know this can't be done. • You can include spaces and hyphens if you want. • If you start this - Pioneer VSX-49TX | Owner's Manual - Page 92
VSX-47TX 1 From the Standby mode, and while holding down the DIGITAL NR button press the STANDBY/ON button for about three seconds. 1 1 2 When you see RESET speaker, surround sound settings and tuner settings will be reset to the default settings. 22 Resetting the Remote Control The following - Pioneer VSX-49TX | Owner's Manual - Page 93
SETUP VIDEO SELECT SPEAKER A/B MAIN SUB EFFECT/ CH SEL. LOUDNESS TAPE 2 MONITOR INPUT ATT. SIGNAL SELECT REMOTE SETUP CD CD-R/ TAPE1 TUNER VIDEO SAT TV CONTROL press the RECEIVER on the remote control. 2 Press the SUB button on the remote control. 3 Press the SYSTEM SETUP button. 4 5 System - Pioneer VSX-49TX | Owner's Manual - Page 94
DIMMER STATUS SYSTEM SETUP VIDEO SELECT SPEAKER A/B MAIN SUB EFFECT/ CH SEL. LOUDNESS TAPE 2 MONITOR INPUT ATT. SIGNAL SELECT REMOTE SETUP CD CD-R/ TAPE1 TUNER VIDEO SAT TV CONTROL 1 Turn on the receiver and your TV, press the RECEIVER on the remote control. 2 Press the SUB button on the - Pioneer VSX-49TX | Owner's Manual - Page 95
MAIN SUB EFFECT/ CH SEL. LOUDNESS TAPE 2 MONITOR INPUT ATT. SIGNAL SELECT REMOTE SETUP CD CD-R/ TAPE1 TUNER VIDEO SAT TV CONTROL 4 System Setup [ Auto Surround Setup ] [1. Input Assign ] [2. Surround Setup] [3. Expert Setup] [4. THX Audio Setup] [Exit] 1 Turn on the receiver and your TV - Pioneer VSX-49TX | Owner's Manual - Page 96
Advanced Setup 7 1.3. i.LINK Input 1 DV-757Ai 2 DV-47Ai [ i.LINK ] [ DVD/LD ] [Return] 7 Use the 2 3 buttons to select the source you want. When you assign an i.LINK-equipped video component, select the input source to which you have connected the video signal from the component. TUNER and - Pioneer VSX-49TX | Owner's Manual - Page 97
these settings or not. They are not crucial to good surround sound. You only need to make these settings once (unless you CH + CH - VOL + VOL - FUNCTION ENTER STANDBY/ON MULTI SYSTEM OPERATION OFF MUTING MASTER VOLUME + - 1 Turn on the receiver and your TV, press the RECEIVER on the remote - Pioneer VSX-49TX | Owner's Manual - Page 98
it seems difficult to see all the instructions on the screen. This adjustment basically lets a better match between the displays for this receiver and your TV. ENTER STANDBY/ON 5˜∞˜2˜3˜ENTER buttons Bass Peak Level] [3. D-Range Control] [4. Multi-Ch In Select] [5. Function Rename] [6. Hi-bit/Hi - Pioneer VSX-49TX | Owner's Manual - Page 99
OK] Bass Peak Level [-10] [Setting Cancel] CD LINE/ TUNER TV CONTROL CH - VOL + VOL - FUNCTION M MUTING MASTER VOLUME + - MASTER VOLUME +/- LARGE except for the subwoofer. 4 Press ENTER. The display on the receiver will show RESUME and the MASTER VOLUME will return to its original position - Pioneer VSX-49TX | Owner's Manual - Page 100
the difference between the loudest and the softest sounds in any given signal. Compressing the range plays sounds so the quieter ones are audible and the [1. OSD Adjustment ] [2. Bass Peak Level ] [3. D-Range Control ] [4. Multi-Ch In Select ] [5. Function Rename ] [6. Hi-bit/Hi-sampling ] [7. Multi - Pioneer VSX-49TX | Owner's Manual - Page 101
of output for audio signals which were input from MULTI CH INPUT terminals. You can set the output of the audio signal in regards to the surround speakers and the surround back speakers, which were input from 5.1 channel surround sound soundtrack. There are three OUTPUT MODE settings: THROUGH: the - Pioneer VSX-49TX | Owner's Manual - Page 102
FUNCTION RENAME capability to rename the display on the receiver and your OSD for different functions (DVD, etc.). 1 3.Expert Setup [1. OSD Adjustment ] [2. Bass Peak Level ] [3. D-Range Control ] [4. Multi-Ch In Select ] [5. Function Rename ] [6. Hi-bit/Hi-sampling ] [7. Multi-Room Setting ] [ - Pioneer VSX-49TX | Owner's Manual - Page 103
finer audio reproduction. ENTER STANDBY/ON 5˜∞˜2˜3˜ENTER buttons 1 3.Expert Setup [1. OSD Adjustment ] [2. Bass Peak Level] [3. D-Range Control] [4. Multi-Ch In Select] [5. Function Renane] [6. Hi-bit/Hi-sampling] [7. Multi-Room Setting ] [Return] 2 3.6. Hi-bit/Hi-sampling Hi-bit/Hi - Pioneer VSX-49TX | Owner's Manual - Page 104
Setup to adjust the low end sounds. 1 3 2 RECEIVER DVD/LD Receiver TONE BASS/ ATREBLE VCR1 /DVR VCR2 VCR3 TV DISPLAY DIMMER STATUS SYSTEM SETUP VIDEO SELECT SPEAKER A/B MAIN SUB EFFECT/ CH SEL. LOUDNESS TAPE 2 MONITOR INPUT ATT. SIGNAL SELECT REMOTE SETUP CD CD-R/ TAPE1 TUNER VIDEO - Pioneer VSX-49TX | Owner's Manual - Page 105
to select this setting. The Advanced Speaker Array (ASA) system was developed with the principles of THX Ultra2 technology in order to get optimum sound from your surround back speakers. You choose whether your speakers are 0-1 feet apart (setting them together is best for ASA), 1-4 feet apart or - Pioneer VSX-49TX | Owner's Manual - Page 106
digital sound. It uses masking technology and Adaptive Transform Coding, resulting in no audible loss of sound quality. In the present age of digital sound Dolby of choice. 106 memo For receivers and components other than the VSX-49TX Dolby Pro Logic II may not have the above mentioned functions. - Pioneer VSX-49TX | Owner's Manual - Page 107
Techno Tidbits & Problem-solving Dolby Digital Surround EX This new recording technology is able to play 6.1 channel sound and was developed in and CDs. Both of these formats are compatible with a conventional DTS 5.1 ch decoder. In this system each channel is encoded and decoded individually, adding - Pioneer VSX-49TX | Owner's Manual - Page 108
including pre-amplifier performance and at www.thx.com. Only receiver and controller products bearing the sound experience using two new modes; THX Ultra2 Cinema and THX MusicMode. THX Ultra2™ Cinema mode: When presented with a multichannel digital signal (Dolby Digital, DTS, etc.) the VSX-49TX - Pioneer VSX-49TX | Owner's Manual - Page 109
support your speakers. Avoid placing the speakers on soft (like cushions or sofas) as these will also lead to sound to achieve a surround sound effect, make sure the speakers are a reasonable distance from your main listening position. Follow the diagrams and instructions below for optimum placement - Pioneer VSX-49TX | Owner's Manual - Page 110
Techno Tidbits & Problem-solving Speaker Placement for a Complete THX sound waves represent the actual transmitted sound and the shaded sound waves represent the how the sound will seem to the listener (the virtual sound). This setting is only achieved when listening to input sound from MULTI CH - Pioneer VSX-49TX | Owner's Manual - Page 111
component name. The name of the component isn't recognized. LINK CHECK The receiver is checking the i.LINK network. It does this, for example, when components are added or removed from the network. The sound may be interrupted if this happens during playback. LOOP CONNECT The i.LINK network - Pioneer VSX-49TX | Owner's Manual - Page 112
and electrical appliances being used. If the trouble cannot be rectified even after exercising the checks listed below, ask your nearest PIONEER authorized service center or your dealer to carry out repair work. Problem Cause Remedy i.LINK Interface No sound is output. • An output signal is - Pioneer VSX-49TX | Owner's Manual - Page 113
sound. • The speakers have been incorrectly connected (+/- connections are reversed). The image on the screen is disturbed when an overlay message disappears. • Some TVs display this problem. This is not a malfunction with the receiver MUTING on the remote control. • • Turn MULTI CH INPUT mode off - Pioneer VSX-49TX | Owner's Manual - Page 114
Problem-solving Problem No sound output from the subwoofer. No sound output from the surround back speakers. No sound output from one speaker. No sound is output from one speaker whose channel's program format indicator lights. Sound manual). • Check all connections. • The LISTENING CH SELECT - Pioneer VSX-49TX | Owner's Manual - Page 115
supplied U-shaped connectors (p.34). Other audio problems Subwoofer output is very low. During MULTI only sound output is from the front speakers. • Settings route signal away from subwoofer. • The MULTI CH IN the noise or move it away from the receiver. • Place the antenna farther away from the - Pioneer VSX-49TX | Owner's Manual - Page 116
screen doesn't appear. • See same problem on p.113. No image is output • Please read the TV monitor manual and change the settings accordingly. • you press the function key on the remote. You can't get DIGITAL or incorrect. • Tape 2 MONITOR is on. • MULTI CH IN mode is on. • You're in an - Pioneer VSX-49TX | Owner's Manual - Page 117
correct jack (p.84). • Disconnect the IR Receiver from the rear panel, and set to the other IR Receiver type using the remote control (p.81). • Turn Locking the settings off (p.72). • Set the lock switch to USE (p.9). • Input the correct preset code (p.69). • Reset the proper system settings (p.69 - Pioneer VSX-49TX | Owner's Manual - Page 118
Reset the remote control. (Note: In doing this, all settings in the remote control will be reset to the default.) (see Resetting the Remote Sound Setup. The receiver doesn't memorize the volume level last used before turn off. • Turning off the receiver immediately after • Turn off the receiver - Pioneer VSX-49TX | Owner's Manual - Page 119
Techno Tidbits & Problem-solving Specifications Amplifier Section Continuous average power output of 160 watts Parts FM wire Antenna 1 AM Loop Antenna 1 "AA" IEC LR6 batteries 4 Remote Control Unit 1 Touch Pen 1 Cushion for Remote 4 Microphone 1 U-shaped connectors 2 Operating Instructions - Pioneer VSX-49TX | Owner's Manual - Page 120
ELECTRONICS AUSTRALIA PTY. LTD. 178-184 Boundary Road, Braeside, Victoria 3195, Australia, TEL: [03] 9586-6300 PIONEER ELECTRONICS DE MEXICO S.A. DE C.V. San Lorenzo 1009 3er Piso Desp. 302 Col. Del Valle Mexico D.F. C.P. 03100 TEL: 55-5688-5290 Printed in Japan <
-
 1
1 -
 2
2 -
 3
3 -
 4
4 -
 5
5 -
 6
6 -
 7
7 -
8
-
9
-
10
-
11
-
12
-
13
-
14
-
15
-
16
-
17
-
18
-
19
-
20
-
21
-
22
-
23
-
24
-
25
-
26
-
27
-
28
-
29
-
30
-
31
-
32
-
33
-
34
-
35
-
36
-
37
-
38
-
39
-
40
-
41
-
42
-
43
-
44
-
45
-
46
-
47
-
48
-
49
-
50
-
51
-
52
-
53
-
54
-
55
-
56
-
57
-
58
-
59
-
60
-
61
-
62
-
63
-
64
-
65
-
66
-
67
-
68
-
69
-
70
-
71
-
72
-
73
-
74
-
75
-
76
-
77
-
78
-
79
-
80
-
81
-
82
-
83
-
84
-
85
-
86
-
87
-
88
-
89
-
90
-
91
-
92
-
93
-
94
-
95
-
96
-
97
-
98
-
99
-
100
-
101
-
102
-
103
-
104
-
105
-
106
-
107
-
108
-
109
-
110
-
111
-
112
-
113
-
114
-
115
-
116
-
117
-
118
-
119
-
120
 |
 |
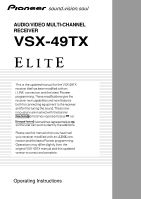
AUDIO/VIDEO MULTI-CHANNEL
RECEIVER
VSX-49TX
Operating Instructions
This is the updated manual for the VSX-49TX
receiver that has been modified with an
i.LINK
connection and the latest Pioneer
programming. These modifications give the
receiver new capabilities and new features
both for connecting equipment to the receiver
and for fine tuning the sound. These new
innovations are marked with the banner
(sometimes represented as
)
or
(sometimes represented as
)
so the user can quickly identify the additions.
Please use this manual when you have had
your receiver modified with an
i.LINK
con-
nection and the latest Pioneer programming.
Operations may differ slightly from the
original VSX-49TX manual and this updated
version is correct and complete.