Pioneer VSX-49TX Owner's Manual - Page 93
Assigning the Digital Inputs
 |
View all Pioneer VSX-49TX manuals
Add to My Manuals
Save this manual to your list of manuals |
Page 93 highlights
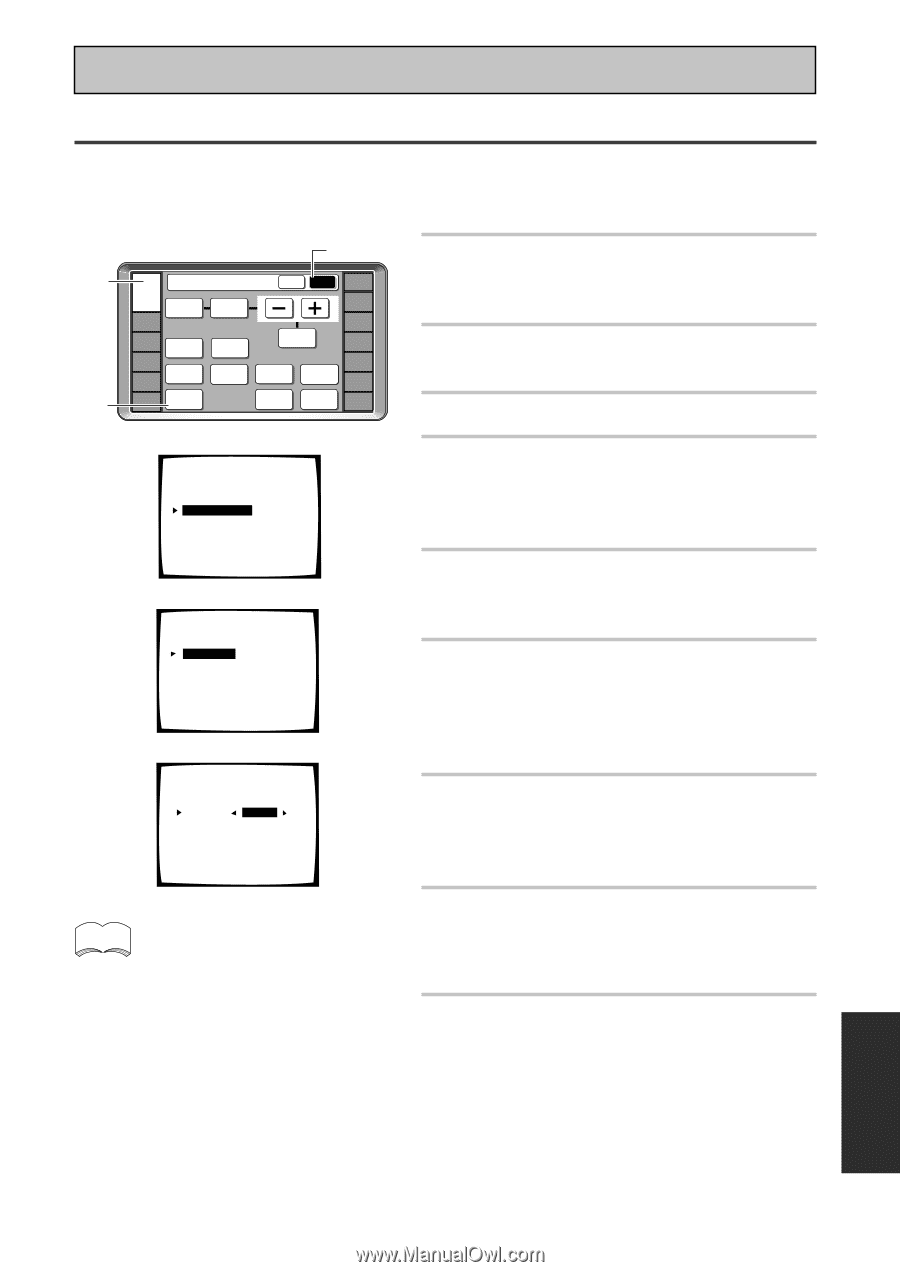
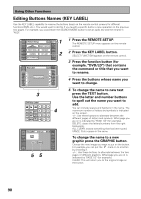
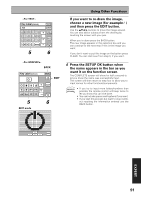
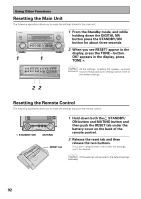
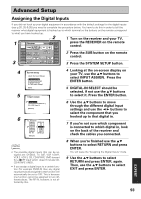
Advanced Setup Assigning the Digital Inputs If you did not hook up your digital equipment in accordance with the default settings for the digital inputs (see p.20, 25 & 26) you need to complete the procedure below. You have to do this in order to tell the receiver what digital equipment is hooked up to which terminal so the buttons on the remote correspond to what you have hooked up. 2 1 Turn on the receiver and your TV, 1 3 RECEIVER DVD/LD Receiver TONE BASS/ ATREBLE VCR1 /DVR VCR2 VCR3 TV DISPLAY DIMMER STATUS SYSTEM SETUP VIDEO SELECT SPEAKER A/B MAIN SUB EFFECT/ CH SEL. LOUDNESS TAPE 2 MONITOR INPUT ATT. SIGNAL SELECT REMOTE SETUP CD CD-R/ TAPE1 TUNER VIDEO SAT TV CONTROL press the RECEIVER on the remote control. 2 Press the SUB button on the remote control. 3 Press the SYSTEM SETUP button. 4 5 System Setup [ Auto Surround Setup ] [1. Input Assign ] [2. Surround Setup] [3. Expert Setup] [4. THX Audio Setup] [Exit] 1.Input Assign [ 1.Digital-In ] [ 2.Component Video In ] [ 3.i.LINK Input ] [Return] 6 1.1. Digital-In Digital-1 [ DVD/LD ] Digital-2 [ TV ] Digital-3 [ CD ] Digital-4 [ SAT ] Digital-5 [ VCR1 ] Digital-6 [ VCR2 ] Digital-7 [ CD-R ] RF IN [ DVD/LD ] [Return] memo • The possible digital inputs that can be assigned are: DVD/LD, TV, SAT, VCR 1/DVR, VCR 2, VCR 3, CD, CD-R/TAPE 1/MD (except for a 2 RF input which doesn't include CD, CD-R/TAPE1 /MD ). • If you assign a digital input to a certain function (for example DVD/LD) then any digital inputs previously assigned to that function will automatically be set to OFF. This is because one function cannot be assigned to two different places. The RF IN, however, is not affected by this. 4 Looking at the on-screen display on your TV, use the 5∞ buttons to select INPUT ASSIGN. Press the ENTER button. 5 DIGITAL-IN SELECT should be selected, if not use the 5∞ buttons to select it. Press the ENTER button. 6 Use the 5∞ buttons to move through the different digital input settings and use the 2 3 buttons to select the component that you hooked up to that digital in. 7 If you're not sure which component is connected to which digital in, look on the back of the receiver and check the cables you connected. 8 When you're finished use the 5∞ buttons to select RETURN and press ENTER. You will leave the "Assigning the Digital Inputs" mode. 9 Use the 5∞ buttons to select RETURN and press ENTER, again. Then, use the 5∞ buttons to select EXIT and press ENTER. EXPERT 93
-
 1
1 -
2
-
3
-
4
-
5
-
6
-
7
-
8
-
9
-
10
-
11
-
12
-
13
-
14
-
15
-
16
-
17
-
18
-
19
-
20
-
21
-
22
-
23
-
24
-
25
-
26
-
27
-
28
-
29
-
30
-
31
-
32
-
33
-
34
-
35
-
36
-
37
-
38
-
39
-
40
-
41
-
42
-
43
-
44
-
45
-
46
-
47
-
48
-
49
-
50
-
51
-
52
-
53
-
54
-
55
-
56
-
57
-
58
-
59
-
60
-
61
-
62
-
63
-
64
-
65
-
66
-
67
-
68
-
69
-
70
-
71
-
72
-
73
-
74
-
75
-
76
-
77
-
78
-
79
-
80
-
81
-
82
-
83
-
84
-
85
-
86
-
87
-
 88
88 -
 89
89 -
 90
90 -
 91
91 -
 92
92 -
 93
93 -
 94
94 -
 95
95 -
 96
96 -
 97
97 -
 98
98 -
99
-
100
-
101
-
102
-
103
-
104
-
105
-
106
-
107
-
108
-
109
-
110
-
111
-
112
-
113
-
114
-
115
-
116
-
117
-
118
-
119
-
120
 |
 |