Pioneer VSX-49TX Owner's Manual - Page 104
THX Audio Setup
 |
View all Pioneer VSX-49TX manuals
Add to My Manuals
Save this manual to your list of manuals |
Page 104 highlights
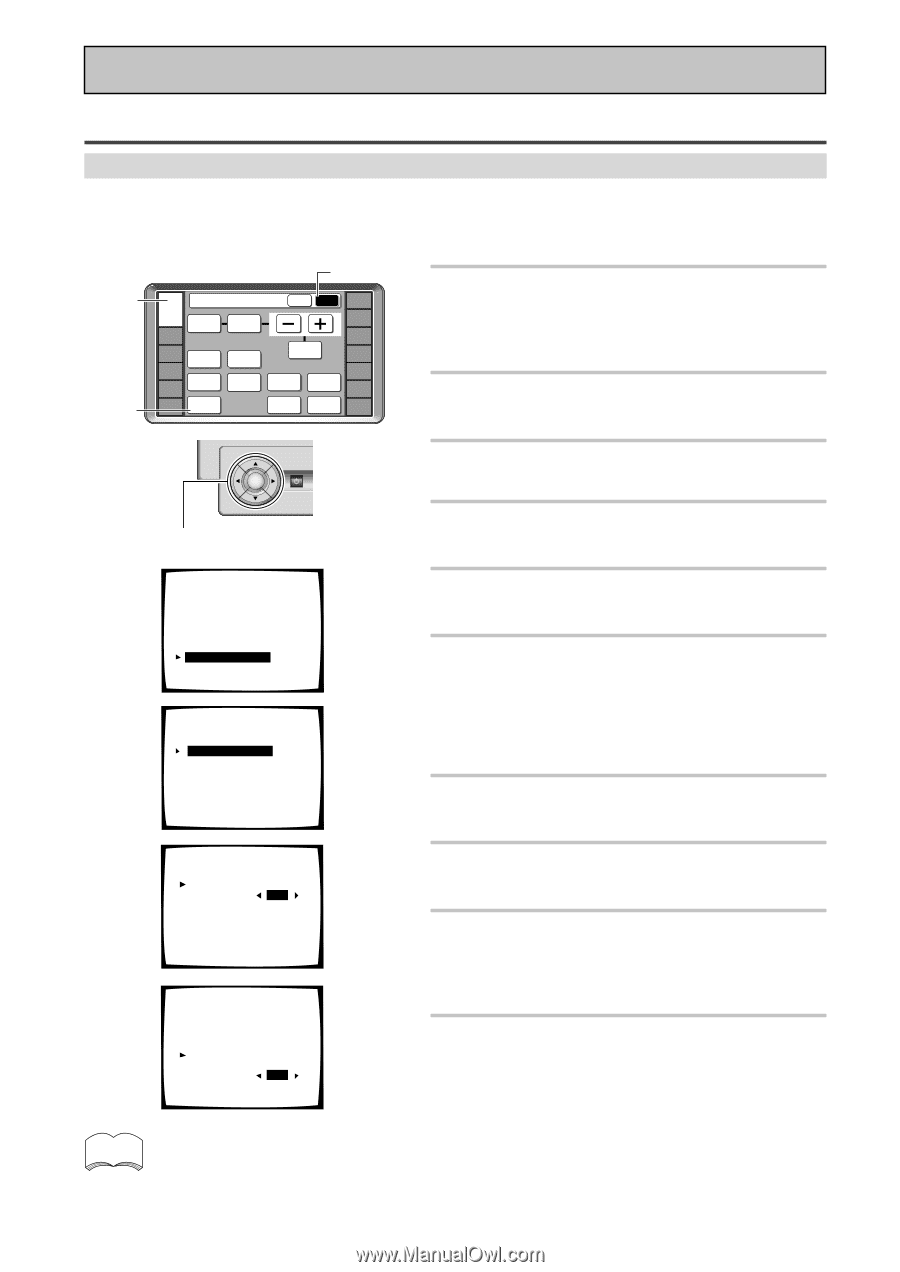
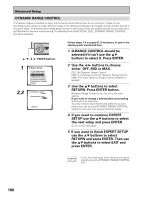
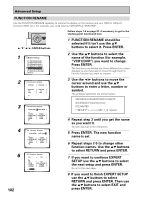
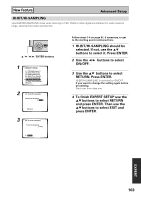
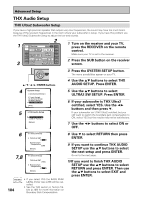
Advanced Setup THX Audio Setup THX Ultra2 Subwoofer Setup If you have a high-precision speaker that outputs very low frequencies, the sound may have too much boom because of the resonant frequencies in the room where your subwoofer is setup. If you have this problem use the THX Ultra2 Subwoofer Setup to adjust the low end sounds. 1 3 2 RECEIVER DVD/LD Receiver TONE BASS/ ATREBLE VCR1 /DVR VCR2 VCR3 TV DISPLAY DIMMER STATUS SYSTEM SETUP VIDEO SELECT SPEAKER A/B MAIN SUB EFFECT/ CH SEL. LOUDNESS TAPE 2 MONITOR INPUT ATT. SIGNAL SELECT REMOTE SETUP CD CD-R/ TAPE1 TUNER VIDEO SAT TV CONTROL 1 Turn on the receiver and your TV, press the RECEIVER on the remote control. Make sure your TV is set to the receiver. 2 Press the SUB button on the receiver screen. ENTER STANDBY/ON 5˜∞˜2˜3˜ENTER buttons 4 System Setup [ Auto Surround Setup ] [1. Input Assign] [2. Surround Setup] [3. Expert Setup] [4. THX Audio Setup] [Exit] 5 4.THX Audio Setup [ 1.Ultra2 SW Setup ] [ 2.SB SP Position ] [Return] 3 Press the SYSTEM SETUP button. The menu possibilities appear on your TV. 4 Use the 5∞ buttons to select THX AUDIO SETUP. Press ENTER. 5 Use the 5∞ buttons to select ULTRA2 SW SETUP. Press ENTER. 6 If your subwoofer is THX Ultra2 certified, select YES. Use the 2 3 buttons and then press ∞. If your subwoofer isn't THX Ultra2 certified, but you still want to switch the boundary gain compensation to ON, select YES but the results may not be satisfactory. 7 Use the 2 3 buttons to select ON or OFF. 6 4.1. Ultra2 SW Setup THX Ultra2 SW? [ YES ] Boundary Gain Compensation [OFF] [Return] 7,8 4.1. Ultra2 SW Setup THX Ultra2 SW? [ YES ] Boundary Gain Compensation [ OFF ] [Return] memo 104 • If you select YES the BASS PEAK LEVEL limiter (see p.99) will be cancelled. • See the THX section in Techno Tidbits (p.108) for more information on Boundary Gain Compensation. 8 Use ∞ to select RETURN then press ENTER. 9 If you want to continue THX AUDIO SETUP use the 5∞ buttons to select the next setup and press ENTER. Go on to the next page. 10 If you want to finish THX AUDIO SETUP use the 5∞ buttons to select RETURN and press ENTER. Then use the 5∞ buttons to select EXIT and press ENTER.
-
 1
1 -
2
-
3
-
4
-
5
-
6
-
7
-
8
-
9
-
10
-
11
-
12
-
13
-
14
-
15
-
16
-
17
-
18
-
19
-
20
-
21
-
22
-
23
-
24
-
25
-
26
-
27
-
28
-
29
-
30
-
31
-
32
-
33
-
34
-
35
-
36
-
37
-
38
-
39
-
40
-
41
-
42
-
43
-
44
-
45
-
46
-
47
-
48
-
49
-
50
-
51
-
52
-
53
-
54
-
55
-
56
-
57
-
58
-
59
-
60
-
61
-
62
-
63
-
64
-
65
-
66
-
67
-
68
-
69
-
70
-
71
-
72
-
73
-
74
-
75
-
76
-
77
-
78
-
79
-
80
-
81
-
82
-
83
-
84
-
85
-
86
-
87
-
88
-
89
-
90
-
91
-
92
-
93
-
94
-
95
-
96
-
97
-
98
-
 99
99 -
 100
100 -
 101
101 -
 102
102 -
 103
103 -
 104
104 -
 105
105 -
 106
106 -
 107
107 -
 108
108 -
 109
109 -
110
-
111
-
112
-
113
-
114
-
115
-
116
-
117
-
118
-
119
-
120
 |
 |