Pioneer VSX-49TX Owner's Manual - Page 58
Adjusting Bass and Treble TONE CONTROL, Listening with SOUND DELAY
 |
View all Pioneer VSX-49TX manuals
Add to My Manuals
Save this manual to your list of manuals |
Page 58 highlights
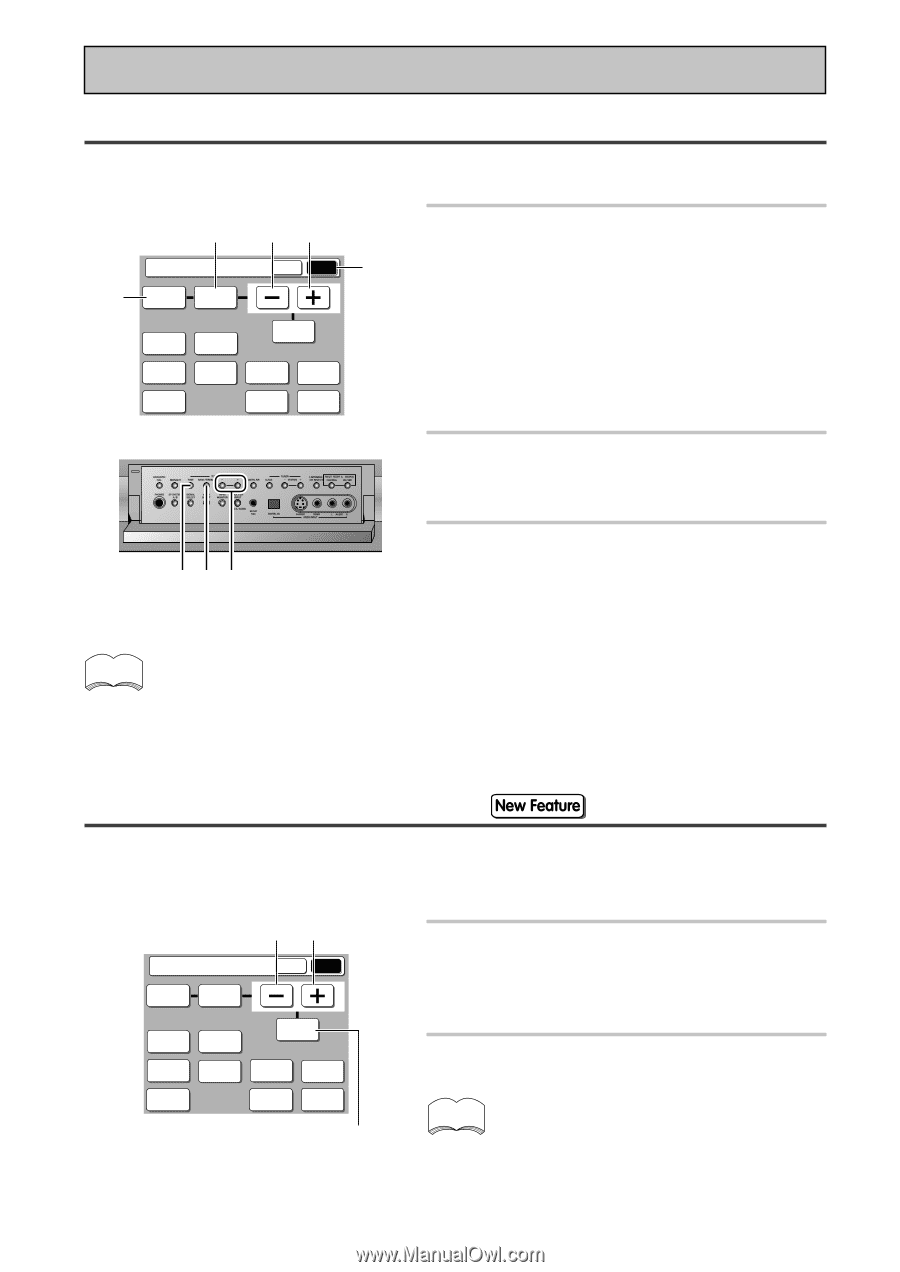
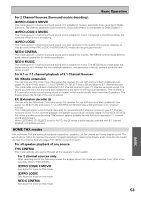
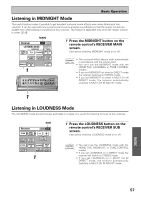
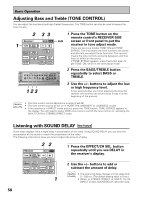
Basic Operation Adjusting Bass and Treble (TONE CONTROL) You can adjust the low (bass) and high (treble) frequencies. The TONE button can also be used to bypass the tone circuitry. 2 33 Receiver 1 TONE BASS/ TREBLE MAIN SUB DISPLAY VIDEO DIMMER SELECT EFFECT/ CH SEL. STATUS SPEAKER A/B LOUDNESS INPUT ATT. SYSTEM SETUP TAPE 2 SIGNAL MONITOR SELECT SUB 1 Press the TONE button on the remote control's RECEIVER SUB screen or front panel to put the receiver in tone adjust mode. There are two tone modes TONE: ON and TONE: BYPASS. The first means the tone functions are active and also lets you adjust these functions. The second means the tone controls are being bypassed, and thus have no effect on the sound. If TONE: BYPASS appears, press the button again to get TONE: ON, which is the tone adjust mode. 2 Press the BASS/TREBLE button repeatedly to select BASS or TREBLE. 123 3 Use the +/- buttons to adjust the low or high frequency level. A few seconds after you finish adjusting the tone the receiver will revert to the sound mode it was in at the beginning of the process. memo • The tone control can be adjusted in a range of ±6 dB. • The tone control cannot be set on in HOME THX, MIDNIGHT or LOUDNESS modes. • If the receiver is in DIRECT mode and you press the TONE button, TONE: BYPASS appears in the display. You will need to press TONE once more to switch the tone control on, canceling the (MULTI CH IN or STEREO) DIRECT mode. Listening with SOUND DELAY Some video displays have a slight delay in presentation of the video. Using SOUND DELAY you can slow the presentation of the sound to match the presentation of the video. The following instructions show you how to adjust the amount of delay. 2 2 Receiver MAIN SUB TONE BASS/ TREBLE DISPLAY VIDEO DIMMER SELECT EFFECT/ CH SEL. STATUS SPEAKER A/B LOUDNESS INPUT ATT. SYSTEM SETUP TAPE 2 SIGNAL MONITOR SELECT 1 1 Press the EFFECT/CH SEL. button repeatedly until you see DELAY in the receiver's display. 2 Use the +/- buttons to add or subtract the amount of delay. memo • The amount of delay changes in 5 ms steps from 0 - 200 ms. (The default setting value is 0 ms.) • When in STEREO DIRECT or MULTI CH IN DIRECT modes, SOUND DELAY cannot be used. 58
-
 1
1 -
2
-
3
-
4
-
5
-
6
-
7
-
8
-
9
-
10
-
11
-
12
-
13
-
14
-
15
-
16
-
17
-
18
-
19
-
20
-
21
-
22
-
23
-
24
-
25
-
26
-
27
-
28
-
29
-
30
-
31
-
32
-
33
-
34
-
35
-
36
-
37
-
38
-
39
-
40
-
41
-
42
-
43
-
44
-
45
-
46
-
47
-
48
-
49
-
50
-
51
-
52
-
 53
53 -
 54
54 -
 55
55 -
 56
56 -
 57
57 -
 58
58 -
 59
59 -
 60
60 -
 61
61 -
 62
62 -
 63
63 -
64
-
65
-
66
-
67
-
68
-
69
-
70
-
71
-
72
-
73
-
74
-
75
-
76
-
77
-
78
-
79
-
80
-
81
-
82
-
83
-
84
-
85
-
86
-
87
-
88
-
89
-
90
-
91
-
92
-
93
-
94
-
95
-
96
-
97
-
98
-
99
-
100
-
101
-
102
-
103
-
104
-
105
-
106
-
107
-
108
-
109
-
110
-
111
-
112
-
113
-
114
-
115
-
116
-
117
-
118
-
119
-
120
 |
 |