Pioneer VSX-49TX Owner's Manual - Page 14
Speaker Connections - thx
 |
View all Pioneer VSX-49TX manuals
Add to My Manuals
Save this manual to your list of manuals |
Page 14 highlights
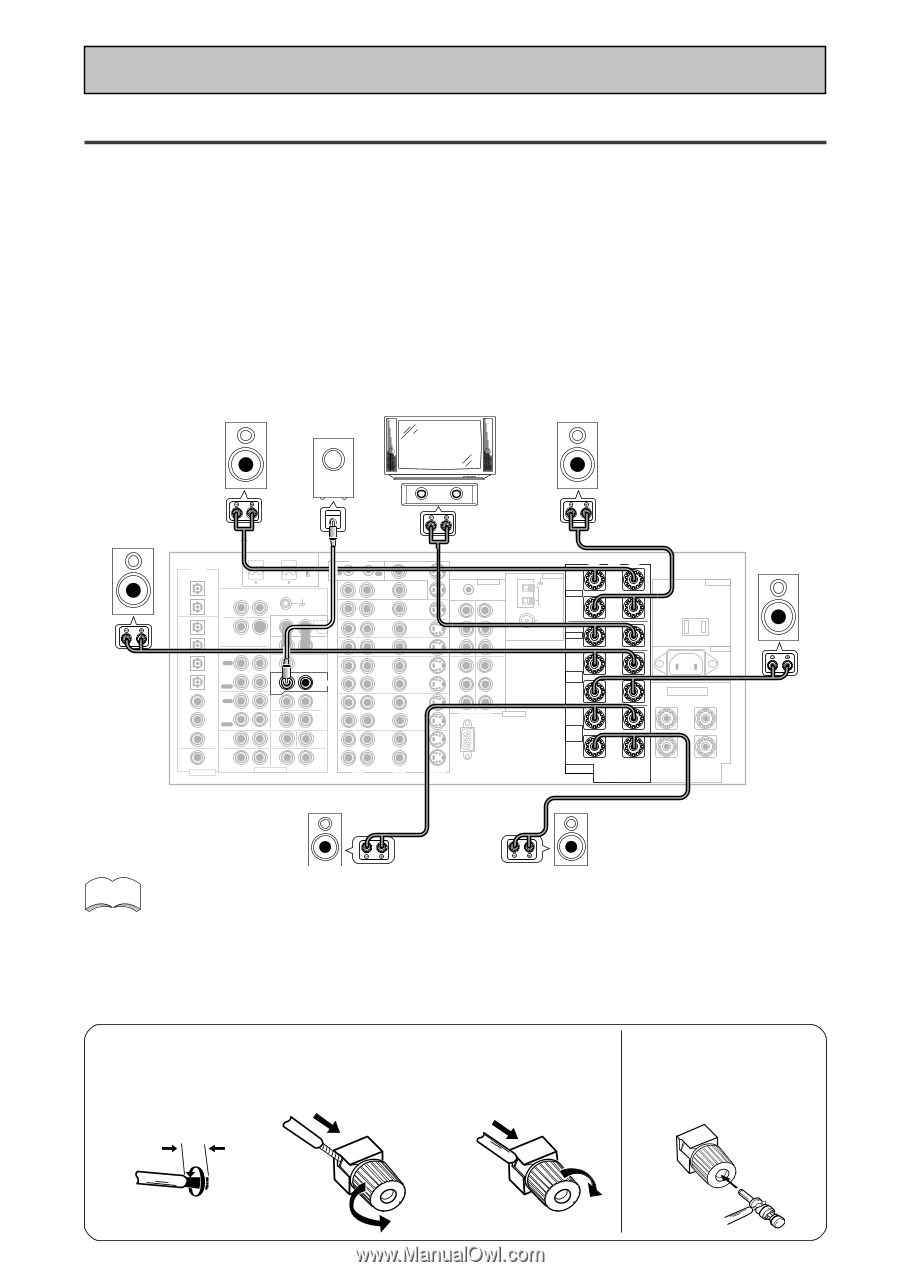
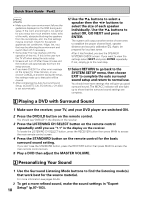
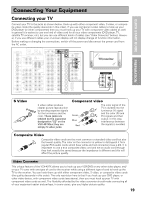
Quick Start Guide Part1 2 Speaker Connections Home theater is designed to be setup with five, or seven speakers (front left & right; center; surround left & right; and, optimally, surround back left & right) and a subwoofer, but you can use this receiver with fewer speakers. Hook up the speakers you have to the A speaker terminals on the back of the receiver. If you only have two speakers hook them up as FRONT. If you have three hook up the single speaker as CENTER. Follow the diagram below in order to hook up all your speakers. A center speaker is very important for watching films because in digital soundtracks the dialog comes from the center speaker. If you do not have a center speaker you must tell the receiver the center channel is off or when you listen to digital soundtracks you won't hear any dialog. This can be done automatically by following the Auto Surround Sound Setup instructions from page 16 in this Quick Start Guide. If possible, use surround back speakers. These speakers are important to take full advantage of all the sound channels on new, eight channel home theater DVDs. The diagram below also explains how to hook up a subwoofer which provides realistic bass sounds. For the subwoofer use a mono (single plug) RCA cord and for the other speakers use regular speaker cords. See pages 29, 109-110 for advice on speaker placement. Make sure you connect the speaker on the right to the R terminal and the speaker on the left to the L terminal. Also make sure the positive and negative (+/-) terminals on the receiver match those on the speakers. Front speaker (Left) Surround speaker (Left) Powered subwoofer INPUT TV/monitor Center speaker Front speaker (Right) DIGITAL PCM/2DIGITAL /DTS 2 OUT S400 (AUDIO) OUT 1 PHONO R AUDIO L OUT IN 7 (CD-R/ CD TAPE1 IN /MD) IN 6 (VCR2) IN R 5 OUT (VCR1 REC IN /DVR) CD-R/ TAPE1 4 /MD (SAT) IN IN PLAY 3 IN OUT (CD) REC TAPE2 MONITOR 2 IN (TV) IN PLAY 1 IN (DVD /LD) 2RF IN (DVD /LD) (For LD) ASSIGNABLE FRONT R SURROUND R AUDIO POWER AMP R L IN FRONT L R L CENTER 1 (Single) R R SUB W. L LR MULTI CH INPUT SUB W. PRE OUT 2 SURROUND L SURROUND BACK L (Single) CENTER SURROUND BACK L (Single) CONTROL IN MULTIROOM & SOURCE DVD /LD IN TV IN SAT IN OUT VCR1 /DVR IN OUT VCR2 IN MONITOR OUT OUT IN IN IN OUT IN OUT IN DVD /LD IN 1 Y PB PR IN 2 Y REMOTE IN MULTIROOM & SOURCE Y MONITOR OUT PB PR IN 3 Y PB PB PR PR COMPONENT VIDEO ASSIGNABLE R L AUDIO OUT OUT VCR3 IN IN VIDEO S2 VIDEO RS-232C ·Åª ANTENNA L AM LOOP ANTENNA FM 75Ω UNBAL FRONT R CENTER L SURROUND R L SURROUND BACK R (Single) SPEAKERS AC OUTLET AC IN SPEAKERS ª ı· L R Surround speaker (Right) Surround back speaker (Left) Surround back speaker (Right) memo • Please use speakers with a nominal impedance rated 6Ω-16Ω. • If you only have one surround back speaker hook it up to the left surround back terminal. • If you use a THX certified subwoofer use the THX INPUT jack on the subwoofer (if your subwoofer has one) or switch the filter position to THX on your subwoofer. • When you attached your speaker wire to the speaker terminal make sure that not even one strand of wire touches the back of the receiver. If this happens it could short out the receiver. • If you have only one pair of surround speakers connect them to the surround terminals, not the surround back terminals. 7 Speaker terminals 1 Twist exposed wire strands together tightly. 2 Loosen speaker terminal and insert exposed wire. 3/8 in(10mm) 3 Tighten terminal. The speaker terminals also accept single banana plugs. (Refer to speaker manual for details.) 14
-
 1
1 -
2
-
3
-
4
-
5
-
6
-
7
-
8
-
 9
9 -
 10
10 -
 11
11 -
 12
12 -
 13
13 -
 14
14 -
 15
15 -
 16
16 -
 17
17 -
 18
18 -
 19
19 -
20
-
21
-
22
-
23
-
24
-
25
-
26
-
27
-
28
-
29
-
30
-
31
-
32
-
33
-
34
-
35
-
36
-
37
-
38
-
39
-
40
-
41
-
42
-
43
-
44
-
45
-
46
-
47
-
48
-
49
-
50
-
51
-
52
-
53
-
54
-
55
-
56
-
57
-
58
-
59
-
60
-
61
-
62
-
63
-
64
-
65
-
66
-
67
-
68
-
69
-
70
-
71
-
72
-
73
-
74
-
75
-
76
-
77
-
78
-
79
-
80
-
81
-
82
-
83
-
84
-
85
-
86
-
87
-
88
-
89
-
90
-
91
-
92
-
93
-
94
-
95
-
96
-
97
-
98
-
99
-
100
-
101
-
102
-
103
-
104
-
105
-
106
-
107
-
108
-
109
-
110
-
111
-
112
-
113
-
114
-
115
-
116
-
117
-
118
-
119
-
120
 |
 |