Pioneer VSX-49TX Owner's Manual - Page 8
Checking the Supplied Accessories, Preparing the Remote Control - receiver remote
 |
View all Pioneer VSX-49TX manuals
Add to My Manuals
Save this manual to your list of manuals |
Page 8 highlights
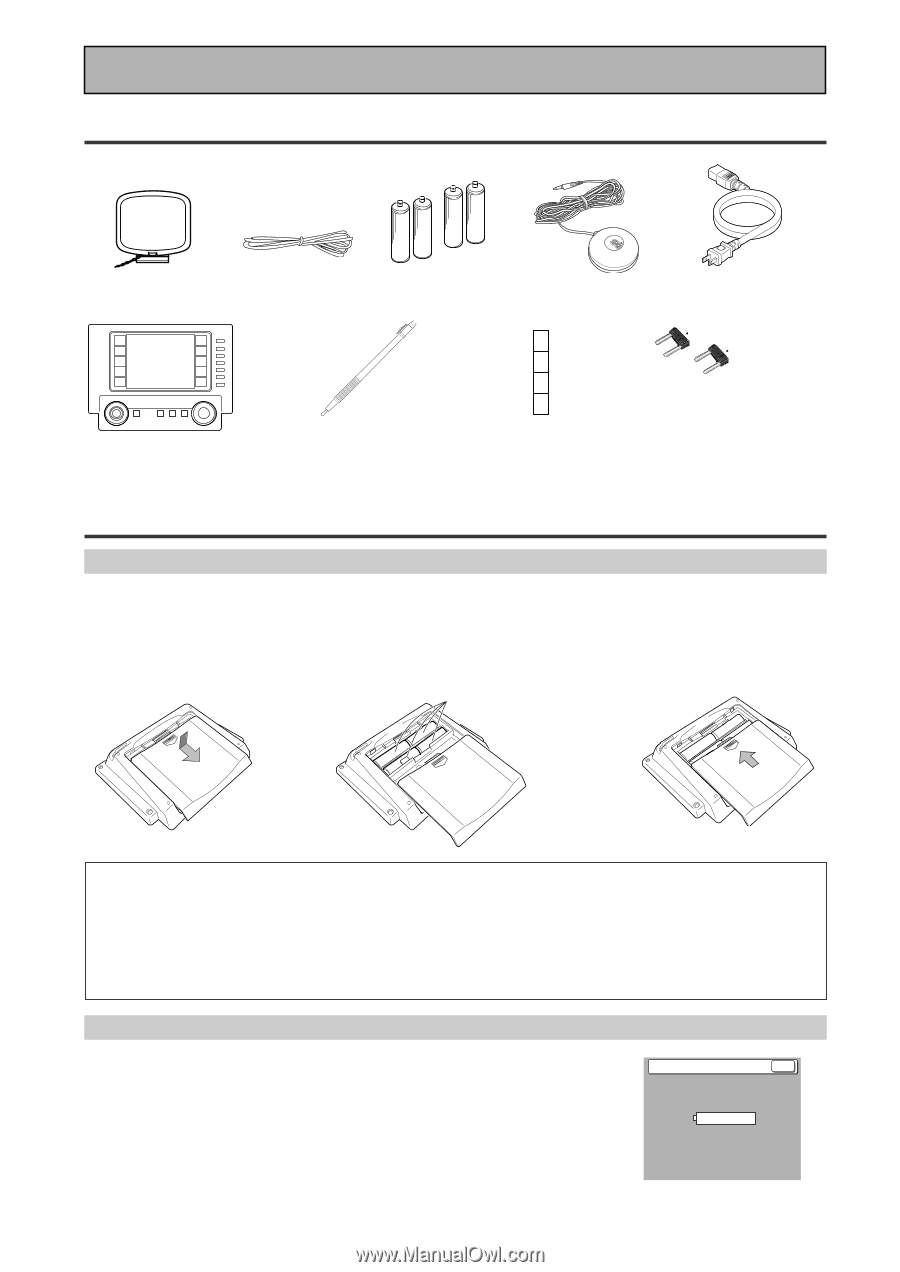
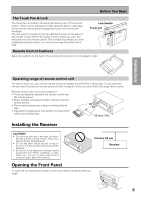
Before You Start Checking the Supplied Accessories Please check that you have received all of the following supplied accessories. AM Loop Antenna FM wire Antenna "AA" IEC LR6 batteries x 4 Microphone AC power cord Remote Control Unit Touch Pen (attached to the back of the remote control) Cushion for Remote x 4 U-shaped connectors x 2 (attached to back of receiver) • Operating Instructions Preparing the Remote Control Loading the batteries Load the batteries into the remote control as shown below. The remote control uses a lot of power due to the LCD display so please use alkaline batteries. Depending on individual use you may have to change the batteries fairly often but most users should be able to get an average of 1-3 months of battery life. When you notice a decrease in the operating range or if the alarm sounds (see below), replace all batteries with new ones. NOTE: After replacing the batteries, the touch panel will need re-adjusting (see p. 10-11). "AA" IEC LR6 1 2 batteries x 4 · 3 ª ª ·· ª ª · \ \ CAUTION! Incorrect use of batteries may result in such hazards as leakage and bursting. Observe the following precautions. • Never use new and old batteries together. • Insert the plus and minus sides of the batteries properly according to the marks in the battery case. • Batteries with the same shape may have different voltages. Do not use different batteries together. • When disposing of used batteries, please comply with governmental regulations or environmental public institu- tion's rules that apply in your country or area. Remote Control Battery Alarm When the batteries get too weak to operate the remote control properly an alarm will sound and a warning screen will appear on the remote. Change the batteries as shown above. This must be done within five minutes of the alarm sounding or all your remote control settings will be cleared. Change Battery !! OK ? SIZE AA, LR6 8
-
 1
1 -
2
-
 3
3 -
 4
4 -
 5
5 -
 6
6 -
 7
7 -
 8
8 -
 9
9 -
 10
10 -
 11
11 -
 12
12 -
 13
13 -
14
-
15
-
16
-
17
-
18
-
19
-
20
-
21
-
22
-
23
-
24
-
25
-
26
-
27
-
28
-
29
-
30
-
31
-
32
-
33
-
34
-
35
-
36
-
37
-
38
-
39
-
40
-
41
-
42
-
43
-
44
-
45
-
46
-
47
-
48
-
49
-
50
-
51
-
52
-
53
-
54
-
55
-
56
-
57
-
58
-
59
-
60
-
61
-
62
-
63
-
64
-
65
-
66
-
67
-
68
-
69
-
70
-
71
-
72
-
73
-
74
-
75
-
76
-
77
-
78
-
79
-
80
-
81
-
82
-
83
-
84
-
85
-
86
-
87
-
88
-
89
-
90
-
91
-
92
-
93
-
94
-
95
-
96
-
97
-
98
-
99
-
100
-
101
-
102
-
103
-
104
-
105
-
106
-
107
-
108
-
109
-
110
-
111
-
112
-
113
-
114
-
115
-
116
-
117
-
118
-
119
-
120
 |
 |