Samsung SCH U340 User Manual (ENGLISH) - Page 63
Renaming a Contacts Group, Deleting a Contacts Entry
 |
UPC - 635753463200
View all Samsung SCH U340 manuals
Add to My Manuals
Save this manual to your list of manuals |
Page 63 highlights
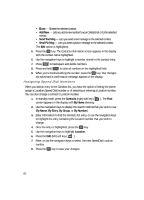
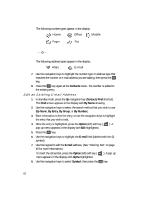
Renaming a Contacts Group 9. Press abc (@ symbol), and enter the remainder of the e-mail address using the keypad. (See "Entering Text" on page 46 for more information.) 10. Press the Option (left) soft key ( ). 11. Use the navigation keys to highlight .com, then use the navigation keys to show the desired domain type (.com, .edu, .net), then press the OK key. 12. Press the OK key to save your changes. Renaming a Contacts Group Use this option to rename a group in your Contacts list. 1. In standby mode, press the MENU ( OK ) key, then press @ (for Contacts) and def for Rename Group. The following default group names (or any changed group names) appear in the display: • Friend • Family • Colleague • VIP • No Name 2. Use the navigation keys to highlight the group that you wish to rename, then press the OK key. The current name of the group appears in the display with a flashing cursor at the end of the name. 3. Enter a new group name using the keypad, then press the OK key. (See "Entering Text" on page 46 for more information.) Deleting a Contacts Entry 1. In standby mode, press the Contacts (right) soft key ( ) (Contacts Find shortcut). The Find screen appears in the display with By Name showing. 2. Use the navigation keys to display the search method that you wish to use (By Name, By Entry, By Group, or By Number). 3. Enter information to find the entry, or use the navigation keys to highlight the entry that you wish to erase. 4. Press the Option (left) soft key ( ). A pop-up menu containing the following options appears in the display: • Edit - Lets you edit details of the highlighted contact. • Erase - Erases the selected contact. • Add New - Lets you add a new number to your Contacts list or to the selected contact. Understanding Your Contacts 63
-
 1
1 -
2
-
3
-
4
-
5
-
6
-
7
-
8
-
9
-
10
-
11
-
12
-
13
-
14
-
15
-
16
-
17
-
18
-
19
-
20
-
21
-
22
-
23
-
24
-
25
-
26
-
27
-
28
-
29
-
30
-
31
-
32
-
33
-
34
-
35
-
36
-
37
-
38
-
39
-
40
-
41
-
42
-
43
-
44
-
45
-
46
-
47
-
48
-
49
-
50
-
51
-
52
-
53
-
54
-
55
-
56
-
57
-
 58
58 -
 59
59 -
 60
60 -
 61
61 -
 62
62 -
 63
63 -
 64
64 -
 65
65 -
 66
66 -
 67
67 -
 68
68 -
69
-
70
-
71
-
72
-
73
-
74
-
75
-
76
-
77
-
78
-
79
-
80
-
81
-
82
-
83
-
84
-
85
-
86
-
87
-
88
-
89
-
90
-
91
-
92
-
93
-
94
-
95
-
96
-
97
-
98
-
99
-
100
-
101
-
102
-
103
-
104
-
105
-
106
-
107
-
108
-
109
-
110
-
111
-
112
-
113
-
114
-
115
-
116
-
117
-
118
-
119
-
120
-
121
-
122
-
123
-
124
-
125
-
126
-
127
-
128
-
129
-
130
-
131
-
132
-
133
-
134
-
135
-
136
-
137
-
138
-
139
-
140
-
141
-
142
-
143
-
144
-
145
-
146
-
147
-
148
-
149
-
150
-
151
-
152
-
153
-
154
-
155
-
156
-
157
-
158
 |
 |