Samsung SCH U340 User Manual (ENGLISH) - Page 69
Creating and Sending Handwritten Messages - snap
 |
UPC - 635753463200
View all Samsung SCH U340 manuals
Add to My Manuals
Save this manual to your list of manuals |
Page 69 highlights
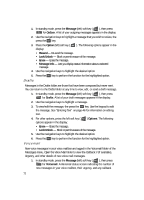
Creating and Sending Handwritten Messages 11. Use the Up and Down navigation keys to highlight the Sound field. 12. Press the Option (left) soft key ( ). The following sub-menus and option appear in the display: • Sounds - Record or select a sound file and add it to the message. • Erase - Remove a sound file from the message. 13. Use the Up and Down navigation keys to highlight the desired sub-menu or option and press the OK key. Note: You can record and insert a voice memo of up to 60 seconds in length if you record first before attaching a picture. (See "Voice Memo" on page 107 for more information.) If a picture is attached before recording, the size of the voice memo is limited to the amount of remaining memory. 14. At any point while composing the picture message, press the Next (left) soft key ( ). The following message composition and sending options appear in the display: • Preview - The picture message appears in the display as will appear to the recipient(s). • Send Options - Choose the Priority, Validity, whether you wish to receive a Delivery Ack (acknowledgement) message, and whether you wish to Defer Delivery of the picture message to another day or time. • Save in Draft - Save the picture message in your Drafts folder. Use the Up and Down navigation keys to highlight the desired option, then press the OK key. 15. To send the Picture message now, press the SEND key ( OK ). Pic Msg Sending appears in the display and a progress bar indicates the send status. Creating and Sending Handwritten Messages New Handwr.Msg lets you quickly send handwritten messages as pictures, rather than using the keypad to enter the text into a message. 1. In standby mode, press the Message (left) soft key ( ), then press def for New Handwr.Message. The camera viewfinder screen appears in the display in Sketch color tone with normal brightness, Fine quality, and low resolution with Zoom functionality. 2. Position your handset so that the complete text of the message appears within the image corners. See "Simple Snap Shot" on page 86 for more information. Messaging 69
-
 1
1 -
2
-
3
-
4
-
5
-
6
-
7
-
8
-
9
-
10
-
11
-
12
-
13
-
14
-
15
-
16
-
17
-
18
-
19
-
20
-
21
-
22
-
23
-
24
-
25
-
26
-
27
-
28
-
29
-
30
-
31
-
32
-
33
-
34
-
35
-
36
-
37
-
38
-
39
-
40
-
41
-
42
-
43
-
44
-
45
-
46
-
47
-
48
-
49
-
50
-
51
-
52
-
53
-
54
-
55
-
56
-
57
-
58
-
59
-
60
-
61
-
62
-
63
-
 64
64 -
 65
65 -
 66
66 -
 67
67 -
 68
68 -
 69
69 -
 70
70 -
 71
71 -
 72
72 -
 73
73 -
 74
74 -
75
-
76
-
77
-
78
-
79
-
80
-
81
-
82
-
83
-
84
-
85
-
86
-
87
-
88
-
89
-
90
-
91
-
92
-
93
-
94
-
95
-
96
-
97
-
98
-
99
-
100
-
101
-
102
-
103
-
104
-
105
-
106
-
107
-
108
-
109
-
110
-
111
-
112
-
113
-
114
-
115
-
116
-
117
-
118
-
119
-
120
-
121
-
122
-
123
-
124
-
125
-
126
-
127
-
128
-
129
-
130
-
131
-
132
-
133
-
134
-
135
-
136
-
137
-
138
-
139
-
140
-
141
-
142
-
143
-
144
-
145
-
146
-
147
-
148
-
149
-
150
-
151
-
152
-
153
-
154
-
155
-
156
-
157
-
158
 |
 |
