Samsung SCH U340 User Manual (ENGLISH) - Page 87
Point, Click, and Send a Picture
 |
UPC - 635753463200
View all Samsung SCH U340 manuals
Add to My Manuals
Save this manual to your list of manuals |
Page 87 highlights
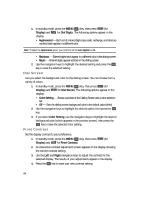
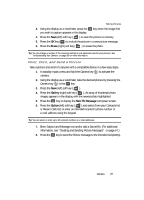
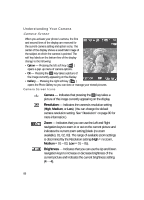
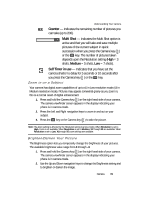
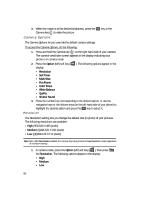
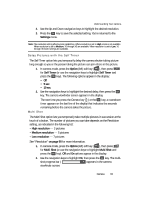
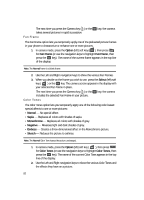
Taking Pictures 3. Using the display as a viewfinder, press the OK key when the image that you wish to capture appears in the display. 4. Press the Save (left) soft key ( ) to save the picture to memory. 5. Press the OK key ( OK ) to include the picture in a new picture message. 6. Press the Erase (right) soft key ( ) to erase the photo. Tip: You can change a number of the camera's settings to suit particular uses for your pictures. See "Understanding Your Camera" on page 88 for more information. Point, Click, and Send a Picture Take a picture and send it to anyone with a compatible device in a few easy steps. 1. In standby mode, press and hold the Camera key ( ) to activate the camera. 2. Using the display as a viewfinder, take the desired picture by pressing the Camera key ( ) or the OK key. 3. Press the Save (left) soft key ( ). 4. Press the Gallery (right) soft key ( ). An array of thumbnail photo images appears in the display with the newest photo highlighted. 5. Press the OK key to display the New Pic Message composer screen. 6. Press the Option (left) soft key ( ) and select (from your Contacts list or Recent Calls list) or enter an intended recipient's phone number or e-mail address using the keypad. Tip: You can select or enter up to 10 recipient numbers or e-mail addresses. 7. Enter Subject and Message text and/or add a Sound file. (For additional information, see "Creating and Sending Picture Messages" on page 67.) 8. Press the OK key to send the Picture message to the intended recipient(s). Camera 87
-
 1
1 -
2
-
3
-
4
-
5
-
6
-
7
-
8
-
9
-
10
-
11
-
12
-
13
-
14
-
15
-
16
-
17
-
18
-
19
-
20
-
21
-
22
-
23
-
24
-
25
-
26
-
27
-
28
-
29
-
30
-
31
-
32
-
33
-
34
-
35
-
36
-
37
-
38
-
39
-
40
-
41
-
42
-
43
-
44
-
45
-
46
-
47
-
48
-
49
-
50
-
51
-
52
-
53
-
54
-
55
-
56
-
57
-
58
-
59
-
60
-
61
-
62
-
63
-
64
-
65
-
66
-
67
-
68
-
69
-
70
-
71
-
72
-
73
-
74
-
75
-
76
-
77
-
78
-
79
-
80
-
81
-
 82
82 -
 83
83 -
 84
84 -
 85
85 -
 86
86 -
 87
87 -
 88
88 -
 89
89 -
 90
90 -
 91
91 -
 92
92 -
93
-
94
-
95
-
96
-
97
-
98
-
99
-
100
-
101
-
102
-
103
-
104
-
105
-
106
-
107
-
108
-
109
-
110
-
111
-
112
-
113
-
114
-
115
-
116
-
117
-
118
-
119
-
120
-
121
-
122
-
123
-
124
-
125
-
126
-
127
-
128
-
129
-
130
-
131
-
132
-
133
-
134
-
135
-
136
-
137
-
138
-
139
-
140
-
141
-
142
-
143
-
144
-
145
-
146
-
147
-
148
-
149
-
150
-
151
-
152
-
153
-
154
-
155
-
156
-
157
-
158
 |
 |