Samsung SGH-A697 User Manual (user Manual) (ver.f8.4) (English) - Page 146
Start Time, Keypad, Alarm, Set Details, End Date, End Time, Alarm Tone, Repeat Until, Tools, Calendar
 |
View all Samsung SGH-A697 manuals
Add to My Manuals
Save this manual to your list of manuals |
Page 146 highlights
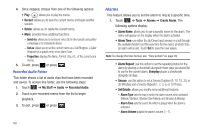
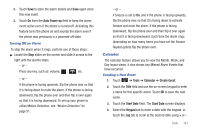
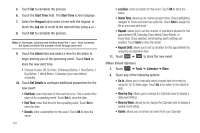
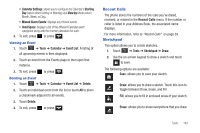
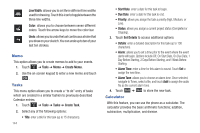
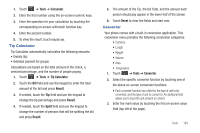
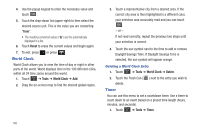
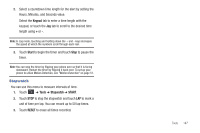
5. Touch Set to complete the process. 6. Touch the Start Time field. The Start Time screen displays. 7. Select the Keypad tab to enter a time with the keypad, or touch the Jog tab to scroll to the desired time using + or -. 8. Touch Set to complete the process. Note: In Jog mode, touching and holding down the + and - keys increases the speed at which the numbers scroll through each reel. 9. Touch the Alarm field and select a time for the alarm to begin alerting you of the upcoming event. Touch Save to store the new alert time. • Choices include: Off, On Time, 30 Minutes Before, 1 Hour Before, 1 Day Before, 1 Week Before, Customize (your own defined schedule). 10. Touch Set Details to configure additional parameters for the new event: • End Date: enter final date for this event to occur. This is useful if the alarm is for a repeating event. Touch Set to store the date. • End Time: enter final time for this repeating event. Touch Set to store the time. • Details: enter a description for this event. Touch OK to store the name. 142 • Location: enter a location for this event. Touch OK to store the name. • Alarm Tone: allows you to choose an alarm tone. Once highlighted, navigate to Tones and select an audio file. Touch Add to assign the file as your new alert tone. • Repeat: allows you to set the number of repetitions allowed for this appointment (Off, Everyday, Every Week, Every Month, or Every Year). Once selected, all remaining alarm settings are enabled. Touch Save to store the option. • Repeat Until: allows you to set as duration for this appointment by assigning an expiration date. 11. Touch Save ➔ Save to store the new event. Other Event Options 1. Touch ➔ Tools ➔ Calendar ➔ More. 2. Touch any of the following options: • Go to: allows you to manually select a target date for review by using the Go To dialer page. Touch Go to be taken to the dialed-in date. • View by Day: allows you to change the Calendar view to display a daily event listing. • View by Week: allows you to change the Calendar view to display a weekly event listing. • Delete: allows you to remove an event from your Calendar.
-
 1
1 -
2
-
3
-
4
-
5
-
6
-
7
-
8
-
9
-
10
-
11
-
12
-
13
-
14
-
15
-
16
-
17
-
18
-
19
-
20
-
21
-
22
-
23
-
24
-
25
-
26
-
27
-
28
-
29
-
30
-
31
-
32
-
33
-
34
-
35
-
36
-
37
-
38
-
39
-
40
-
41
-
42
-
43
-
44
-
45
-
46
-
47
-
48
-
49
-
50
-
51
-
52
-
53
-
54
-
55
-
56
-
57
-
58
-
59
-
60
-
61
-
62
-
63
-
64
-
65
-
66
-
67
-
68
-
69
-
70
-
71
-
72
-
73
-
74
-
75
-
76
-
77
-
78
-
79
-
80
-
81
-
82
-
83
-
84
-
85
-
86
-
87
-
88
-
89
-
90
-
91
-
92
-
93
-
94
-
95
-
96
-
97
-
98
-
99
-
100
-
101
-
102
-
103
-
104
-
105
-
106
-
107
-
108
-
109
-
110
-
111
-
112
-
113
-
114
-
115
-
116
-
117
-
118
-
119
-
120
-
121
-
122
-
123
-
124
-
125
-
126
-
127
-
128
-
129
-
130
-
131
-
132
-
133
-
134
-
135
-
136
-
137
-
138
-
139
-
140
-
 141
141 -
 142
142 -
 143
143 -
 144
144 -
 145
145 -
 146
146 -
 147
147 -
 148
148 -
 149
149 -
 150
150 -
 151
151 -
152
-
153
-
154
-
155
-
156
-
157
-
158
-
159
-
160
-
161
-
162
-
163
-
164
-
165
-
166
-
167
-
168
-
169
-
170
-
171
-
172
-
173
-
174
-
175
-
176
-
177
-
178
-
179
-
180
-
181
-
182
-
183
-
184
-
185
 |
 |