Toshiba NB200-SP2904R User Guide 1 - Page 50
Hard Disk Drive Recovery using the recovery partition, Sample Image Warning screen
 |
View all Toshiba NB200-SP2904R manuals
Add to My Manuals
Save this manual to your list of manuals |
Page 50 highlights
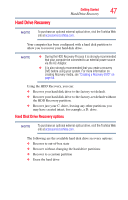
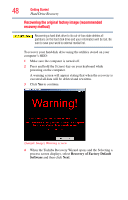
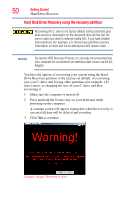
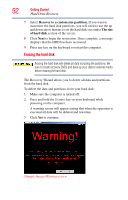
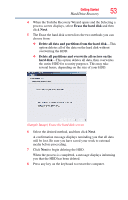
50 Getting Started Hard Drive Recovery Hard Disk Drive Recovery using the recovery partition Recovering the C: drive to its factory default setting reformats your drive and your information on the recovered drive will be lost. Be sure to save your work to external media first. If you have created other partitions (for example, a D: drive) those partitions and any information on them will not be affected and will remain intact. NOTE During the HDD Recovery Process it is strongly recommended that your computer be connected to an external power source via the AC Adaptor. You have the options of recovering your system using the Hard Drive Recovery partition to the factory-set default, or recovering just your C: drive and leaving other partitions (for example, a D: drive) intact, or changing the size of your C: drive and then recovering it. 1 Make sure the computer is turned off. 2 Press and hold the 0 (zero) key on your keyboard while powering on the computer. A warning screen will appear stating that when the recovery is executed all data will be deleted and rewritten. 3 Click Yes to continue. (Sample Image) Warning screen
-
 1
1 -
2
-
3
-
4
-
5
-
6
-
7
-
8
-
9
-
10
-
11
-
12
-
13
-
14
-
15
-
16
-
17
-
18
-
19
-
20
-
21
-
22
-
23
-
24
-
25
-
26
-
27
-
28
-
29
-
30
-
31
-
32
-
33
-
34
-
35
-
36
-
37
-
38
-
39
-
40
-
41
-
42
-
43
-
44
-
 45
45 -
 46
46 -
 47
47 -
 48
48 -
 49
49 -
 50
50 -
 51
51 -
 52
52 -
 53
53 -
 54
54 -
 55
55 -
56
-
57
-
58
-
59
-
60
-
61
-
62
-
63
-
64
-
65
-
66
-
67
-
68
-
69
-
70
-
71
-
72
-
73
-
74
-
75
-
76
-
77
-
78
-
79
-
80
-
81
-
82
-
83
-
84
-
85
-
86
-
87
-
88
-
89
-
90
-
91
-
92
-
93
-
94
-
95
-
96
-
97
-
98
-
99
-
100
-
101
-
102
-
103
-
104
-
105
-
106
-
107
-
108
-
109
-
110
-
111
-
112
-
113
-
114
-
115
-
116
-
117
-
118
-
119
-
120
-
121
-
122
-
123
-
124
-
125
-
126
-
127
-
128
-
129
-
130
-
131
-
132
-
133
-
134
-
135
-
136
-
137
-
138
-
139
-
140
-
141
-
142
-
143
-
144
-
145
-
146
-
147
-
148
-
149
-
150
-
151
-
152
-
153
-
154
-
155
-
156
-
157
-
158
-
159
-
160
-
161
-
162
-
163
-
164
-
165
-
166
-
167
-
168
-
169
-
170
-
171
-
172
-
173
-
174
-
175
-
176
-
177
-
178
-
179
-
180
-
181
-
182
-
183
-
184
-
185
-
186
-
187
-
188
-
189
-
190
-
191
-
192
-
193
-
194
-
195
-
196
-
197
-
198
-
199
-
200
-
201
-
202
-
203
-
204
-
205
-
206
-
207
 |
 |