Toshiba NB200-SP2904R User Guide 1 - Page 52
Erasing the hard disk, Recover to a custom size partition, The size, of hard disk
 |
View all Toshiba NB200-SP2904R manuals
Add to My Manuals
Save this manual to your list of manuals |
Page 52 highlights
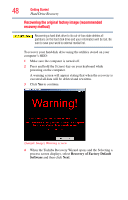
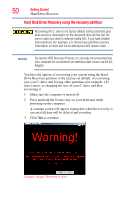
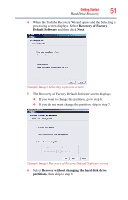
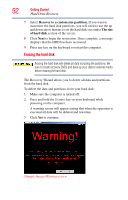
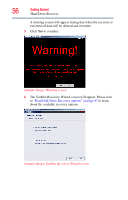
52 Getting Started Hard Drive Recovery 7 Select Recover to a custom size partition, If you want to customize the hard disk partitions, you will need to use the up and down arrow buttons to set the hard disk size under The size of hard disk section of the screen. 8 Click Next to begin the restoration. Once complete, a message displays that the HDD has been recovered. 9 Press any key on the keyboard to restart the computer. Erasing the hard disk Erasing the hard disk will delete all data including the partitions. Be sure to create recovery DVDs and back up your data to external media before erasing the hard disk. The Recovery Wizard allows you to delete all data and partitions from the hard disk. To delete the data and partitions from your hard disk: 1 Make sure the computer is turned off. 2 Press and hold the 0 (zero) key on your keyboard while powering on the computer. A warning screen will appear stating that when the operation is executed all data will be deleted and rewritten. 3 Click Yes to continue. (Sample Image) Warning screen
-
 1
1 -
2
-
3
-
4
-
5
-
6
-
7
-
8
-
9
-
10
-
11
-
12
-
13
-
14
-
15
-
16
-
17
-
18
-
19
-
20
-
21
-
22
-
23
-
24
-
25
-
26
-
27
-
28
-
29
-
30
-
31
-
32
-
33
-
34
-
35
-
36
-
37
-
38
-
39
-
40
-
41
-
42
-
43
-
44
-
45
-
46
-
 47
47 -
 48
48 -
 49
49 -
 50
50 -
 51
51 -
 52
52 -
 53
53 -
 54
54 -
 55
55 -
 56
56 -
 57
57 -
58
-
59
-
60
-
61
-
62
-
63
-
64
-
65
-
66
-
67
-
68
-
69
-
70
-
71
-
72
-
73
-
74
-
75
-
76
-
77
-
78
-
79
-
80
-
81
-
82
-
83
-
84
-
85
-
86
-
87
-
88
-
89
-
90
-
91
-
92
-
93
-
94
-
95
-
96
-
97
-
98
-
99
-
100
-
101
-
102
-
103
-
104
-
105
-
106
-
107
-
108
-
109
-
110
-
111
-
112
-
113
-
114
-
115
-
116
-
117
-
118
-
119
-
120
-
121
-
122
-
123
-
124
-
125
-
126
-
127
-
128
-
129
-
130
-
131
-
132
-
133
-
134
-
135
-
136
-
137
-
138
-
139
-
140
-
141
-
142
-
143
-
144
-
145
-
146
-
147
-
148
-
149
-
150
-
151
-
152
-
153
-
154
-
155
-
156
-
157
-
158
-
159
-
160
-
161
-
162
-
163
-
164
-
165
-
166
-
167
-
168
-
169
-
170
-
171
-
172
-
173
-
174
-
175
-
176
-
177
-
178
-
179
-
180
-
181
-
182
-
183
-
184
-
185
-
186
-
187
-
188
-
189
-
190
-
191
-
192
-
193
-
194
-
195
-
196
-
197
-
198
-
199
-
200
-
201
-
202
-
203
-
204
-
205
-
206
-
207
 |
 |
