Yamaha CS6R Owner's Manual - Page 47
Using Controllers, Pitch Bend Wheel, Modulation Wheel
 |
View all Yamaha CS6R manuals
Add to My Manuals
Save this manual to your list of manuals |
Page 47 highlights
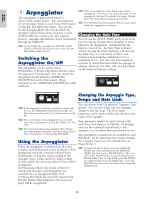
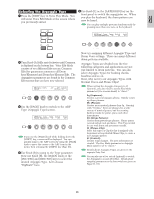
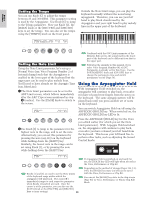
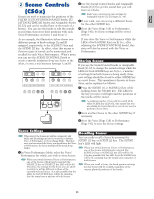
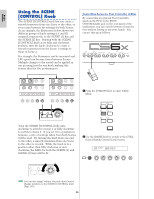
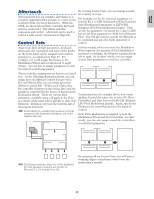
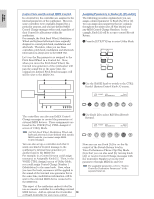
Basics Section 3 Use Knob [B] to select "04:FootCtrl" (Foot Controller). CTRL Scene) Scene Control Sys 04[FootCtrl] SHIFT PAGE A B C 1 2 DATA PART/ELEMENT 4 Use the [PAGE] knob to switch to the CTL Assign2 (Voice Control Assign 2) screen. CTRL Assign2) FC Vce [ off ] 00 RB----Mode 22 hold SHIFT PAGE A B C 1 2 DATA PART/ELEMENT 5 Use Knob [C] to select "04:FootCtrl" (Foot Controller). CTRL Assign2) FC RB Vce [FootCtrl] 04 22 SHIFT PAGE A B C 1 2 DATA PART/ELEMENT Switch to Voice Mode and you are now ready to use the Foot Controller to control Scenes. The above procedure is for assigning a Foot Controller to control Scenes in Voice Mode. For Performance Mode, follow the same procedure but at steps 4 and 5, switch to the CTL Assign2 screen in Performance Edit Mode. 3 Using Controllers The CS6x is equipped with Pitch Bend and Modulation Wheels, plus a Ribbon Controller. Either of the CS6x and CS6R is equipped with front panel Knobs [A], [B], [C], [1] and [2], with which you can control many different parameters. Pitch Bend Wheel This wheel's prime function is to control pitch. Roll the wheel upward/downward to bend the pitch upward/downward. The effect can also be reversed. Pitch Up Pitch Down Pitch Bend Wheel Modulation Wheel Pitch Bend Range can be set for each Voice. The wheel can also be assigned other parameters (Page 84). Even if a different parameter is assigned to the wheel, Pitch Bend messages are still transmitted through the MIDI Out when it is being used. Modulation Wheel The more you roll this wheel upwards, the greater the modulation that is applied to the sound. Deeper Pitch Bend Wheel Modulation Wheel Modulation depth can also be set beforehand. Also, the wheel can be assigned different parameters, such as Volume or Pan (Page 84). 47
-
 1
1 -
2
-
3
-
4
-
5
-
6
-
7
-
8
-
9
-
10
-
11
-
12
-
13
-
14
-
15
-
16
-
17
-
18
-
19
-
20
-
21
-
22
-
23
-
24
-
25
-
26
-
27
-
28
-
29
-
30
-
31
-
32
-
33
-
34
-
35
-
36
-
37
-
38
-
39
-
40
-
41
-
 42
42 -
 43
43 -
 44
44 -
 45
45 -
 46
46 -
 47
47 -
 48
48 -
 49
49 -
 50
50 -
 51
51 -
 52
52 -
53
-
54
-
55
-
56
-
57
-
58
-
59
-
60
-
61
-
62
-
63
-
64
-
65
-
66
-
67
-
68
-
69
-
70
-
71
-
72
-
73
-
74
-
75
-
76
-
77
-
78
-
79
-
80
-
81
-
82
-
83
-
84
-
85
-
86
-
87
-
88
-
89
-
90
-
91
-
92
-
93
-
94
-
95
-
96
-
97
-
98
-
99
-
100
-
101
-
102
-
103
-
104
-
105
-
106
-
107
-
108
-
109
-
110
-
111
-
112
-
113
-
114
-
115
-
116
-
117
-
118
-
119
-
120
-
121
-
122
-
123
-
124
-
125
-
126
-
127
-
128
-
129
-
130
-
131
-
132
-
133
-
134
-
135
-
136
-
137
-
138
-
139
-
140
-
141
-
142
-
143
-
144
-
145
-
146
-
147
-
148
-
149
-
150
-
151
-
152
-
153
-
154
-
155
-
156
-
157
-
158
-
159
-
160
-
161
-
162
-
163
-
164
-
165
-
166
-
167
-
168
-
169
-
170
-
171
-
172
-
173
-
174
-
175
-
176
-
177
-
178
-
179
-
180
-
181
-
182
-
183
-
184
-
185
-
186
-
187
-
188
-
189
-
190
-
191
-
192
-
193
-
194
-
195
-
196
 |
 |
