Dell OptiPlex Gs Reference and Installation Guide (.pdf) - Page 42
Adding a Listed Card, ICU Window, Add Network Card Dialog Box, Table 3-1., ICU Keys
 |
View all Dell OptiPlex Gs manuals
Add to My Manuals
Save this manual to your list of manuals |
Page 42 highlights
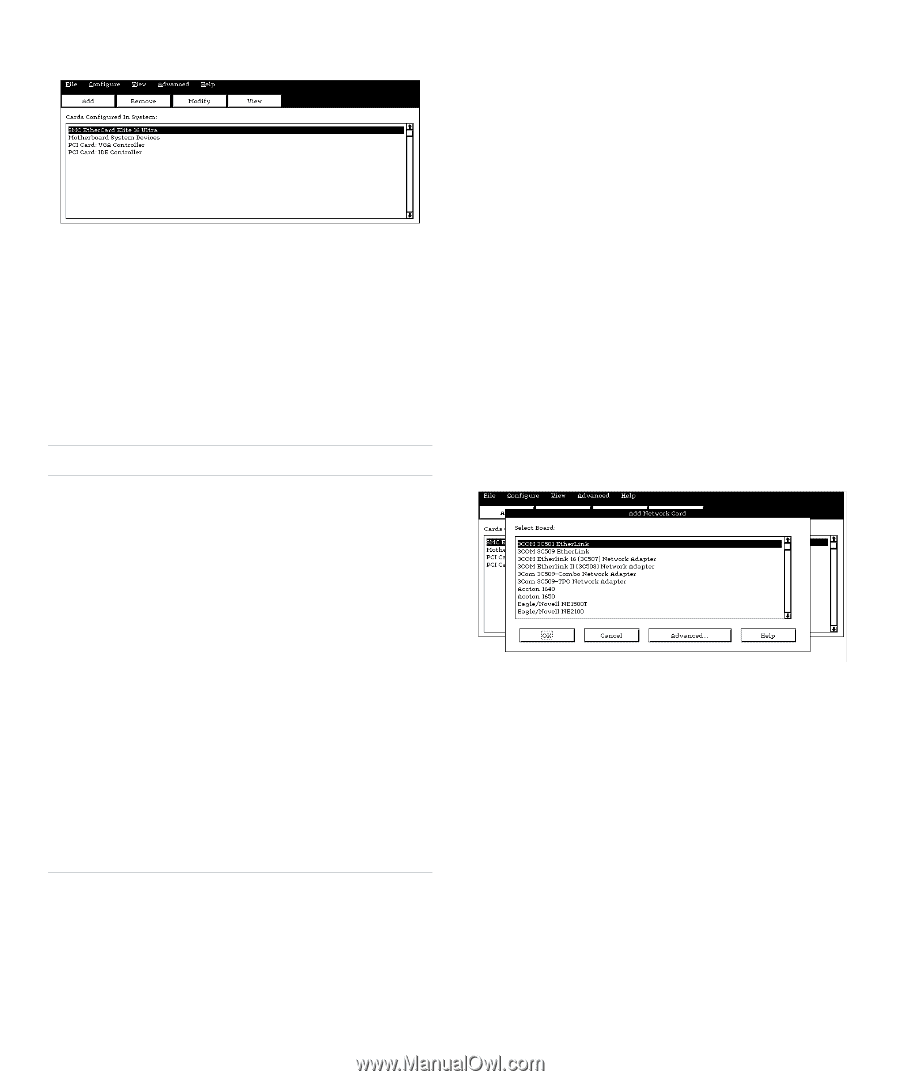
Figure 3-1. ICU Window You can maneuver through each menu and dialog box using a mouse. If a mouse is not available, you can use the keys shown in Table 3-1. Each menu and menu option has an underlined character in its name. When you press the key for that character in conjunction with the key, that menu or menu option is selected . Table 3-1. ICU Keys Keys Action Displays the menu containing the underlined letter x and performs the operation indicated by the menu item containing the underlined letter y. For example, to save a file (that is, to display the File menu and select the SAVE menu option), press and . Moves from one control button or list to another. Up- and downarrow keys Moves up and down items in a list. Highlights an item in a list. Selects the highlighted button or item in a list. Adding a Listed Card NOTE: If you want to add a configuration file that you received on diskette with a new expansion card, you must copy the configuration file to the \db subdirectory on the backup copy of the ICU diskette. You should then reboot your system and perform the following procedure to add the expansion card. Use the following procedure to add a listed card with the ICU: 1. Start the ICU as described in "Starting the ICU" found earlier in this chapter. 2. From the ICU window, click the Add button or select ADD CARD from the Configure menu. 3. Click the name of the category of card that you want to add. If you clicked the Add button in step 2, click the OK button. A dialog box like the one in Figure 3-2 appears listing the names of all available cards of that type. Figure 3-2. Add Network Card Dialog Box 4. Select the name of the card you want to add. If the name of the card that you want to add is not on the list, see "Adding an Unlisted Card" found later in this chapter for instructions on how to add the card. 5. If you want the ICU to select the resources for the card, click the OK button. Otherwise, skip to step 6. The ICU uses the default resources set by the card manufacturer whenever possible. If the ICU cannot find a resource that is valid for the card and available in the system, the utility generates an error message. See Appendix A, "ISA Configuration Utility 3-4 Dell OptiPlex Gs and Gs+ Low-Profile Systems Reference and Installation Guide
-
 1
1 -
2
-
3
-
4
-
5
-
6
-
7
-
8
-
9
-
10
-
11
-
12
-
13
-
14
-
15
-
16
-
17
-
18
-
19
-
20
-
21
-
22
-
23
-
24
-
25
-
26
-
27
-
28
-
29
-
30
-
31
-
32
-
33
-
34
-
35
-
36
-
 37
37 -
 38
38 -
 39
39 -
 40
40 -
 41
41 -
 42
42 -
 43
43 -
 44
44 -
 45
45 -
 46
46 -
 47
47 -
48
-
49
-
50
-
51
-
52
-
53
-
54
-
55
-
56
-
57
-
58
-
59
-
60
-
61
-
62
-
63
-
64
-
65
-
66
-
67
-
68
-
69
-
70
-
71
-
72
-
73
-
74
-
75
-
76
-
77
-
78
-
79
-
80
-
81
-
82
-
83
-
84
-
85
-
86
-
87
-
88
-
89
-
90
-
91
-
92
-
93
-
94
-
95
-
96
-
97
-
98
-
99
-
100
-
101
-
102
-
103
-
104
-
105
-
106
-
107
-
108
-
109
-
110
-
111
-
112
-
113
-
114
-
115
-
116
-
117
-
118
-
119
-
120
-
121
 |
 |