Dell OptiPlex Gs Reference and Installation Guide (.pdf) - Page 61
Removing and Replacing the Expansion-Card Cage, Removing the Expansion-Card Cage
 |
View all Dell OptiPlex Gs manuals
Add to My Manuals
Save this manual to your list of manuals |
Page 61 highlights
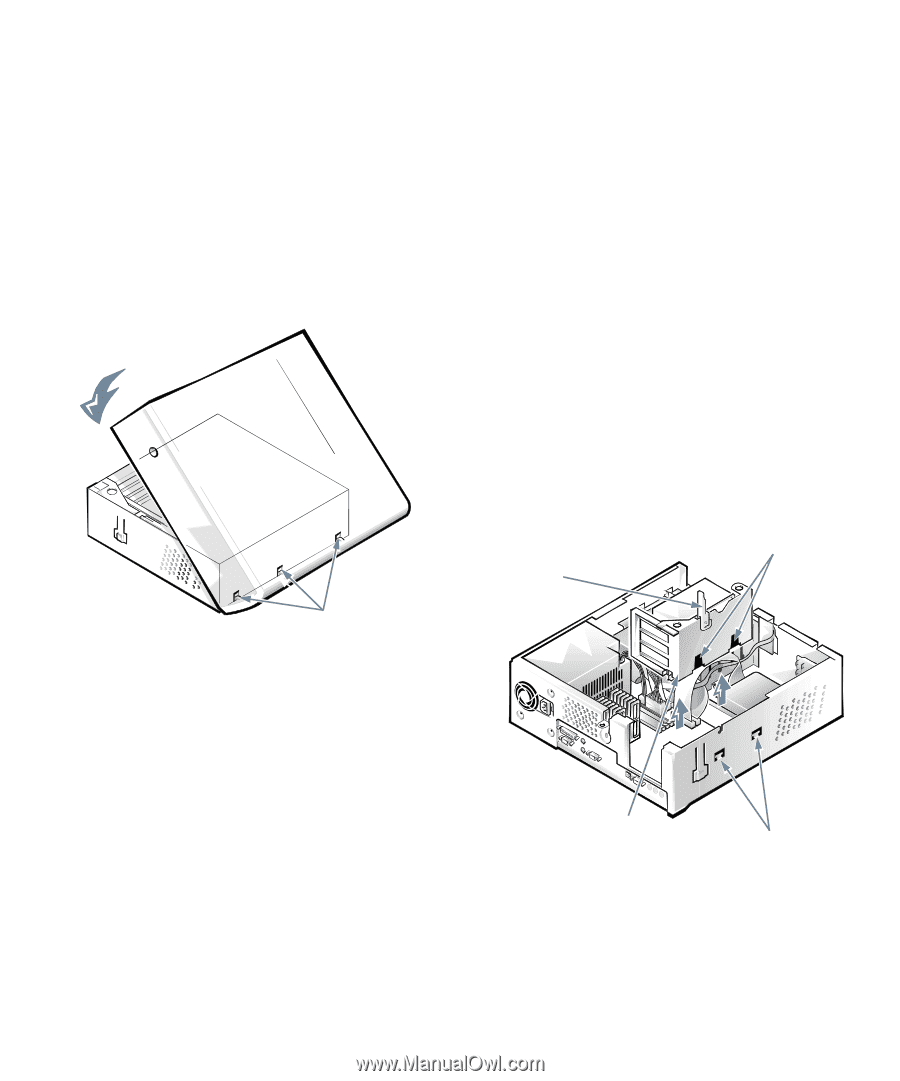
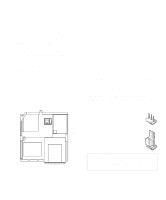
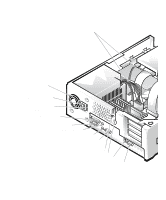
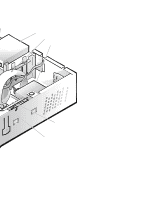
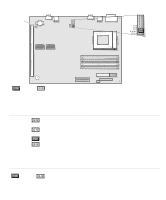
2. Check to see that no tools or extra parts (including screws) are left inside the computer's chassis. 3. Replace the cover. From the front of the computer, hold the cover at about a 45-degree angle as shown in Figure 5-3. Fit the three cover hooks into the rectangular slots on the chassis. (It may be helpful to look down into the chassis to verify that the hooks are in place.) Pivot the cover down toward the back and into position (make sure the securing buttons click into place). hooks in slots Figure 5-3. Replacing the Computer Cover 4. If you are using the optional floor stand, reattach the floor stand. See "Using the Optional Floor Stand" in Chapter 1 for instructions. 5. If you are using a padlock to secure your system, reinstall the padlock. Removing and Replacing the Expansion-Card Cage Your Dell computer has a removable expansion-card cage, which greatly simplifies many installation procedures by allowing you to remove the riser board and all installed expansion cards in a single step. Removing the Expansion-Card Cage Use the following procedure to remove the expansioncard cage: 1. Remove the computer cover as instructed in "Removing the Computer Cover" found earlier in this chapter. 2. Check any cables connected to expansion cards through the back-panel openings. Disconnect any cables that will not reach to where the cage must be placed while removed from the chassis. 3. Locate the card-cage securing lever (see Figure 5-4). Rotate the lever upward until it stops in an upright position. securing lever slots left side of computer expansion- card cage tabs Figure 5-4. Removing the ExpansionCard Cage 4. Lift the expansion-card cage up and away from the chassis. Working Inside Your Computer 5-3
-
 1
1 -
2
-
3
-
4
-
5
-
6
-
7
-
8
-
9
-
10
-
11
-
12
-
13
-
14
-
15
-
16
-
17
-
18
-
19
-
20
-
21
-
22
-
23
-
24
-
25
-
26
-
27
-
28
-
29
-
30
-
31
-
32
-
33
-
34
-
35
-
36
-
37
-
38
-
39
-
40
-
41
-
42
-
43
-
44
-
45
-
46
-
47
-
48
-
49
-
50
-
51
-
52
-
53
-
54
-
55
-
 56
56 -
 57
57 -
 58
58 -
 59
59 -
 60
60 -
 61
61 -
 62
62 -
 63
63 -
 64
64 -
 65
65 -
 66
66 -
67
-
68
-
69
-
70
-
71
-
72
-
73
-
74
-
75
-
76
-
77
-
78
-
79
-
80
-
81
-
82
-
83
-
84
-
85
-
86
-
87
-
88
-
89
-
90
-
91
-
92
-
93
-
94
-
95
-
96
-
97
-
98
-
99
-
100
-
101
-
102
-
103
-
104
-
105
-
106
-
107
-
108
-
109
-
110
-
111
-
112
-
113
-
114
-
115
-
116
-
117
-
118
-
119
-
120
-
121
 |
 |