Dell OptiPlex Gs Reference and Installation Guide (.pdf) - Page 43
Card Configuration Dialog Box, Configuration Settings Dialog, Available Settings List Box
 |
View all Dell OptiPlex Gs manuals
Add to My Manuals
Save this manual to your list of manuals |
Page 43 highlights
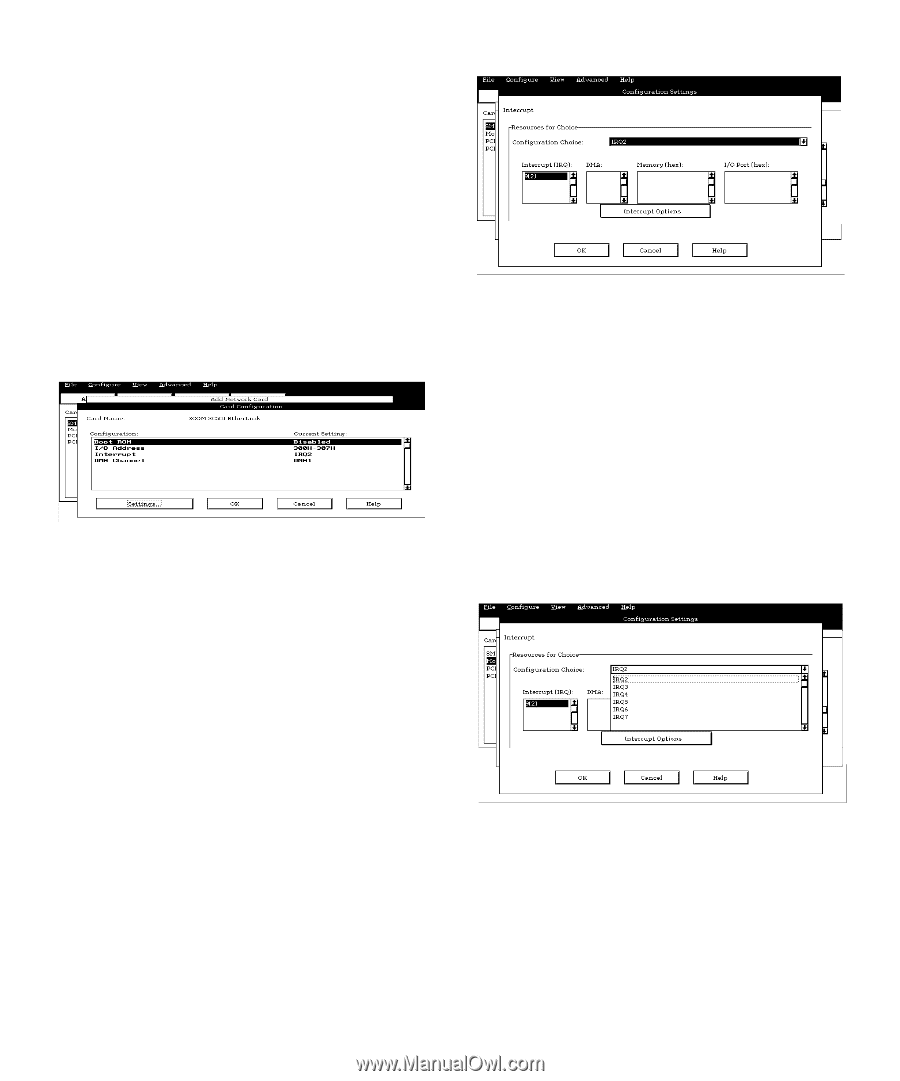
Messages," for an explanation of the message and a possible solution to the conflict. If you are satisfied with the default resources assigned to the card, you can skip the remainder of this procedure. 6. To select the resources yourself, click the Advanced button. The Card Configuration dialog box (see Figure 3-3) displays all resources used by the card. Some cards have multiple functions, each having one or more resources associated with it. For example, a communications card can have fax, modem, and scanner functions, each of which may have one or more associated resources. Figure 3-3. Card Configuration Dialog Box 7. To change any of the resource settings for the card, select the resource setting and then click the Settings button. The Configuration Settings dialog box (see Figure 3-4) displays the name of the resource that you selected in the upper-left corner of the box. The resource values currently associated with the selected function are displayed in the Resources for Choice box. The resource values displayed are INTERRUPT (IRQ), DMA, MEMORY (HEX), and I/O PORT (HEX). Figure 3-4. Configuration Settings Dialog Box 8. To change the resource settings, click the down arrow next to the Configuration Choice box. Then click the new resource setting from the list of available settings (see Figure 3-5). You cannot manually enter a value; you must choose a setting from the list. If there is only one setting listed, no other settings are available. The setting that you select may affect the resources available. For example, if you are offered the DISABLED option and select it, all resource values are blank, indicating that a disabled setting uses no resources. Figure 3-5. Available Settings List Box Using the ISA Configuration Utility 3-5
-
 1
1 -
2
-
3
-
4
-
5
-
6
-
7
-
8
-
9
-
10
-
11
-
12
-
13
-
14
-
15
-
16
-
17
-
18
-
19
-
20
-
21
-
22
-
23
-
24
-
25
-
26
-
27
-
28
-
29
-
30
-
31
-
32
-
33
-
34
-
35
-
36
-
37
-
 38
38 -
 39
39 -
 40
40 -
 41
41 -
 42
42 -
 43
43 -
 44
44 -
 45
45 -
 46
46 -
 47
47 -
 48
48 -
49
-
50
-
51
-
52
-
53
-
54
-
55
-
56
-
57
-
58
-
59
-
60
-
61
-
62
-
63
-
64
-
65
-
66
-
67
-
68
-
69
-
70
-
71
-
72
-
73
-
74
-
75
-
76
-
77
-
78
-
79
-
80
-
81
-
82
-
83
-
84
-
85
-
86
-
87
-
88
-
89
-
90
-
91
-
92
-
93
-
94
-
95
-
96
-
97
-
98
-
99
-
100
-
101
-
102
-
103
-
104
-
105
-
106
-
107
-
108
-
109
-
110
-
111
-
112
-
113
-
114
-
115
-
116
-
117
-
118
-
119
-
120
-
121
 |
 |