Dell PowerConnect J-8216 Hardware Guide - Page 162
Connecting and Configuring a J-EX Series Switch (J-Web Procedure)
 |
View all Dell PowerConnect J-8216 manuals
Add to My Manuals
Save this manual to your list of manuals |
Page 162 highlights
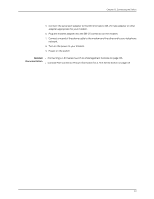
Dell PowerConnect J-Series J-EX8216 Ethernet Switch Hardware Guide Connecting and Configuring a J-EX Series Switch (J-Web Procedure) There are two ways to connect and configure a J-EX Series switch: one method is through the console using the CLI and the other is using the J-Web interface. This topic describes the J-Web procedure. NOTE: Before you begin the configuration, enable a DHCP client on the management PC you will connect to the switch so that the switch can obtain an IP address dynamically. NOTE: Read the following steps before you begin the configuration. You must complete the initial configuration using EZSetup within 10 minutes. The switch exits EZSetup after 10 minutes and reverts to the factory default configuration, and the PC loses connectivity to the switch. The LCD displays a count-down timer when the switch is in initial setup mode. To connect and configure the switch using the J-Web interface: 1. To transition the switch into initial setup mode, use the Menu and Enter buttons located to the right of the LCD panel (see Figure 67 on page 146): Figure 67: LCD Panel in a J-EX8200 Switch a. Press the Menu button until you see MAINTENANCE MENU. Then press the Enter button. b. Press Menu until you see ENTER EZSetup. Then press Enter. If EZSetup does not appear as an option in the menu, select Factory Default to return the switch to the factory default configuration. EZSetup is displayed in the menu only when the switch is set to the factory default configuration. c. Press Enter to confirm setup and continue with EZSetup. 2. Connect the Ethernet cable from the Ethernet port on the PC to the port labeled MGMT on the Routing Engine (RE) module in slot RE0. This port is configured as the DHCP server with the default IP address, 192.168.1.1. The switch can assign an IP address to the management PC in the IP address range 192.168.1.2 through 192.168.1.253. 3. From the PC, open a Web browser, type http://192.168.1.1 in the address field, and press Enter. 146
-
 1
1 -
2
-
3
-
4
-
5
-
6
-
7
-
8
-
9
-
10
-
11
-
12
-
13
-
14
-
15
-
16
-
17
-
18
-
19
-
20
-
21
-
22
-
23
-
24
-
25
-
26
-
27
-
28
-
29
-
30
-
31
-
32
-
33
-
34
-
35
-
36
-
37
-
38
-
39
-
40
-
41
-
42
-
43
-
44
-
45
-
46
-
47
-
48
-
49
-
50
-
51
-
52
-
53
-
54
-
55
-
56
-
57
-
58
-
59
-
60
-
61
-
62
-
63
-
64
-
65
-
66
-
67
-
68
-
69
-
70
-
71
-
72
-
73
-
74
-
75
-
76
-
77
-
78
-
79
-
80
-
81
-
82
-
83
-
84
-
85
-
86
-
87
-
88
-
89
-
90
-
91
-
92
-
93
-
94
-
95
-
96
-
97
-
98
-
99
-
100
-
101
-
102
-
103
-
104
-
105
-
106
-
107
-
108
-
109
-
110
-
111
-
112
-
113
-
114
-
115
-
116
-
117
-
118
-
119
-
120
-
121
-
122
-
123
-
124
-
125
-
126
-
127
-
128
-
129
-
130
-
131
-
132
-
133
-
134
-
135
-
136
-
137
-
138
-
139
-
140
-
141
-
142
-
143
-
144
-
145
-
146
-
147
-
148
-
149
-
150
-
151
-
152
-
153
-
154
-
155
-
156
-
 157
157 -
 158
158 -
 159
159 -
 160
160 -
 161
161 -
 162
162 -
 163
163 -
 164
164 -
 165
165 -
 166
166 -
 167
167 -
168
-
169
-
170
-
171
-
172
-
173
-
174
-
175
-
176
-
177
-
178
-
179
-
180
-
181
-
182
-
183
-
184
-
185
-
186
-
187
-
188
-
189
-
190
-
191
-
192
-
193
-
194
-
195
-
196
-
197
-
198
-
199
-
200
-
201
-
202
-
203
-
204
-
205
-
206
-
207
-
208
-
209
-
210
-
211
-
212
-
213
-
214
-
215
-
216
-
217
-
218
-
219
-
220
-
221
-
222
-
223
-
224
-
225
-
226
-
227
-
228
-
229
-
230
-
231
-
232
-
233
-
234
-
235
-
236
-
237
-
238
-
239
-
240
-
241
-
242
-
243
-
244
-
245
-
246
-
247
-
248
-
249
-
250
-
251
-
252
-
253
-
254
-
255
-
256
-
257
-
258
-
259
-
260
-
261
-
262
-
263
-
264
-
265
-
266
-
267
-
268
-
269
-
270
 |
 |
