Dell PowerConnect J-8216 Hardware Guide - Page 183

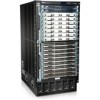
Location of the ESD Point on a J-EX8200 Switch Chassis
Page 183 highlights

Chapter 13: Removing Switch Components • If there are any transceivers installed in the line card, remove them before you remove the line card. See "Removing a Transceiver from a J-EX Series Switch" on page 168. • Ensure that you know how to handle and store the line card (see "Handling and Storing Line Cards in J-EX8200 Switches" on page 175). Ensure that you have the following parts and tools available to remove a line card from a J-EX8200 switch chassis: • Electrostatic discharge (ESD) grounding strap • Phillips (+) screwdriver, number 2 • An antistatic bag or an antistatic mat • Replacement line card or a cover panel and its captive screws to cover the empty slot To remove a line card from a J-EX8200 switch (see Figure 76 on page 168): 1. Place the antistatic bag or antistatic mat on a flat, stable surface. 2. Attach the electrostatic discharge (ESD) grounding strap to your bare wrist, and connect the strap to the ESD point on the switch chassis (see Figure 75 on page 167). Figure 75: Location of the ESD Point on a J-EX8200 Switch Chassis 3. Label the cables connected to each port on the line card so you can reconnect the cables to the correct ports. 4. Take the line card offline by issuing the following CLI command: user@switch> request chassis fpc slot slot-number offline 5. Remove the captive screws on the faceplate of the line card by using the screwdriver. 6. Grasp the ejector levers on the faceplate of the line card and pull them outward simultaneously until the line card is unseated. See "Handling and Storing Line Cards in J-EX8200 Switches" on page 175. 7. Grasp the ejector levers and gently slide the line card halfway out of the chassis. CAUTION: Do not lift the line card by holding the ejector levers on the faceplate or the edge connectors. The levers cannot support the weight of the line card. Lifting the line cards by the levers might bend them. Bent levers prevent the line cards from being properly seated in the chassis. 167

  • 1
  • 2
  • 3
  • 4
  • 5
  • 6
  • 7
  • 8
  • 9
  • 10
  • 11
  • 12
  • 13
  • 14
  • 15
  • 16
  • 17
  • 18
  • 19
  • 20
  • 21
  • 22
  • 23
  • 24
  • 25
  • 26
  • 27
  • 28
  • 29
  • 30
  • 31
  • 32
  • 33
  • 34
  • 35
  • 36
  • 37
  • 38
  • 39
  • 40
  • 41
  • 42
  • 43
  • 44
  • 45
  • 46
  • 47
  • 48
  • 49
  • 50
  • 51
  • 52
  • 53
  • 54
  • 55
  • 56
  • 57
  • 58
  • 59
  • 60
  • 61
  • 62
  • 63
  • 64
  • 65
  • 66
  • 67
  • 68
  • 69
  • 70
  • 71
  • 72
  • 73
  • 74
  • 75
  • 76
  • 77
  • 78
  • 79
  • 80
  • 81
  • 82
  • 83
  • 84
  • 85
  • 86
  • 87
  • 88
  • 89
  • 90
  • 91
  • 92
  • 93
  • 94
  • 95
  • 96
  • 97
  • 98
  • 99
  • 100
  • 101
  • 102
  • 103
  • 104
  • 105
  • 106
  • 107
  • 108
  • 109
  • 110
  • 111
  • 112
  • 113
  • 114
  • 115
  • 116
  • 117
  • 118
  • 119
  • 120
  • 121
  • 122
  • 123
  • 124
  • 125
  • 126
  • 127
  • 128
  • 129
  • 130
  • 131
  • 132
  • 133
  • 134
  • 135
  • 136
  • 137
  • 138
  • 139
  • 140
  • 141
  • 142
  • 143
  • 144
  • 145
  • 146
  • 147
  • 148
  • 149
  • 150
  • 151
  • 152
  • 153
  • 154
  • 155
  • 156
  • 157
  • 158
  • 159
  • 160
  • 161
  • 162
  • 163
  • 164
  • 165
  • 166
  • 167
  • 168
  • 169
  • 170
  • 171
  • 172
  • 173
  • 174
  • 175
  • 176
  • 177
  • 178
  • 179
  • 180
  • 181
  • 182
  • 183
  • 184
  • 185
  • 186
  • 187
  • 188
  • 189
  • 190
  • 191
  • 192
  • 193
  • 194
  • 195
  • 196
  • 197
  • 198
  • 199
  • 200
  • 201
  • 202
  • 203
  • 204
  • 205
  • 206
  • 207
  • 208
  • 209
  • 210
  • 211
  • 212
  • 213
  • 214
  • 215
  • 216
  • 217
  • 218
  • 219
  • 220
  • 221
  • 222
  • 223
  • 224
  • 225
  • 226
  • 227
  • 228
  • 229
  • 230
  • 231
  • 232
  • 233
  • 234
  • 235
  • 236
  • 237
  • 238
  • 239
  • 240
  • 241
  • 242
  • 243
  • 244
  • 245
  • 246
  • 247
  • 248
  • 249
  • 250
  • 251
  • 252
  • 253
  • 254
  • 255
  • 256
  • 257
  • 258
  • 259
  • 260
  • 261
  • 262
  • 263
  • 264
  • 265
  • 266
  • 267
  • 268
  • 269
  • 270

If there are any transceivers installed in the line card, remove them before you remove
the line card. See “Removing a Transceiver from a J-EX Series Switch” on page 168.
Ensure that you know how to handle and store the line card (see “Handling and Storing
Line Cards in J-EX8200 Switches” on page 175).
Ensure that you have the following parts and tools available to remove a line card from
a J-EX8200 switch chassis:
Electrostatic discharge (ESD) grounding strap
Phillips (+) screwdriver, number 2
An antistatic bag or an antistatic mat
Replacement line card or a cover panel and its captive screws to cover the empty slot
To remove a line card from a J-EX8200 switch (see Figure 76 on page 168):
1.
Place the antistatic bag or antistatic mat on a flat, stable surface.
2.
Attach the electrostatic discharge (ESD) grounding strap to your bare wrist, and
connect the strap to the ESD point on the switch chassis (see Figure 75 on page 167).
Figure 75: Location of the ESD Point on a J-EX8200 Switch Chassis
3.
Label the cables connected to each port on the line card so you can reconnect the
cables to the correct ports.
4.
Take the line card offline by issuing the following CLI command:
user@switch>
request chassis fpc slot
slot-number
offline
5.
Remove the captive screws on the faceplate of the line card by using the screwdriver.
6.
Grasp the ejector levers on the faceplate of the line card and pull them outward
simultaneously until the line card is unseated. See “Handling and Storing Line Cards
in J-EX8200 Switches” on page 175.
7.
Grasp the ejector levers and gently slide the line card halfway out of the chassis.
CAUTION:
Do not lift the line card by holding the ejector levers on the
faceplate or the edge connectors. The levers cannot support the weight
of the line card. Lifting the line cards by the levers might bend them. Bent
levers prevent the line cards from being properly seated in the chassis.
167
Chapter 13: Removing Switch Components