Epson PhotoPC 850Z User Manual - Page 109
Connecting the Camera with the USB Cable, you can set it manually. See
 |
View all Epson PhotoPC 850Z manuals
Add to My Manuals
Save this manual to your list of manuals |
Page 109 highlights
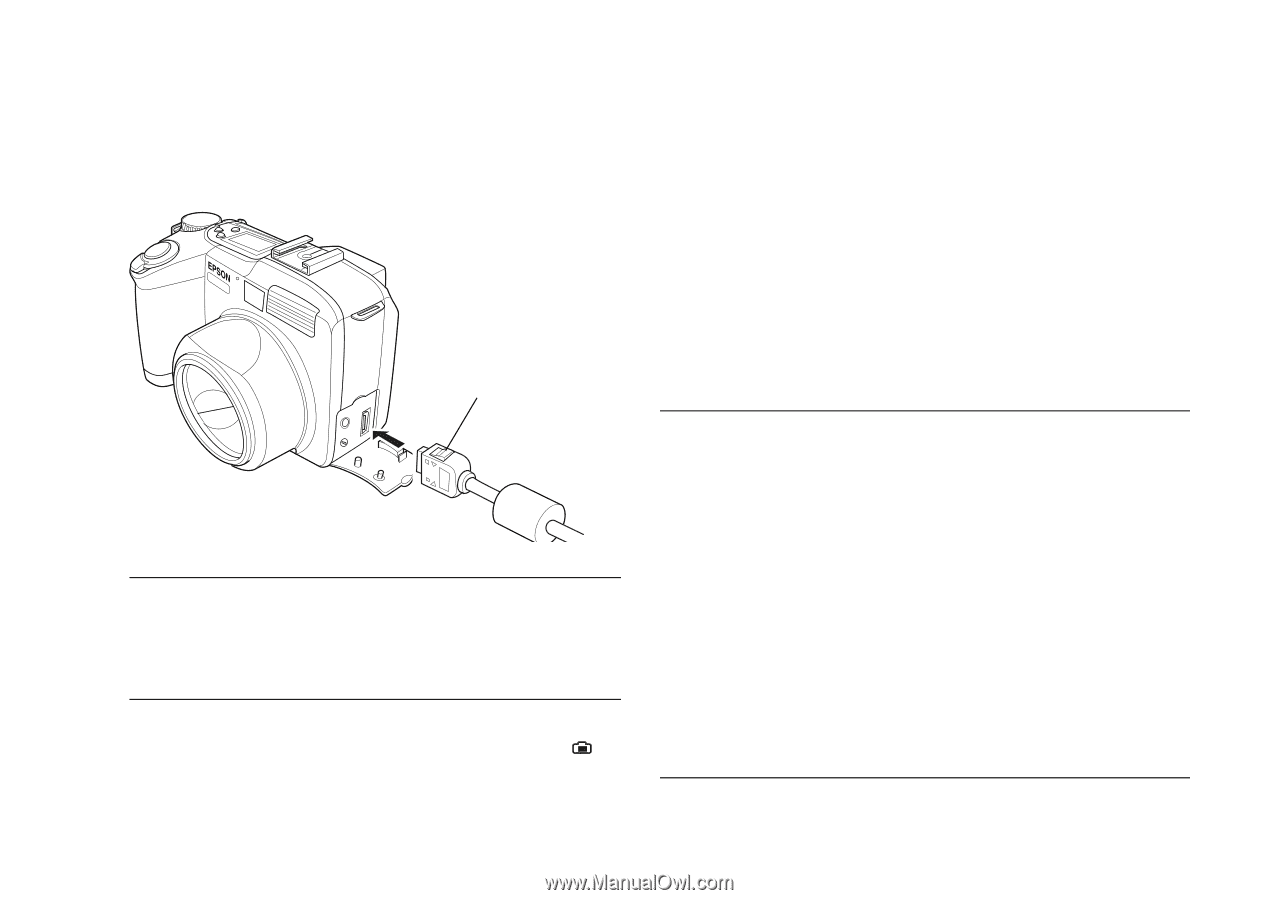
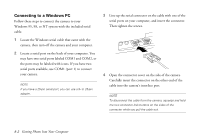
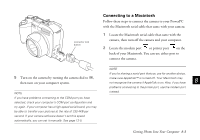
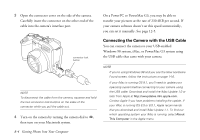
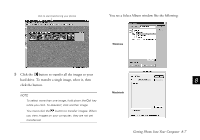
3 Open the connector cover on the side of the camera. Carefully insert the connector on the other end of the cable into the camera's interface port. On a PowerPC or PowerMac G3, you may be able to transfer your pictures at the rate of 230.4KB per second. If your camera software doesn't set this speed automatically, you can set it manually. See page 12-5. connector lock button NOTE To disconnect the cable from the camera, squeeze and hold the two connector lock buttons on the sides of the connector while you pull the cable out. 4 Turn on the camera by turning the camera dial to , then turn on your Macintosh system. Connecting the Camera with the USB Cable You can connect the camera to your USB-enabled Windows 98 system, iMac, or PowerMac G3 system using the USB cable that came with your camera. NOTE If you're using Windows 98 and you see the New Hardware Found screen, follow the instructions on page 1-16. If your iMac is running OS 8.1, you'll need to update your operating system before connecting to your camera using the USB cable. Download and install the iMac Update 1.0 or later from Apple at http://swupdates.info.apple.com. Contact Apple if you have problems installing the update. If your iMac is running OS 8.5 or 8.5.1, Apple recommends that you download and install iMac Update 1.1. To find out which operating system your iMac is running, select About This Computer in the Apple menu. 8-4 Getting Photos Into Your Computer
-
 1
1 -
2
-
3
-
4
-
5
-
6
-
7
-
8
-
9
-
10
-
11
-
12
-
13
-
14
-
15
-
16
-
17
-
18
-
19
-
20
-
21
-
22
-
23
-
24
-
25
-
26
-
27
-
28
-
29
-
30
-
31
-
32
-
33
-
34
-
35
-
36
-
37
-
38
-
39
-
40
-
41
-
42
-
43
-
44
-
45
-
46
-
47
-
48
-
49
-
50
-
51
-
52
-
53
-
54
-
55
-
56
-
57
-
58
-
59
-
60
-
61
-
62
-
63
-
64
-
65
-
66
-
67
-
68
-
69
-
70
-
71
-
72
-
73
-
74
-
75
-
76
-
77
-
78
-
79
-
80
-
81
-
82
-
83
-
84
-
85
-
86
-
87
-
88
-
89
-
90
-
91
-
92
-
93
-
94
-
95
-
96
-
97
-
98
-
99
-
100
-
101
-
102
-
103
-
 104
104 -
 105
105 -
 106
106 -
 107
107 -
 108
108 -
 109
109 -
 110
110 -
 111
111 -
 112
112 -
 113
113 -
 114
114 -
115
-
116
-
117
-
118
-
119
-
120
-
121
-
122
-
123
-
124
-
125
-
126
-
127
-
128
-
129
-
130
-
131
-
132
-
133
-
134
-
135
-
136
-
137
-
138
-
139
-
140
-
141
-
142
-
143
-
144
-
145
-
146
-
147
-
148
-
149
-
150
-
151
-
152
-
153
-
154
-
155
-
156
-
157
-
158
-
159
-
160
-
161
-
162
-
163
-
164
-
165
-
166
-
167
-
168
-
169
-
170
-
171
-
172
-
173
-
174
-
175
-
176
-
177
-
178
-
179
-
180
-
181
-
182
-
183
-
184
-
185
-
186
-
187
-
188
-
189
-
190
-
191
-
192
-
193
-
194
-
195
-
196
-
197
-
198
-
199
-
200
-
201
-
202
-
203
-
204
-
205
-
206
-
207
-
208
-
209
-
210
-
211
-
212
-
213
-
214
-
215
-
216
-
217
-
218
-
219
-
220
-
221
-
222
-
223
-
224
-
225
-
226
-
227
-
228
-
229
-
230
-
231
-
232
-
233
-
234
-
235
-
236
-
237
-
238
-
239
-
240
-
241
-
242
-
243
-
244
-
245
-
246
-
247
-
248
-
249
 |
 |