Epson PhotoPC 850Z User Manual - Page 6
Adjusting Camera Settings, Getting Photos Into Your Computer, Getting Your Photos Into Documents - usb cable
 |
View all Epson PhotoPC 850Z manuals
Add to My Manuals
Save this manual to your list of manuals |
Page 6 highlights
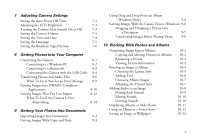
7 Adjusting Camera Settings Using Drag and Drop From an Album Setting the Auto Power Off Time 7-1 Adjusting the LCD Brightness 7-3 Turning the Camera Alert Sounds On or Off 7-3 Setting the Camera Volume 7-4 Setting the Time and Date 7-4 (Windows Only) 9-4 Getting Images With the Camio Viewer (Windows) 9-6 Dragging and Dropping a Picture Into a Document 9-7 Transferring Images Before Placing Them 9-8 Setting the Language Setting the Broadcast Signal System 7-5 7-6 10 Working With Photos and Albums Organizing Image Expert Albums 10-2 8 Getting Photos Into Your Computer Copying and Moving Pictures in Albums 10-2 Connecting the Camera 8-1 Connecting to a Windows PC 8-2 Connecting to a Macintosh 8-3 Connecting the Camera with the USB Cable 8-4 Transferring Photos and Audio Files 8-6 What To Do if You See an Error Message 8-9 Getting Images Into TWAIN- Compliant Applications 8-10 Getting Images That You Can Import 8-12 What To Do If the Camera Is Not Responding 8-14 Renaming a Picture Viewing Picture Information Printing an Image or Album Choosing the Layout Style Adding Text Choosing Album Images Adjusting the Printed Area Adding Audio to an Image Playing Back Sounds Editing Sounds Deleting Sounds Displaying Albums as Slide Shows 10-3 10-3 10-4 10-5 10-6 10-7 10-7 10-8 10-9 10-10 A 10-10 10-11 9 Getting Your Photos Into Documents Importing Images Into Documents 9-2 Getting Images With Copy and Paste 9-3 Using an Album as a Screen Saver Setting an Image as Wallpaper 10-12 B 10-12 v
-
 1
1 -
 2
2 -
 3
3 -
 4
4 -
 5
5 -
 6
6 -
 7
7 -
 8
8 -
 9
9 -
 10
10 -
 11
11 -
 12
12 -
13
-
14
-
15
-
16
-
17
-
18
-
19
-
20
-
21
-
22
-
23
-
24
-
25
-
26
-
27
-
28
-
29
-
30
-
31
-
32
-
33
-
34
-
35
-
36
-
37
-
38
-
39
-
40
-
41
-
42
-
43
-
44
-
45
-
46
-
47
-
48
-
49
-
50
-
51
-
52
-
53
-
54
-
55
-
56
-
57
-
58
-
59
-
60
-
61
-
62
-
63
-
64
-
65
-
66
-
67
-
68
-
69
-
70
-
71
-
72
-
73
-
74
-
75
-
76
-
77
-
78
-
79
-
80
-
81
-
82
-
83
-
84
-
85
-
86
-
87
-
88
-
89
-
90
-
91
-
92
-
93
-
94
-
95
-
96
-
97
-
98
-
99
-
100
-
101
-
102
-
103
-
104
-
105
-
106
-
107
-
108
-
109
-
110
-
111
-
112
-
113
-
114
-
115
-
116
-
117
-
118
-
119
-
120
-
121
-
122
-
123
-
124
-
125
-
126
-
127
-
128
-
129
-
130
-
131
-
132
-
133
-
134
-
135
-
136
-
137
-
138
-
139
-
140
-
141
-
142
-
143
-
144
-
145
-
146
-
147
-
148
-
149
-
150
-
151
-
152
-
153
-
154
-
155
-
156
-
157
-
158
-
159
-
160
-
161
-
162
-
163
-
164
-
165
-
166
-
167
-
168
-
169
-
170
-
171
-
172
-
173
-
174
-
175
-
176
-
177
-
178
-
179
-
180
-
181
-
182
-
183
-
184
-
185
-
186
-
187
-
188
-
189
-
190
-
191
-
192
-
193
-
194
-
195
-
196
-
197
-
198
-
199
-
200
-
201
-
202
-
203
-
204
-
205
-
206
-
207
-
208
-
209
-
210
-
211
-
212
-
213
-
214
-
215
-
216
-
217
-
218
-
219
-
220
-
221
-
222
-
223
-
224
-
225
-
226
-
227
-
228
-
229
-
230
-
231
-
232
-
233
-
234
-
235
-
236
-
237
-
238
-
239
-
240
-
241
-
242
-
243
-
244
-
245
-
246
-
247
-
248
-
249
 |
 |
