HP H470 User Manual - Page 29
To change settings from an application for current jobs (Windows) - drivers
 |
UPC - 883585461585
View all HP H470 manuals
Add to My Manuals
Save this manual to your list of manuals |
Page 29 highlights
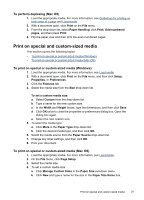
made from the printer driver. However, after the application is closed, the settings return to the defaults configured in the driver. NOTE: To set print settings for all print jobs, make the changes in the printer driver. For more information about the features of the Windows printer driver, see the online help for the driver. For more information about printing from a specific application, see the documentation that came with the application. • To change settings from an application for current jobs (Windows) • To change default settings for all future jobs (Windows) • To change settings (Mac OS) To change settings from an application for current jobs (Windows) 1. Open the document that you want to print. 2. On the File menu, click Print, and then click Setup, Properties, or Preferences. (Specific options may vary depending on the application that you are using.) 3. Change the settings that you want, and then click OK, Print, or a similar command. To change default settings for all future jobs (Windows) 1. Click Start, point to Settings, and then click Printers or Printers and Faxes. - Or Click Start, click Control Panel, and then double-click Printers. 2. Right-click the printer icon, and then click Properties, Document Defaults, or Printing Preferences. 3. Change the settings that you want, and then click OK. To change settings (Mac OS) 1. On the File menu, click Page Setup. 2. Change the settings that you want (such as paper size), and then click OK. 3. On the File menu, click Print to open the print driver. 4. Change the settings that you want (such as media type), and then click OK or Print. Use the HP Solution Center (Windows) Use the HP Solution Center to change print settings, order supplies, and access the onscreen Help. The features available in the HP Solution Center vary depending on the devices you have installed. The HP Solution Center is customized to show icons that are associated with the selected device. If the selected device is not equipped with a particular feature, then the icon for that feature does not appear in the HP Solution Center. If the HP Solution Center on your computer does not contain any icons, an error might have occurred during the software installation. To correct this, use the Control Panel in Windows to completely uninstall and reinstall the software. Use the HP Solution Center (Windows) 25
-
 1
1 -
2
-
3
-
4
-
5
-
6
-
7
-
8
-
9
-
10
-
11
-
12
-
13
-
14
-
15
-
16
-
17
-
18
-
19
-
20
-
21
-
22
-
23
-
 24
24 -
 25
25 -
 26
26 -
 27
27 -
 28
28 -
 29
29 -
 30
30 -
 31
31 -
 32
32 -
 33
33 -
 34
34 -
35
-
36
-
37
-
38
-
39
-
40
-
41
-
42
-
43
-
44
-
45
-
46
-
47
-
48
-
49
-
50
-
51
-
52
-
53
-
54
-
55
-
56
-
57
-
58
-
59
-
60
-
61
-
62
-
63
-
64
-
65
-
66
-
67
-
68
-
69
-
70
-
71
-
72
-
73
-
74
-
75
-
76
-
77
-
78
-
79
-
80
-
81
-
82
-
83
-
84
-
85
-
86
-
87
-
88
-
89
-
90
-
91
-
92
-
93
-
94
-
95
-
96
-
97
-
98
-
99
-
100
-
101
-
102
-
103
-
104
-
105
-
106
-
107
-
108
-
109
-
110
-
111
-
112
-
113
-
114
-
115
-
116
-
117
-
118
-
119
-
120
-
121
-
122
-
123
-
124
-
125
-
126
-
127
-
128
-
129
-
130
-
131
-
132
 |
 |