HP H470 User Manual - Page 54
wireless connection, Uninstall your HP Software - mobile wireless printer
 |
UPC - 883585461585
View all HP H470 manuals
Add to My Manuals
Save this manual to your list of manuals |
Page 54 highlights
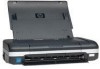
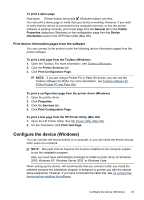
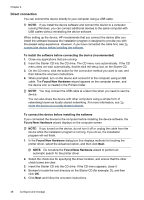
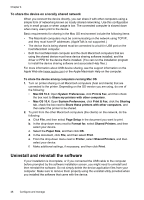
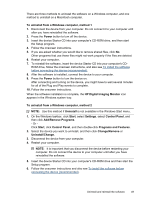
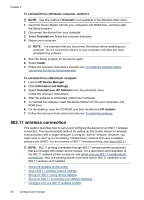
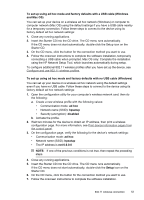
Chapter 4 To uninstall from a Windows computer, method 3 NOTE: Use this method if Uninstall is not available in the Windows Start menu. 1. Insert the device Starter CD into your computer's CD-ROM drive, and then start the Setup program. 2. Disconnect the device from your computer. 3. Select Uninstall and follow the onscreen directions. 4. Restart your computer. NOTE: It is important that you disconnect the device before restarting your computer. Do not connect the device to your computer until after you have reinstalled the software. 5. Start the Setup program for the device again. 6. Select Install. 7. Follow the onscreen instructions and also see To install the software before connecting the device (recommended). To uninstall from a Macintosh computer 1. Launch HP Device Manager. 2. Click Information and Settings. 3. Select Uninstall your HP Software from the pull-down menu. Follow the onscreen instructions. 4. After the software is uninstalled, restart your computer. 5. To reinstall the software, insert the device Starter CD into your computer's CD- ROM drive. 6. On the desktop, open the CD-ROM, and then double-click HP Installer. 7. Follow the onscreen instructions and also see To install the software. 802.11 wireless connection This section describes how to set up and configure the device for an 802.11 wireless connection. The recommended method for setting up this mobile device for wireless communication with a single computer is using an "ad hoc" network. However, you might want to set it up on an existing "infrastructure" network that uses a wireless access point (WAP). For an overview of 802.11 wireless printing, see About 802.11. NOTE: 802.11 printing is available through 802.11 wireless printer accessories that are included with certain device models. For a description and illustration of the 802.11 wireless printer accessory, see Install and use 802.11 and Bluetooth accessories. Also, the sending device must have built-in 802.11 capability or an 802.11 wireless card installed. • About the wireless profile switch • About 802.11 wireless network settings • Set up for 802.11 using factory defaults • Set up for 802.11 on existing (non-default) networks • Configure and use 802.11 wireless profiles 50 Configure and manage
-
 1
1 -
2
-
3
-
4
-
5
-
6
-
7
-
8
-
9
-
10
-
11
-
12
-
13
-
14
-
15
-
16
-
17
-
18
-
19
-
20
-
21
-
22
-
23
-
24
-
25
-
26
-
27
-
28
-
29
-
30
-
31
-
32
-
33
-
34
-
35
-
36
-
37
-
38
-
39
-
40
-
41
-
42
-
43
-
44
-
45
-
46
-
47
-
48
-
 49
49 -
 50
50 -
 51
51 -
 52
52 -
 53
53 -
 54
54 -
 55
55 -
 56
56 -
 57
57 -
 58
58 -
 59
59 -
60
-
61
-
62
-
63
-
64
-
65
-
66
-
67
-
68
-
69
-
70
-
71
-
72
-
73
-
74
-
75
-
76
-
77
-
78
-
79
-
80
-
81
-
82
-
83
-
84
-
85
-
86
-
87
-
88
-
89
-
90
-
91
-
92
-
93
-
94
-
95
-
96
-
97
-
98
-
99
-
100
-
101
-
102
-
103
-
104
-
105
-
106
-
107
-
108
-
109
-
110
-
111
-
112
-
113
-
114
-
115
-
116
-
117
-
118
-
119
-
120
-
121
-
122
-
123
-
124
-
125
-
126
-
127
-
128
-
129
-
130
-
131
-
132
 |
 |
