HP Officejet Pro 6830 User Guide - Page 110
The Using Correct Type of Phone Cord with Fax test failed, printer
 |
View all HP Officejet Pro 6830 manuals
Add to My Manuals
Save this manual to your list of manuals |
Page 110 highlights
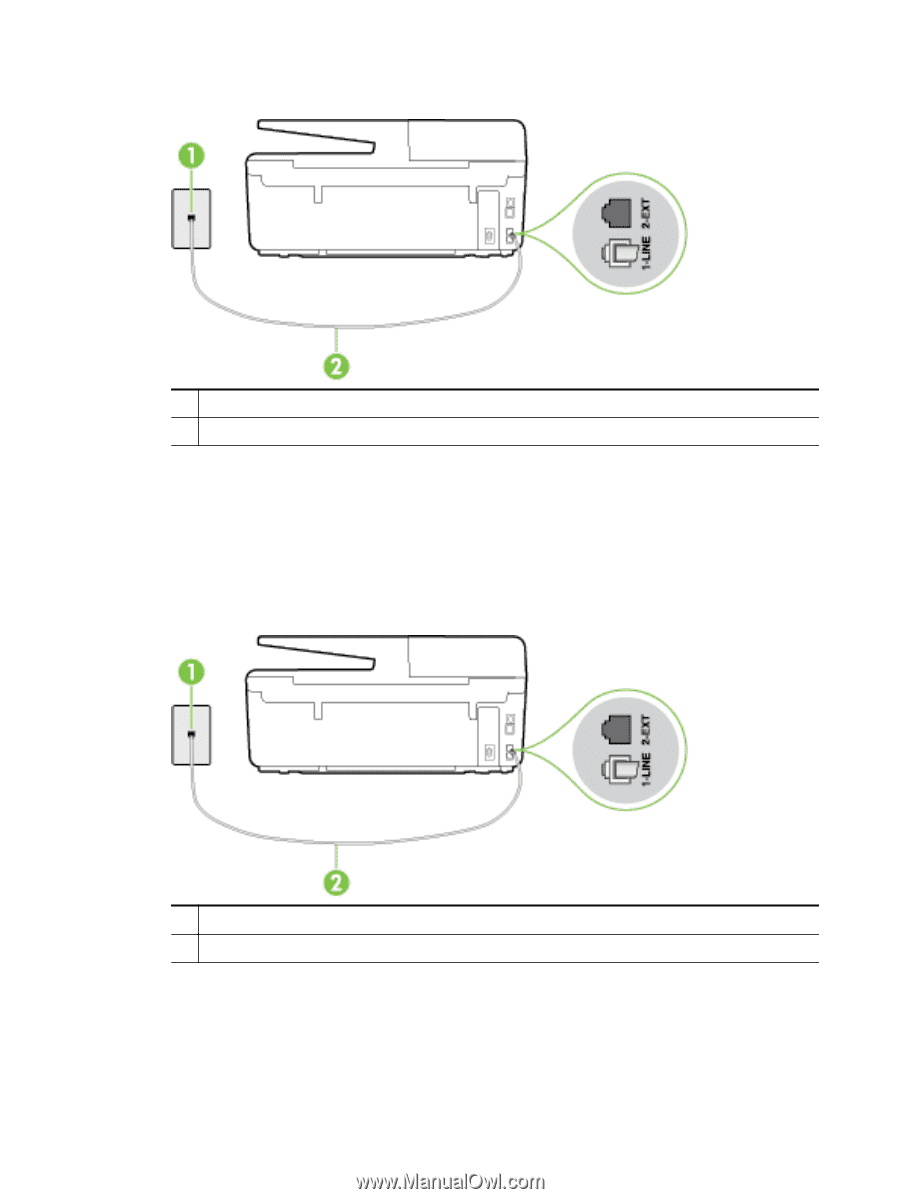
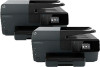
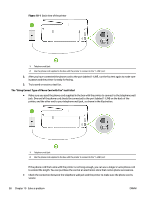
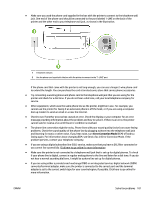
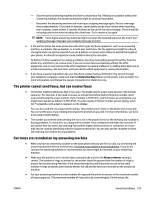
Figure 10-1 Back view of the printer 1 Telephone wall jack 2 Use the phone cord supplied in the box with the printer to connect to the "1-LINE" port 2. After you have connected the phone cord to the port labeled 1-LINE, run the fax test again to make sure it passes and the printer is ready for faxing. 3. Try to send or receive a test fax. The "Using Correct Type of Phone Cord with Fax" test failed ● Make sure you used the phone cord supplied in the box with the printer to connect to the telephone wall jack. One end of the phone cord should be connected to the port labeled 1-LINE on the back of the printer, and the other end to your telephone wall jack, as shown in the illustration. 1 Telephone wall jack 2 Use the phone cord supplied in the box with the printer to connect to the "1-LINE" port If the phone cord that came with the printer is not long enough, you can use a longer 2-wire phone cord to extend the length. You can purchase the cord at an electronics store that carries phone accessories. ● Check the connection between the telephone wall jack and the printer to make sure the phone cord is secure. 98 Chapter 10 Solve a problem ENWW
-
 1
1 -
2
-
3
-
4
-
5
-
6
-
7
-
8
-
9
-
10
-
11
-
12
-
13
-
14
-
15
-
16
-
17
-
18
-
19
-
20
-
21
-
22
-
23
-
24
-
25
-
26
-
27
-
28
-
29
-
30
-
31
-
32
-
33
-
34
-
35
-
36
-
37
-
38
-
39
-
40
-
41
-
42
-
43
-
44
-
45
-
46
-
47
-
48
-
49
-
50
-
51
-
52
-
53
-
54
-
55
-
56
-
57
-
58
-
59
-
60
-
61
-
62
-
63
-
64
-
65
-
66
-
67
-
68
-
69
-
70
-
71
-
72
-
73
-
74
-
75
-
76
-
77
-
78
-
79
-
80
-
81
-
82
-
83
-
84
-
85
-
86
-
87
-
88
-
89
-
90
-
91
-
92
-
93
-
94
-
95
-
96
-
97
-
98
-
99
-
100
-
101
-
102
-
103
-
104
-
 105
105 -
 106
106 -
 107
107 -
 108
108 -
 109
109 -
 110
110 -
 111
111 -
 112
112 -
 113
113 -
 114
114 -
 115
115 -
116
-
117
-
118
-
119
-
120
-
121
-
122
-
123
-
124
-
125
-
126
-
127
-
128
-
129
-
130
-
131
-
132
-
133
-
134
-
135
-
136
-
137
-
138
-
139
-
140
-
141
-
142
-
143
-
144
-
145
-
146
-
147
-
148
-
149
-
150
-
151
-
152
-
153
-
154
-
155
-
156
-
157
-
158
-
159
-
160
-
161
-
162
-
163
-
164
-
165
-
166
-
167
-
168
-
169
-
170
-
171
-
172
-
173
-
174
-
175
-
176
-
177
-
178
-
179
-
180
-
181
-
182
-
183
-
184
-
185
-
186
 |
 |