HP ProLiant DL170e HP ProLiant DL170e G6 Server Maintenance and Service Guide - Page 142
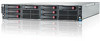
Install the system board to the 2U system board tray as shown
 |
View all HP ProLiant DL170e manuals
Add to My Manuals
Save this manual to your list of manuals |
Page 142 highlights
The 2U node shares the same procedures with 1U node for system board replacement except for the operation of 2U air baffles. • During the removing procedure of the system board, the 2U PCIe cage and air baffles should be removed before the system board is removed from the 2U system board tray. • The 2U air baffles should be installed before the system board is installed on the 2U system board tray. To remove the 2U system board: 1. Power off the node. 2. Disconnect all external cables. 3. Release the retaining latch and handle of the 2U system board tray as shown in Figure 150. 4. Slide the 2U system board assembly out of the chassis. 5. Remove the 2U upper sheet metal air baffle as shown in Figure 63. 6. Remove the 2U PCIe assembly as shown in Figure 66. 7. Remove the 2U bottom plastic air baffle as shown in Figure 83. 8. Remove the processors and memory modules. Refer to the sections of Processor and Memory for details. 9. Remove all necessary cables from the system board. 10. Remove the system board from the 2U system board tray as shown in Figure 152. To install the 2U system board: 1. Install the system board to the 2U system board tray as shown in Figure 153. 2. Install the processors and memory modules. Refer to the sections of Processor and Memory for details. 3. Install all removed cables to the system board. 4. Install the 2U bottom air baffle as shown in Figure 88. 5. Install the 2U PCIe assembly as shown in Figure 93. 6. Install the 2U upper metal sheet air baffle as shown in Figure 96. 7. Slide the system board assembly into the chassis. Removal and replacement procedures 142
-
 1
1 -
2
-
3
-
4
-
5
-
6
-
7
-
8
-
9
-
10
-
11
-
12
-
13
-
14
-
15
-
16
-
17
-
18
-
19
-
20
-
21
-
22
-
23
-
24
-
25
-
26
-
27
-
28
-
29
-
30
-
31
-
32
-
33
-
34
-
35
-
36
-
37
-
38
-
39
-
40
-
41
-
42
-
43
-
44
-
45
-
46
-
47
-
48
-
49
-
50
-
51
-
52
-
53
-
54
-
55
-
56
-
57
-
58
-
59
-
60
-
61
-
62
-
63
-
64
-
65
-
66
-
67
-
68
-
69
-
70
-
71
-
72
-
73
-
74
-
75
-
76
-
77
-
78
-
79
-
80
-
81
-
82
-
83
-
84
-
85
-
86
-
87
-
88
-
89
-
90
-
91
-
92
-
93
-
94
-
95
-
96
-
97
-
98
-
99
-
100
-
101
-
102
-
103
-
104
-
105
-
106
-
107
-
108
-
109
-
110
-
111
-
112
-
113
-
114
-
115
-
116
-
117
-
118
-
119
-
120
-
121
-
122
-
123
-
124
-
125
-
126
-
127
-
128
-
129
-
130
-
131
-
132
-
133
-
134
-
135
-
136
-
 137
137 -
 138
138 -
 139
139 -
 140
140 -
 141
141 -
 142
142 -
 143
143 -
 144
144 -
 145
145 -
 146
146 -
 147
147 -
148
-
149
-
150
-
151
-
152
-
153
-
154
-
155
-
156
-
157
-
158
-
159
-
160
-
161
-
162
-
163
-
164
-
165
-
166
-
167
-
168
-
169
-
170
-
171
-
172
-
173
-
174
-
175
-
176
-
177
-
178
-
179
-
180
 |
 |
