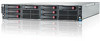
HP ProLiant DL170e HP ProLiant DL170e G6 Server Maintenance and Service Guide - Page 52
Description, WARNING, To remove the backplane
 |
View all HP ProLiant DL170e manuals
Add to My Manuals
Save this manual to your list of manuals |
Page 52 highlights
Item Description 1 Screw holes 2 Headers for hard drive 3 LED indicators Figure 20 24 SFF HDD Backplane Connectors (solder side) Item 1 2 3 Description 2x6 pin power connector PIC program connectors Mini-SAS connectors WARNING: Ensure that the system is powered off and all power sources have been disconnected from the server. Voltages are present at various locations within the server whenever an AC power source is connected. This voltage is present even when the main power switch is in the off position. NOTE: The figures below of replacing the backplane are detached from the chassis just for showing the operation steps clearly. In actual operation, please make sure to make these steps in the chassis. The following replacing procedures of the backplane use the 12 LFF HDD backplane as example. To remove the backplane: 1. Remove all drives out of the drive bays. Refer to the Removing the hard drives section in this chapter for detailed procedures. 2. Remove the top cover. Refer to the Top cover section in this chapter for detailed procedures. 3. Remove the system fan cage. Removal and replacement procedures 52
-
 1
1 -
2
-
3
-
4
-
5
-
6
-
7
-
8
-
9
-
10
-
11
-
12
-
13
-
14
-
15
-
16
-
17
-
18
-
19
-
20
-
21
-
22
-
23
-
24
-
25
-
26
-
27
-
28
-
29
-
30
-
31
-
32
-
33
-
34
-
35
-
36
-
37
-
38
-
39
-
40
-
41
-
42
-
43
-
44
-
45
-
46
-
 47
47 -
 48
48 -
 49
49 -
 50
50 -
 51
51 -
 52
52 -
 53
53 -
 54
54 -
 55
55 -
 56
56 -
 57
57 -
58
-
59
-
60
-
61
-
62
-
63
-
64
-
65
-
66
-
67
-
68
-
69
-
70
-
71
-
72
-
73
-
74
-
75
-
76
-
77
-
78
-
79
-
80
-
81
-
82
-
83
-
84
-
85
-
86
-
87
-
88
-
89
-
90
-
91
-
92
-
93
-
94
-
95
-
96
-
97
-
98
-
99
-
100
-
101
-
102
-
103
-
104
-
105
-
106
-
107
-
108
-
109
-
110
-
111
-
112
-
113
-
114
-
115
-
116
-
117
-
118
-
119
-
120
-
121
-
122
-
123
-
124
-
125
-
126
-
127
-
128
-
129
-
130
-
131
-
132
-
133
-
134
-
135
-
136
-
137
-
138
-
139
-
140
-
141
-
142
-
143
-
144
-
145
-
146
-
147
-
148
-
149
-
150
-
151
-
152
-
153
-
154
-
155
-
156
-
157
-
158
-
159
-
160
-
161
-
162
-
163
-
164
-
165
-
166
-
167
-
168
-
169
-
170
-
171
-
172
-
173
-
174
-
175
-
176
-
177
-
178
-
179
-
180
 |
 |
