HP Z3100 HP Designjet Z3100ps GP Photo Printer - User's Guide - Page 189
The front-panel display recommends reseating or replacing a printhead, Clean the printheads
 |
UPC - 882780677531
View all HP Z3100 manuals
Add to My Manuals
Save this manual to your list of manuals |
Page 189 highlights
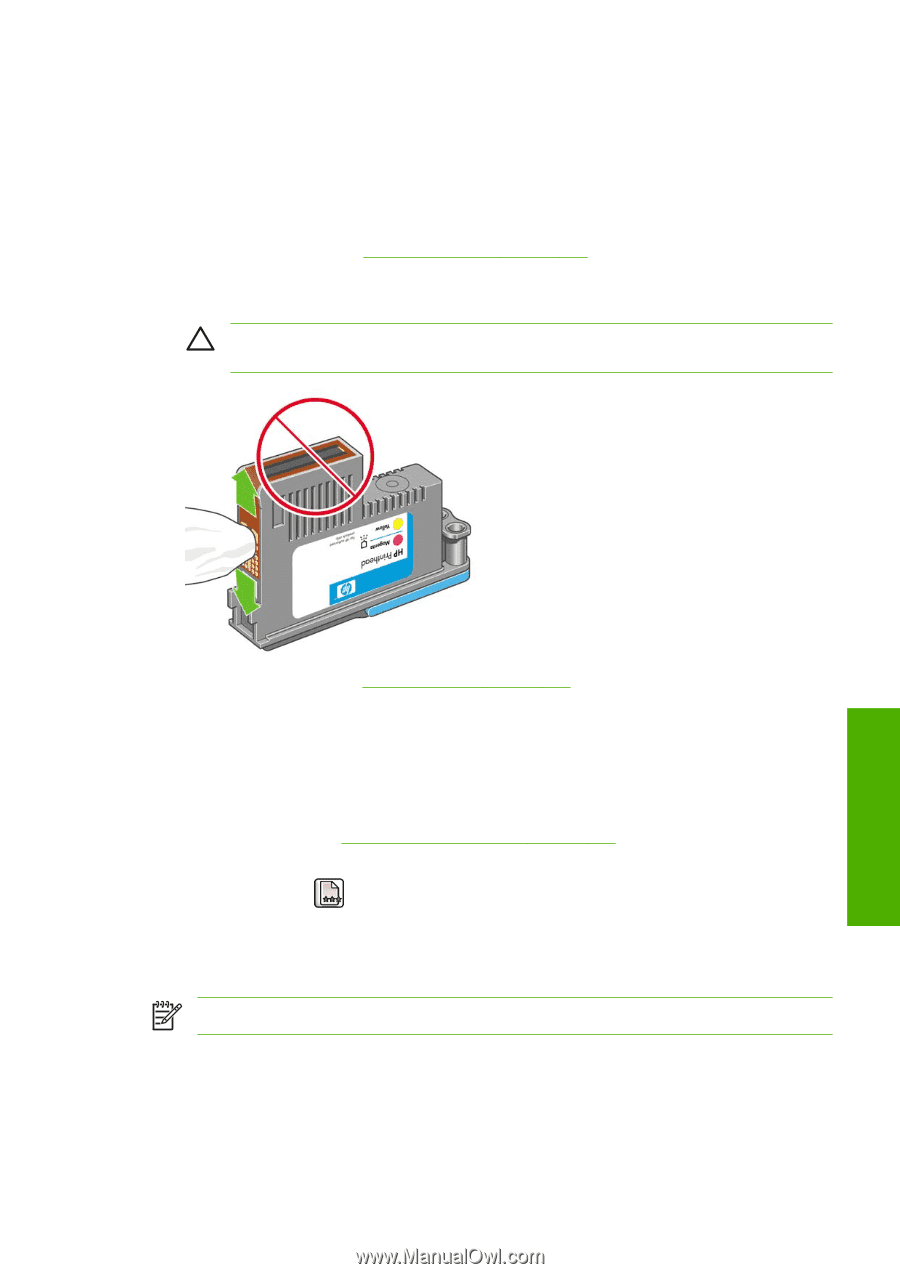
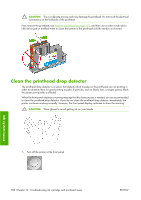
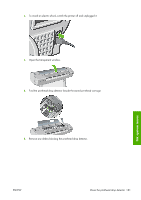
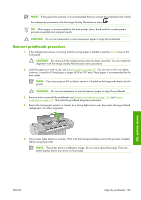
The front-panel display recommends reseating or replacing a printhead 1. From the front panel, turn the power off then on. 2. Check the front-panel display message, if it shows the ready message, the printer is ready to print. If the problem remains continue with the next step. 3. Remove the printhead, see Remove a printhead on page 122. 4. Clean the electrical connections on the backside of the printhead with a lint free cloth. You can carefully use de-ionized or distilled water if moisture is needed to remove residue. Do not use water. CAUTION: This is a delicate process and may damage the printhead. Do not touch the nozzles on the bottom side of the printhead, especially not with any alcohol. Ink system issues 5. Reinsert the printhead, see Insert a printhead on page 125. 6. Check the front-panel display message. If the problem remains, try a new printhead. Clean the printheads As long as the printer is kept turned on, an automatic cleaning is performed periodically. This ensures there is fresh ink in the nozzles and prevents nozzle clogs, which ensures color accuracy. If you have not already done so, please see The Image Diagnostics Print on page 172 before proceeding. To clean the printheads, press the Menu key to return to the main menu and select the Image Quality Maintenance menu icon , then Clean printheads. If you have gone through the Image Quality Diagnostic print process, you know which colors are failing. Select the pair of printheads which contain the failing colors. If you are not sure which colors to clean, you can also select to clean all printheads. Cleaning all printheads takes about 10 minutes. Cleaning a single pair of printheads takes about six minutes. NOTE: Cleaning all printheads uses more ink than cleaning a single pair. If you have cleaned the printheads using the Clean printheads procedure from the front panel and are still experiencing image quality problems, you can try cleaning the printhead nozzles manually using the following procedure. ENWW The front-panel display recommends reseating or replacing a printhead 179
-
 1
1 -
2
-
3
-
4
-
5
-
6
-
7
-
8
-
9
-
10
-
11
-
12
-
13
-
14
-
15
-
16
-
17
-
18
-
19
-
20
-
21
-
22
-
23
-
24
-
25
-
26
-
27
-
28
-
29
-
30
-
31
-
32
-
33
-
34
-
35
-
36
-
37
-
38
-
39
-
40
-
41
-
42
-
43
-
44
-
45
-
46
-
47
-
48
-
49
-
50
-
51
-
52
-
53
-
54
-
55
-
56
-
57
-
58
-
59
-
60
-
61
-
62
-
63
-
64
-
65
-
66
-
67
-
68
-
69
-
70
-
71
-
72
-
73
-
74
-
75
-
76
-
77
-
78
-
79
-
80
-
81
-
82
-
83
-
84
-
85
-
86
-
87
-
88
-
89
-
90
-
91
-
92
-
93
-
94
-
95
-
96
-
97
-
98
-
99
-
100
-
101
-
102
-
103
-
104
-
105
-
106
-
107
-
108
-
109
-
110
-
111
-
112
-
113
-
114
-
115
-
116
-
117
-
118
-
119
-
120
-
121
-
122
-
123
-
124
-
125
-
126
-
127
-
128
-
129
-
130
-
131
-
132
-
133
-
134
-
135
-
136
-
137
-
138
-
139
-
140
-
141
-
142
-
143
-
144
-
145
-
146
-
147
-
148
-
149
-
150
-
151
-
152
-
153
-
154
-
155
-
156
-
157
-
158
-
159
-
160
-
161
-
162
-
163
-
164
-
165
-
166
-
167
-
168
-
169
-
170
-
171
-
172
-
173
-
174
-
175
-
176
-
177
-
178
-
179
-
180
-
181
-
182
-
183
-
 184
184 -
 185
185 -
 186
186 -
 187
187 -
 188
188 -
 189
189 -
 190
190 -
 191
191 -
 192
192 -
 193
193 -
 194
194 -
195
-
196
-
197
-
198
-
199
-
200
-
201
-
202
-
203
-
204
-
205
-
206
-
207
-
208
-
209
-
210
-
211
-
212
-
213
-
214
-
215
-
216
-
217
-
218
-
219
-
220
-
221
 |
 |