IBM 86884RX Maintenance Manual - Page 32
Configuration, Settings, Modem, Dedicated, Disabled, Enabled
 |
View all IBM 86884RX manuals
Add to My Manuals
Save this manual to your list of manuals |
Page 32 highlights
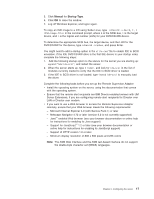
12. If you also want to configure the serial port, continue with "Configuring the serial port for text-based remote access." Otherwise, go to "Installing Advanced System Management device drivers" on page 25. Configuring the serial port for text-based remote access: Complete the following steps to configure the Remote Supervisor Adapter serial port for access using a modem or null modem. If you completed the procedure for configuring the Ethernet port and the Configuration Settings window is open, go to step 4. 1. With the server turned off, insert the CD containing the EFI Remote Supervisor Utility program into the drive, and turn on the server. 2. The utility starts automatically, displaying the Remote Supervisor Utility window. 3. Use the Up Arrow and Down Arrow keys (↑ and ↓) to select Configuration Settings, and press Enter. The Configuration Settings window opens. 4. Use the arrow keys to select Modem Settings, and press Enter. The Modem Settings window opens. Note: The values in the window are only examples; your settings might be different. 5. Verify the following serial port values: Baud Rate The default is 57600. Make sure that the baud rate matches the baud rate of the device you are connecting to the serial port on the Remote Supervisor Adapter. Dedicated to ASM The default setting is Disabled. If you are using point-to-point protocol (PPP), set this field to Enabled. If the value in this field is Enabled when the server is restarted, the serial port remains dedicated to system management and is not returned to the operating system. Note: To use this serial port, you must first install the ASM device drivers as described in "Installing Advanced System Management device drivers" on page 25. If the serial port is shared with the operating system, it is dedicated to the Remote Supervisor Adapter only while the server is turned off or 22 IBM xSeries 450 Type 8688: Hardware Maintenance Manual and Troubleshooting Guide
-
 1
1 -
2
-
3
-
4
-
5
-
6
-
7
-
8
-
9
-
10
-
11
-
12
-
13
-
14
-
15
-
16
-
17
-
18
-
19
-
20
-
21
-
22
-
23
-
24
-
25
-
26
-
 27
27 -
 28
28 -
 29
29 -
 30
30 -
 31
31 -
 32
32 -
 33
33 -
 34
34 -
 35
35 -
 36
36 -
 37
37 -
38
-
39
-
40
-
41
-
42
-
43
-
44
-
45
-
46
-
47
-
48
-
49
-
50
-
51
-
52
-
53
-
54
-
55
-
56
-
57
-
58
-
59
-
60
-
61
-
62
-
63
-
64
-
65
-
66
-
67
-
68
-
69
-
70
-
71
-
72
-
73
-
74
-
75
-
76
-
77
-
78
-
79
-
80
-
81
-
82
-
83
-
84
-
85
-
86
-
87
-
88
-
89
-
90
-
91
-
92
-
93
-
94
-
95
-
96
-
97
-
98
-
99
-
100
-
101
-
102
-
103
-
104
-
105
-
106
-
107
-
108
-
109
-
110
-
111
-
112
-
113
-
114
-
115
-
116
-
117
-
118
-
119
-
120
-
121
-
122
-
123
-
124
-
125
-
126
-
127
-
128
-
129
-
130
-
131
-
132
-
133
-
134
-
135
-
136
-
137
-
138
-
139
-
140
-
141
-
142
-
143
-
144
-
145
-
146
-
147
-
148
-
149
-
150
-
151
-
152
-
153
-
154
-
155
-
156
-
157
-
158
-
159
-
160
-
161
-
162
-
163
-
164
-
165
-
166
-
167
-
168
-
169
-
170
-
171
-
172
-
173
-
174
-
175
-
176
-
177
-
178
-
179
-
180
-
181
-
182
-
183
-
184
-
185
-
186
-
187
-
188
-
189
-
190
-
191
-
192
-
193
-
194
-
195
-
196
-
197
-
198
-
199
-
200
-
201
-
202
-
203
-
204
-
205
-
206
-
207
-
208
-
209
-
210
-
211
-
212
-
213
-
214
-
215
-
216
-
217
-
218
-
219
-
220
-
221
-
222
-
223
-
224
-
225
-
226
-
227
-
228
-
229
-
230
-
231
-
232
-
233
-
234
-
235
-
236
-
237
-
238
-
239
-
240
-
241
-
242
-
243
-
244
-
245
-
246
-
247
-
248
-
249
-
250
-
251
-
252
-
253
-
254
-
255
-
256
-
257
-
258
-
259
-
260
-
261
-
262
 |
 |
