Intel SE7501HG2 Product Guide - Page 106
Saving and Restoring the System Configuration, Saving a Configuration
 |
View all Intel SE7501HG2 manuals
Add to My Manuals
Save this manual to your list of manuals |
Page 106 highlights
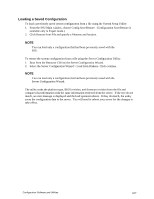
Saving and Restoring the System Configuration Using the System Setup Utility, you can save the following configuration information to a file: • Platform type, BIOS revision, and firmware revision • CMOS settings • Extended system configuration data (ESCD) • Settings for the emergency management port (EMP), platform event paging (PEP), and BMC LAN alerts Data is saved from all sources. You cannot choose only certain pieces of configuration data to save. You can also restore the information from a saved configuration file. ✏ NOTE BIOS passwords are stored in the file. Restoring a configuration can change passwords on a server. EMP and LAN passwords are not stored in the file. Passwords cannot be saved or restored. Using the Server Configuration Wizard, you can save the following configuration information to a file: • Serial / Modem data • Paging data • LAN configuration data • LAN Alert data • Service Partition configuration • System asset tag ✏ NOTE LAN passwords are not stored in the file. Passwords cannot be saved or restored. Saving a Configuration To save the system configuration from the System Setup Utility: 1. From the SSU Main window, choose Config Save/Restore. (Configuration Save/Restore is available only in Expert mode.) 2. Click Save To File and specify a filename and location. To save the system configuration from the Server Configuration Wizard: 1. Follow the configuration prompts until you see "Save Server Configuration" 2. Select the "Save Server Configuration" checkbox and click Continue. 3. Specify a filename and location as prompted. 106 Intel Server Board SE7501HG2 Product Guide
-
 1
1 -
2
-
3
-
4
-
5
-
6
-
7
-
8
-
9
-
10
-
11
-
12
-
13
-
14
-
15
-
16
-
17
-
18
-
19
-
20
-
21
-
22
-
23
-
24
-
25
-
26
-
27
-
28
-
29
-
30
-
31
-
32
-
33
-
34
-
35
-
36
-
37
-
38
-
39
-
40
-
41
-
42
-
43
-
44
-
45
-
46
-
47
-
48
-
49
-
50
-
51
-
52
-
53
-
54
-
55
-
56
-
57
-
58
-
59
-
60
-
61
-
62
-
63
-
64
-
65
-
66
-
67
-
68
-
69
-
70
-
71
-
72
-
73
-
74
-
75
-
76
-
77
-
78
-
79
-
80
-
81
-
82
-
83
-
84
-
85
-
86
-
87
-
88
-
89
-
90
-
91
-
92
-
93
-
94
-
95
-
96
-
97
-
98
-
99
-
100
-
 101
101 -
 102
102 -
 103
103 -
 104
104 -
 105
105 -
 106
106 -
 107
107 -
 108
108 -
 109
109 -
 110
110 -
 111
111 -
112
-
113
-
114
-
115
-
116
-
117
-
118
-
119
-
120
-
121
-
122
-
123
-
124
-
125
-
126
-
127
-
128
-
129
-
130
-
131
-
132
-
133
-
134
-
135
-
136
-
137
-
138
-
139
-
140
 |
 |
