Intel SE7501HG2 Product Guide - Page 34
Attaching the Label to the I/O Shield, Installing the I/O Shield,
 |
View all Intel SE7501HG2 manuals
Add to My Manuals
Save this manual to your list of manuals |
Page 34 highlights
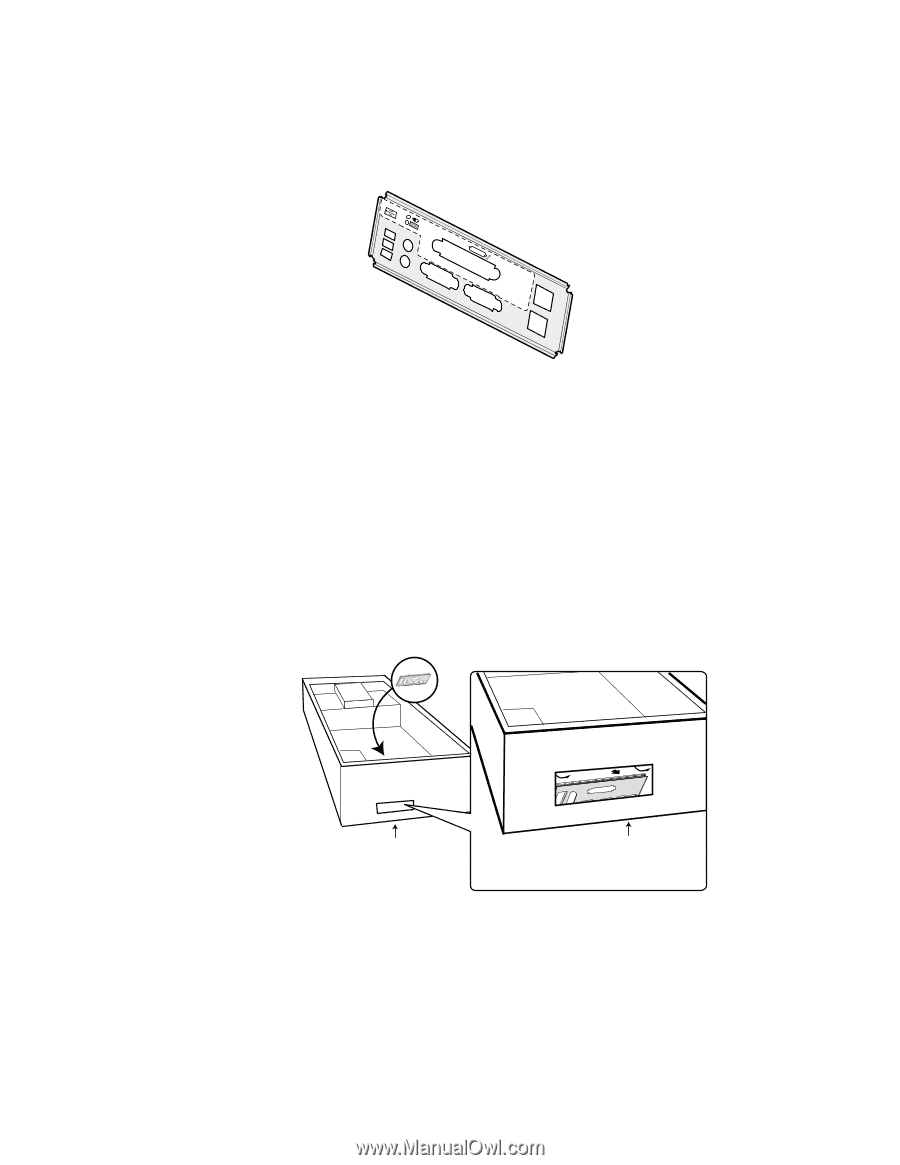
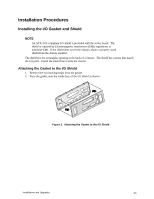
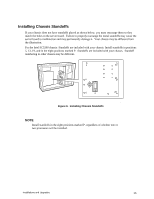
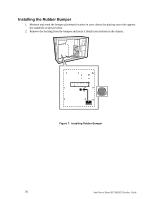
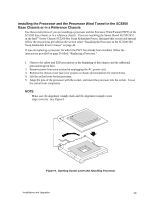
Attaching the Label to the I/O Shield 1. Remove the backing from the label included with your server board. 2. Press the label onto the outside face of the I/O shield. USB 1 2 3 KMYOBUDSE PARALLEL (GNbIiCt)1 (GNbIiCt)2 TP00029 Figure 4. Attaching the Label to the I/O Shield Installing the I/O Shield The shield fits into the rectangular opening in the back of a chassis. It has cutouts that match the I/O ports on the server board. Install the shield from inside the chassis before installing the server board. 1. Position one edge so that the dotted groove is outside the chassis wall, and the lip of the shield rests on the inner chassis wall. 2. Hold the shield in place, and push it into the opening until it is seated. Make sure the I/O shield snaps into place all the way around. Insert top edge as shown. Shield installs from inside of chassis. Chassis back Chassis back Rotate into chassis opening until shield clicks into place. Figure 5. Installing the I/O Shield OM14625 34 Intel Server Board SE7501HG2 Product Guide
-
 1
1 -
2
-
3
-
4
-
5
-
6
-
7
-
8
-
9
-
10
-
11
-
12
-
13
-
14
-
15
-
16
-
17
-
18
-
19
-
20
-
21
-
22
-
23
-
24
-
25
-
26
-
27
-
28
-
 29
29 -
 30
30 -
 31
31 -
 32
32 -
 33
33 -
 34
34 -
 35
35 -
 36
36 -
 37
37 -
 38
38 -
 39
39 -
40
-
41
-
42
-
43
-
44
-
45
-
46
-
47
-
48
-
49
-
50
-
51
-
52
-
53
-
54
-
55
-
56
-
57
-
58
-
59
-
60
-
61
-
62
-
63
-
64
-
65
-
66
-
67
-
68
-
69
-
70
-
71
-
72
-
73
-
74
-
75
-
76
-
77
-
78
-
79
-
80
-
81
-
82
-
83
-
84
-
85
-
86
-
87
-
88
-
89
-
90
-
91
-
92
-
93
-
94
-
95
-
96
-
97
-
98
-
99
-
100
-
101
-
102
-
103
-
104
-
105
-
106
-
107
-
108
-
109
-
110
-
111
-
112
-
113
-
114
-
115
-
116
-
117
-
118
-
119
-
120
-
121
-
122
-
123
-
124
-
125
-
126
-
127
-
128
-
129
-
130
-
131
-
132
-
133
-
134
-
135
-
136
-
137
-
138
-
139
-
140
 |
 |