Lexmark 4079 colorjet printer plus Service Manual - Page 139
careful, drive
 |
View all Lexmark 4079 colorjet printer plus manuals
Add to My Manuals
Save this manual to your list of manuals |
Page 139 highlights
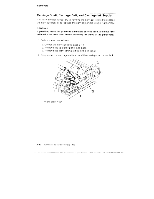
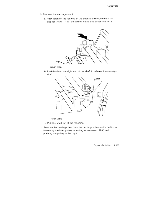
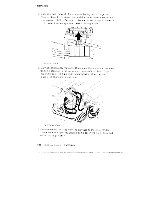
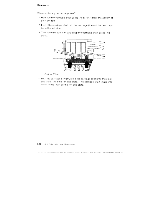
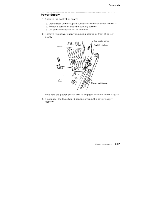
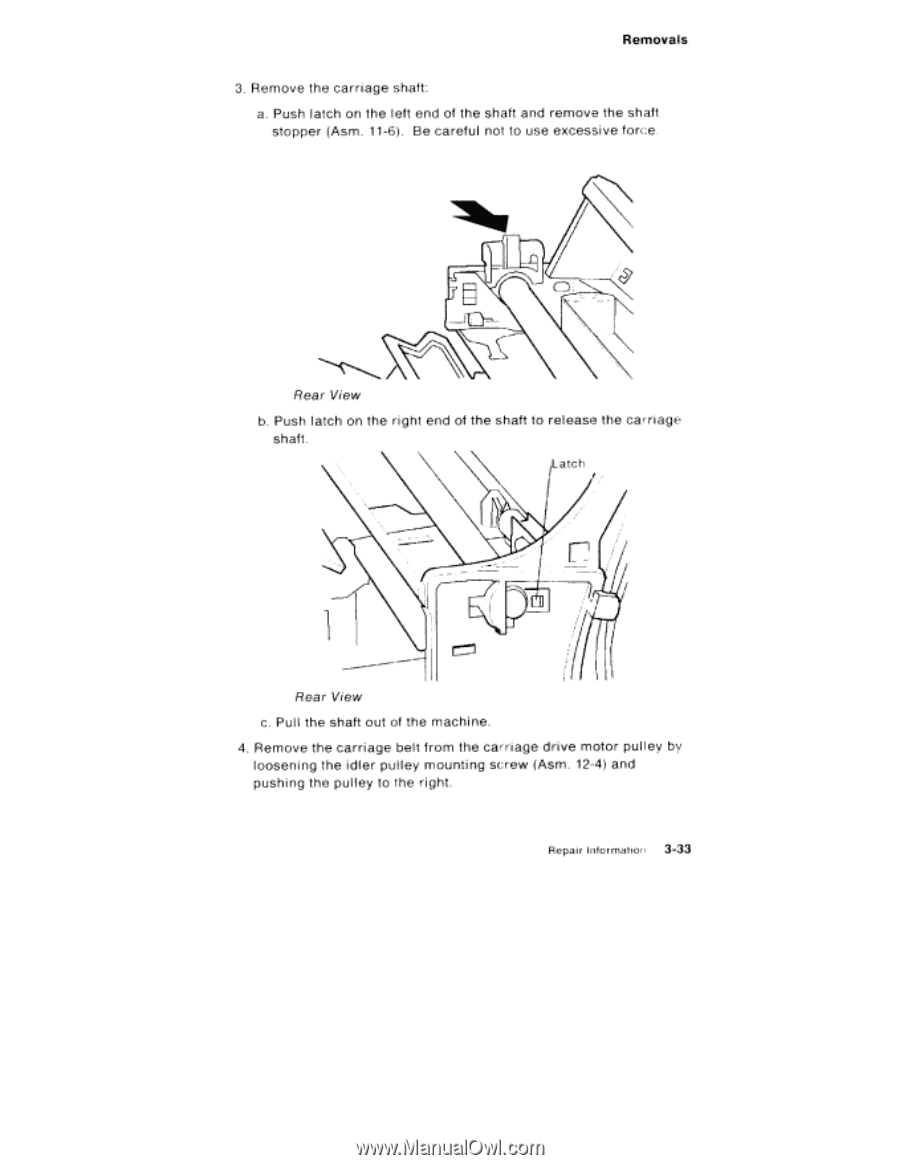
Removals 3. Remove the carriage shaft: a. Push latch on the left end of the shaft and remove the shaft stopper (Asm. 11-6). Be careful not to use excessive force N Rear View b. Push latch on the right end of the shaft to release the carriage shaft. Latch Rear View c. Pull the shaft out of the machine. 4. Remove the carriage belt from the carriage drive motor pulley by loosening the idler pulley mounting screw (Asm. 12-4) and pushing the pulley to the right. Repair Information 3-33
-
 1
1 -
2
-
3
-
4
-
5
-
6
-
7
-
8
-
9
-
10
-
11
-
12
-
13
-
14
-
15
-
16
-
17
-
18
-
19
-
20
-
21
-
22
-
23
-
24
-
25
-
26
-
27
-
28
-
29
-
30
-
31
-
32
-
33
-
34
-
35
-
36
-
37
-
38
-
39
-
40
-
41
-
42
-
43
-
44
-
45
-
46
-
47
-
48
-
49
-
50
-
51
-
52
-
53
-
54
-
55
-
56
-
57
-
58
-
59
-
60
-
61
-
62
-
63
-
64
-
65
-
66
-
67
-
68
-
69
-
70
-
71
-
72
-
73
-
74
-
75
-
76
-
77
-
78
-
79
-
80
-
81
-
82
-
83
-
84
-
85
-
86
-
87
-
88
-
89
-
90
-
91
-
92
-
93
-
94
-
95
-
96
-
97
-
98
-
99
-
100
-
101
-
102
-
103
-
104
-
105
-
106
-
107
-
108
-
109
-
110
-
111
-
112
-
113
-
114
-
115
-
116
-
117
-
118
-
119
-
120
-
121
-
122
-
123
-
124
-
125
-
126
-
127
-
128
-
129
-
130
-
131
-
132
-
133
-
 134
134 -
 135
135 -
 136
136 -
 137
137 -
 138
138 -
 139
139 -
 140
140 -
 141
141 -
 142
142 -
 143
143 -
 144
144 -
145
-
146
-
147
-
148
-
149
-
150
-
151
-
152
-
153
-
154
-
155
-
156
-
157
-
158
-
159
-
160
-
161
-
162
-
163
-
164
-
165
-
166
-
167
-
168
-
169
-
170
-
171
-
172
-
173
-
174
-
175
-
176
-
177
-
178
-
179
-
180
-
181
-
182
-
183
-
184
-
185
-
186
-
187
-
188
-
189
-
190
-
191
-
192
-
193
-
194
-
195
-
196
-
197
-
198
-
199
-
200
-
201
-
202
-
203
-
204
-
205
-
206
-
207
-
208
-
209
-
210
-
211
-
212
-
213
-
214
-
215
-
216
-
217
-
218
-
219
-
220
-
221
-
222
-
223
-
224
-
225
-
226
-
227
-
228
-
229
-
230
-
231
-
232
 |
 |
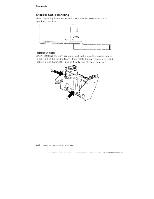
Removals
3.
Remove
the
carriage
shaft:
a.
Push
latch
on
the
left
end
of
the
shaft
and
remove
the
shaft
stopper
(Asm.
11-6).
Be
careful
not
to
use
excessive
force
N
Rear
View
b.
Push
latch
on
the
right
end
of
the
shaft
to
release
the
carriage
shaft.
Latch
Rear
View
c.
Pull
the
shaft
out
of
the
machine.
4.
Remove
the
carriage
belt
from
the
carriage
drive
motor
pulley
by
loosening
the
idler
pul
ley
mounting
screw
(Asm.
12-4)
and
pushing
the
pulley
to
the
right.
Repair
Information
3-33