Lexmark 4079 colorjet printer plus Service Manual - Page 153
Carriage, Frame, disconnecting
 |
View all Lexmark 4079 colorjet printer plus manuals
Add to My Manuals
Save this manual to your list of manuals |
Page 153 highlights
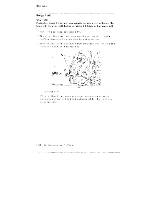
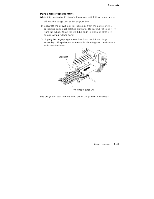
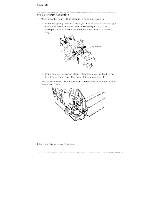
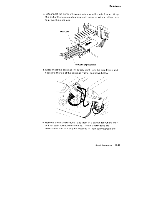
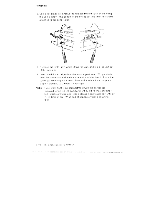
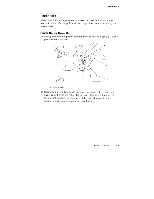
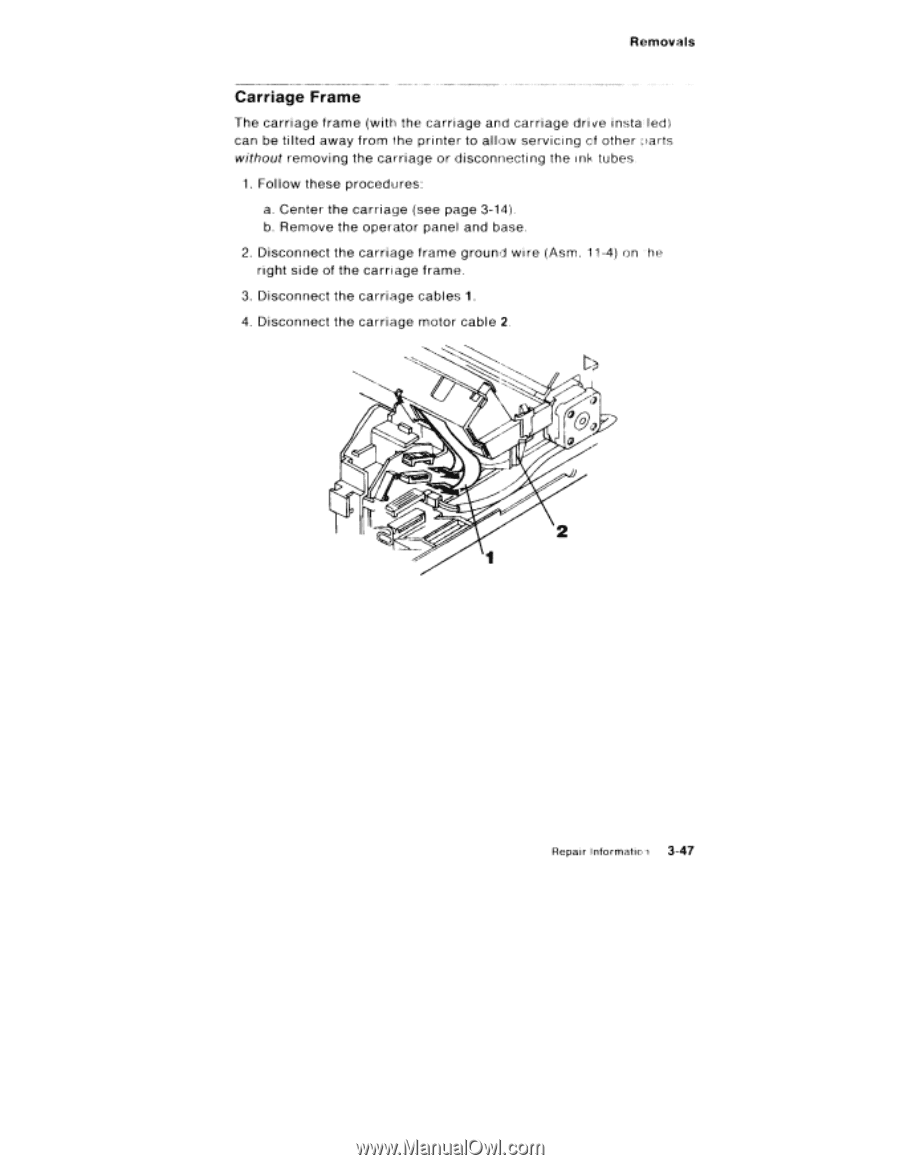
Removals Carriage Frame The carriage frame (with the carriage and carriage drive insta ledl can be tilted away from the printer to allow servicing of other parts without removing the carriage or disconnecting the ink tubes. 1. Follow these procedures: a. Center the carriage (see page 3-14). b. Remove the operator panel and base. 2. Disconnect the carriage frame ground wire (Asm. 11-4) on he right side of the carriage frame. 3. Disconnect the carriage cables 1. 4. Disconnect the carriage motor cable 2. 2 Repair Informatio i 3-47
-
 1
1 -
2
-
3
-
4
-
5
-
6
-
7
-
8
-
9
-
10
-
11
-
12
-
13
-
14
-
15
-
16
-
17
-
18
-
19
-
20
-
21
-
22
-
23
-
24
-
25
-
26
-
27
-
28
-
29
-
30
-
31
-
32
-
33
-
34
-
35
-
36
-
37
-
38
-
39
-
40
-
41
-
42
-
43
-
44
-
45
-
46
-
47
-
48
-
49
-
50
-
51
-
52
-
53
-
54
-
55
-
56
-
57
-
58
-
59
-
60
-
61
-
62
-
63
-
64
-
65
-
66
-
67
-
68
-
69
-
70
-
71
-
72
-
73
-
74
-
75
-
76
-
77
-
78
-
79
-
80
-
81
-
82
-
83
-
84
-
85
-
86
-
87
-
88
-
89
-
90
-
91
-
92
-
93
-
94
-
95
-
96
-
97
-
98
-
99
-
100
-
101
-
102
-
103
-
104
-
105
-
106
-
107
-
108
-
109
-
110
-
111
-
112
-
113
-
114
-
115
-
116
-
117
-
118
-
119
-
120
-
121
-
122
-
123
-
124
-
125
-
126
-
127
-
128
-
129
-
130
-
131
-
132
-
133
-
134
-
135
-
136
-
137
-
138
-
139
-
140
-
141
-
142
-
143
-
144
-
145
-
146
-
147
-
 148
148 -
 149
149 -
 150
150 -
 151
151 -
 152
152 -
 153
153 -
 154
154 -
 155
155 -
 156
156 -
 157
157 -
 158
158 -
159
-
160
-
161
-
162
-
163
-
164
-
165
-
166
-
167
-
168
-
169
-
170
-
171
-
172
-
173
-
174
-
175
-
176
-
177
-
178
-
179
-
180
-
181
-
182
-
183
-
184
-
185
-
186
-
187
-
188
-
189
-
190
-
191
-
192
-
193
-
194
-
195
-
196
-
197
-
198
-
199
-
200
-
201
-
202
-
203
-
204
-
205
-
206
-
207
-
208
-
209
-
210
-
211
-
212
-
213
-
214
-
215
-
216
-
217
-
218
-
219
-
220
-
221
-
222
-
223
-
224
-
225
-
226
-
227
-
228
-
229
-
230
-
231
-
232
 |
 |
Removals
Carriage
Frame
The
carriage
frame
(with
the
carriage
and
carriage
drive
insta
ledl
can
be
ti
lted
away
from
the
printer
to
allow
servicing
of
other
parts
without
removing
the
carriage
or
disconnecting
the
ink
tubes.
1.
Follow
these
procedures:
a.
Center
the
carriage
(see
page
3-14).
b.
Remove the
operator
panel
and
base.
2.
Disconnect
the
carriage
frame
ground
wire
(Asm.
11-4)
on
he
right
side
of
the
carriage
frame.
3.
Disconnect
the
carriage
cables
1.
4.
Disconnect
the
carriage
motor
cable
2.
2
Repair
Informatio
i
3-47