Lexmark 4079 colorjet printer plus Service Manual - Page 151
positions., cartridges.
 |
View all Lexmark 4079 colorjet printer plus manuals
Add to My Manuals
Save this manual to your list of manuals |
Page 151 highlights
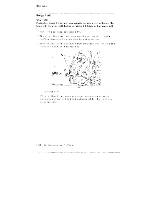
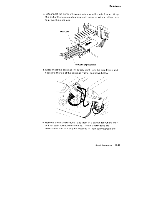
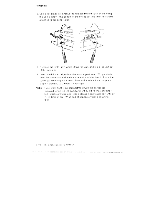
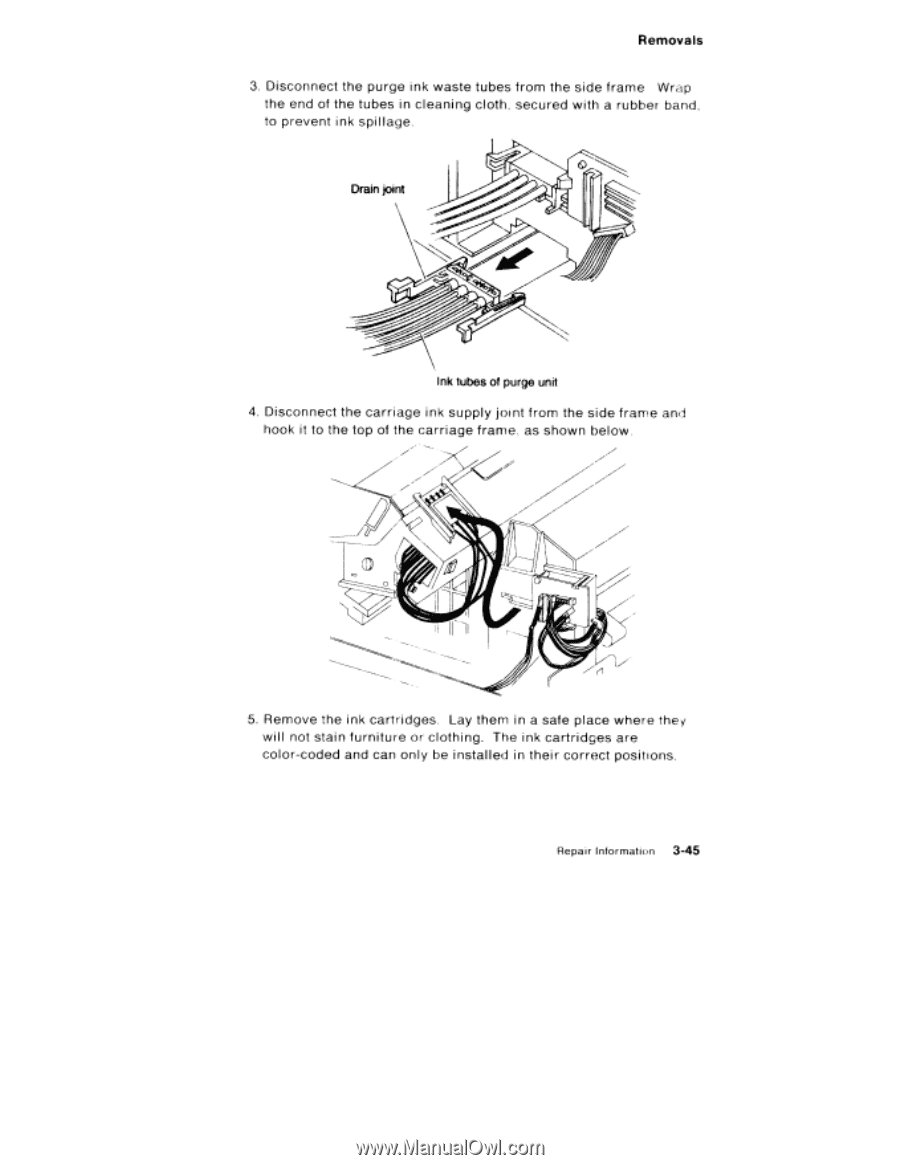
Removals 3. Disconnect the purge ink waste tubes from the side frame Wrap the end of the tubes in cleaning cloth, secured with a rubber band, to prevent ink spillage. Drain joint Ink tubes of purge unit 4. Disconnect the carriage ink supply joint from the side frame and hook it to the top of the carriage frame as shown below. 7 -1t 5. Remove the ink cartridges. Lay them in a safe place where they will not stain furniture or clothing. The ink cartridges are color-coded and can only be installed in their correct positions. Repair Information 3-45
-
 1
1 -
2
-
3
-
4
-
5
-
6
-
7
-
8
-
9
-
10
-
11
-
12
-
13
-
14
-
15
-
16
-
17
-
18
-
19
-
20
-
21
-
22
-
23
-
24
-
25
-
26
-
27
-
28
-
29
-
30
-
31
-
32
-
33
-
34
-
35
-
36
-
37
-
38
-
39
-
40
-
41
-
42
-
43
-
44
-
45
-
46
-
47
-
48
-
49
-
50
-
51
-
52
-
53
-
54
-
55
-
56
-
57
-
58
-
59
-
60
-
61
-
62
-
63
-
64
-
65
-
66
-
67
-
68
-
69
-
70
-
71
-
72
-
73
-
74
-
75
-
76
-
77
-
78
-
79
-
80
-
81
-
82
-
83
-
84
-
85
-
86
-
87
-
88
-
89
-
90
-
91
-
92
-
93
-
94
-
95
-
96
-
97
-
98
-
99
-
100
-
101
-
102
-
103
-
104
-
105
-
106
-
107
-
108
-
109
-
110
-
111
-
112
-
113
-
114
-
115
-
116
-
117
-
118
-
119
-
120
-
121
-
122
-
123
-
124
-
125
-
126
-
127
-
128
-
129
-
130
-
131
-
132
-
133
-
134
-
135
-
136
-
137
-
138
-
139
-
140
-
141
-
142
-
143
-
144
-
145
-
 146
146 -
 147
147 -
 148
148 -
 149
149 -
 150
150 -
 151
151 -
 152
152 -
 153
153 -
 154
154 -
 155
155 -
 156
156 -
157
-
158
-
159
-
160
-
161
-
162
-
163
-
164
-
165
-
166
-
167
-
168
-
169
-
170
-
171
-
172
-
173
-
174
-
175
-
176
-
177
-
178
-
179
-
180
-
181
-
182
-
183
-
184
-
185
-
186
-
187
-
188
-
189
-
190
-
191
-
192
-
193
-
194
-
195
-
196
-
197
-
198
-
199
-
200
-
201
-
202
-
203
-
204
-
205
-
206
-
207
-
208
-
209
-
210
-
211
-
212
-
213
-
214
-
215
-
216
-
217
-
218
-
219
-
220
-
221
-
222
-
223
-
224
-
225
-
226
-
227
-
228
-
229
-
230
-
231
-
232
 |
 |
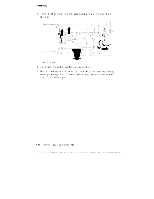
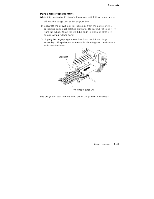
Removals
3.
Disconnect
the
purge
ink
waste
tubes
from
the
side
frame
Wrap
the
end
of
the
tubes
in
cleaning
cloth,
secured
with
a
rubber
band,
to
prevent
ink
spi
l
lage.
Drain
joint
Ink
tubes
of
purge
unit
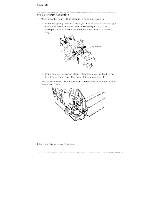
4.
Disconnect
the
carriage
ink
supply
joint
from
the
side
frame
and
hook
it
to
the
top
of
the
carriage
frame
as
shown
below.
7
-
1t
5.
Remove
the
ink
cartridges.
Lay
them
in
a
safe
place
where
they
will
not
stain
furniture
or
clothing.
The
ink
cartridges
are
color
-coded
and
can
only
be
instal
led
in
their
correct
positions.
Repair
Information
3-45