Lexmark 4079 colorjet printer plus Service Manual - Page 97
Print, Sample, niagnostic, information
 |
View all Lexmark 4079 colorjet printer plus manuals
Add to My Manuals
Save this manual to your list of manuals |
Page 97 highlights
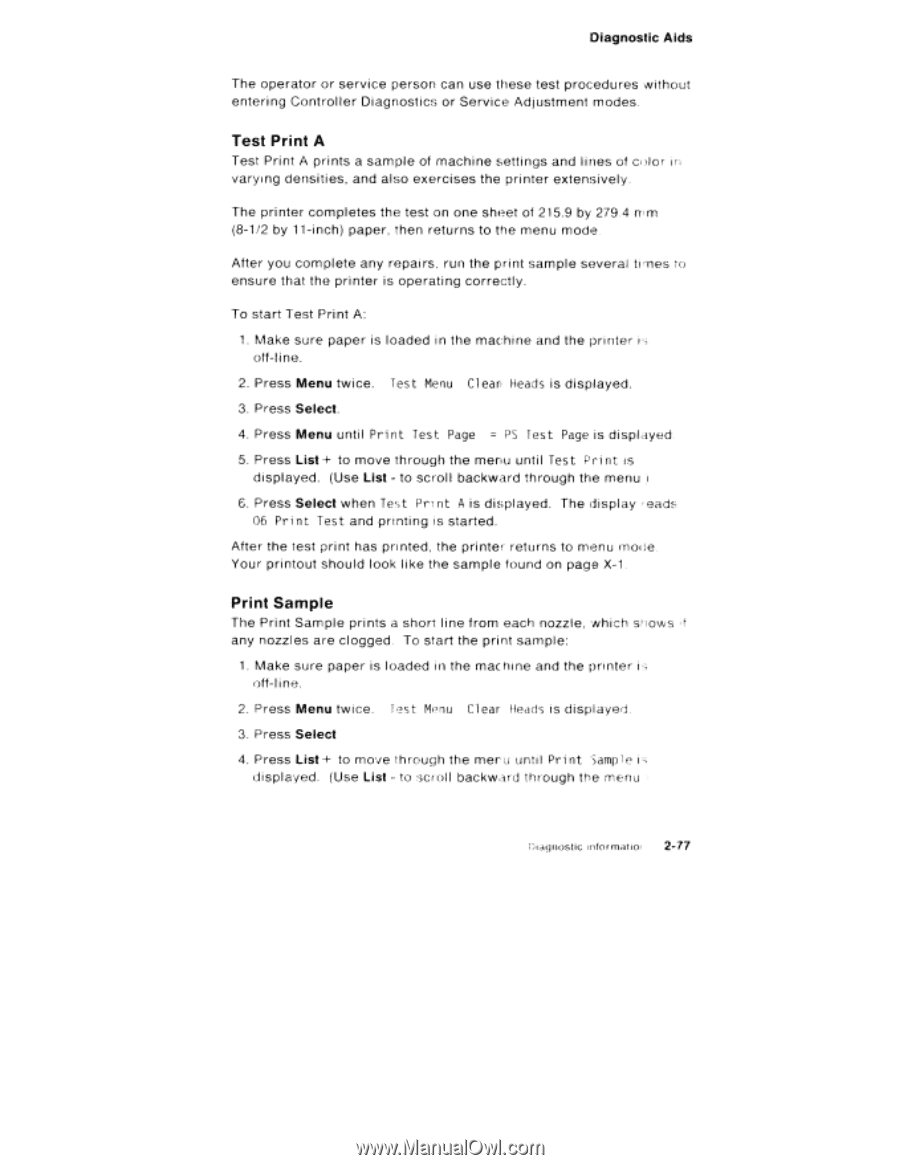
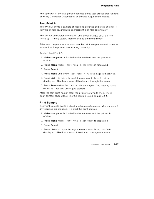
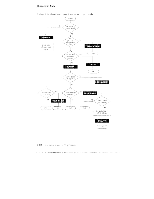
Diagnostic Aids The operator or service person can use these test procedures without entering Controller Diagnostics or Service Adjustment modes. Test Print A Test Print A prints a sample of machine settings and lines of c4 Jlor in varying densities, and also exercises the printer extensively. The printer completes the test on one sheet of 215.9 by 279.4 rrm (8-1/2 by 11-inch) paper, then returns to the menu mode. After you complete any repairs, run the print sample several times to ensure that the printer is operating correctly. To start Test Print A: 1. Make sure paper is loaded in the machine and the printer i5 off-line. 2. Press Menu twice. Test Menu Clean Heads is displayed. 3. Press Select. 4. Press Menu until Print Test Page = PS Test Page is displayed 5. Press List -} to move through the menu until Test Print is displayed. (Use List - to scroll backward through the menu 6. Press Select when Test Print A is displayed. The display eads 06 Print Test and printing is started. After the test print has printed, the printer returns to menu mode. Your printout should look like the sample found on page X-1. Print Sample The Print Sample prints a short line from each nozzle, which shows if any nozzles are clogged. To start the print sample: 1. Make sure paper is loaded in the machine and the printer off-l ine. 2. Press Menu twice. lest Menu Clear Heads is displayed. 3. Press Select 4. Press List + to move through the mere unti l Print Sample is displayed. (Use List to scroll backward through the menu • niagnostic information 2-77
-
 1
1 -
2
-
3
-
4
-
5
-
6
-
7
-
8
-
9
-
10
-
11
-
12
-
13
-
14
-
15
-
16
-
17
-
18
-
19
-
20
-
21
-
22
-
23
-
24
-
25
-
26
-
27
-
28
-
29
-
30
-
31
-
32
-
33
-
34
-
35
-
36
-
37
-
38
-
39
-
40
-
41
-
42
-
43
-
44
-
45
-
46
-
47
-
48
-
49
-
50
-
51
-
52
-
53
-
54
-
55
-
56
-
57
-
58
-
59
-
60
-
61
-
62
-
63
-
64
-
65
-
66
-
67
-
68
-
69
-
70
-
71
-
72
-
73
-
74
-
75
-
76
-
77
-
78
-
79
-
80
-
81
-
82
-
83
-
84
-
85
-
86
-
87
-
88
-
89
-
90
-
91
-
 92
92 -
 93
93 -
 94
94 -
 95
95 -
 96
96 -
 97
97 -
 98
98 -
 99
99 -
 100
100 -
 101
101 -
 102
102 -
103
-
104
-
105
-
106
-
107
-
108
-
109
-
110
-
111
-
112
-
113
-
114
-
115
-
116
-
117
-
118
-
119
-
120
-
121
-
122
-
123
-
124
-
125
-
126
-
127
-
128
-
129
-
130
-
131
-
132
-
133
-
134
-
135
-
136
-
137
-
138
-
139
-
140
-
141
-
142
-
143
-
144
-
145
-
146
-
147
-
148
-
149
-
150
-
151
-
152
-
153
-
154
-
155
-
156
-
157
-
158
-
159
-
160
-
161
-
162
-
163
-
164
-
165
-
166
-
167
-
168
-
169
-
170
-
171
-
172
-
173
-
174
-
175
-
176
-
177
-
178
-
179
-
180
-
181
-
182
-
183
-
184
-
185
-
186
-
187
-
188
-
189
-
190
-
191
-
192
-
193
-
194
-
195
-
196
-
197
-
198
-
199
-
200
-
201
-
202
-
203
-
204
-
205
-
206
-
207
-
208
-
209
-
210
-
211
-
212
-
213
-
214
-
215
-
216
-
217
-
218
-
219
-
220
-
221
-
222
-
223
-
224
-
225
-
226
-
227
-
228
-
229
-
230
-
231
-
232
 |
 |