Lexmark 4079 colorjet printer plus Service Manual - Page 149
Purge, Replacement, Repair, laformatior
 |
View all Lexmark 4079 colorjet printer plus manuals
Add to My Manuals
Save this manual to your list of manuals |
Page 149 highlights
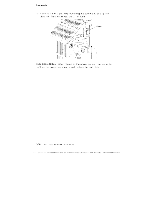
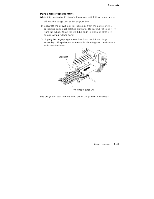
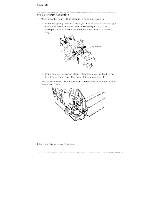
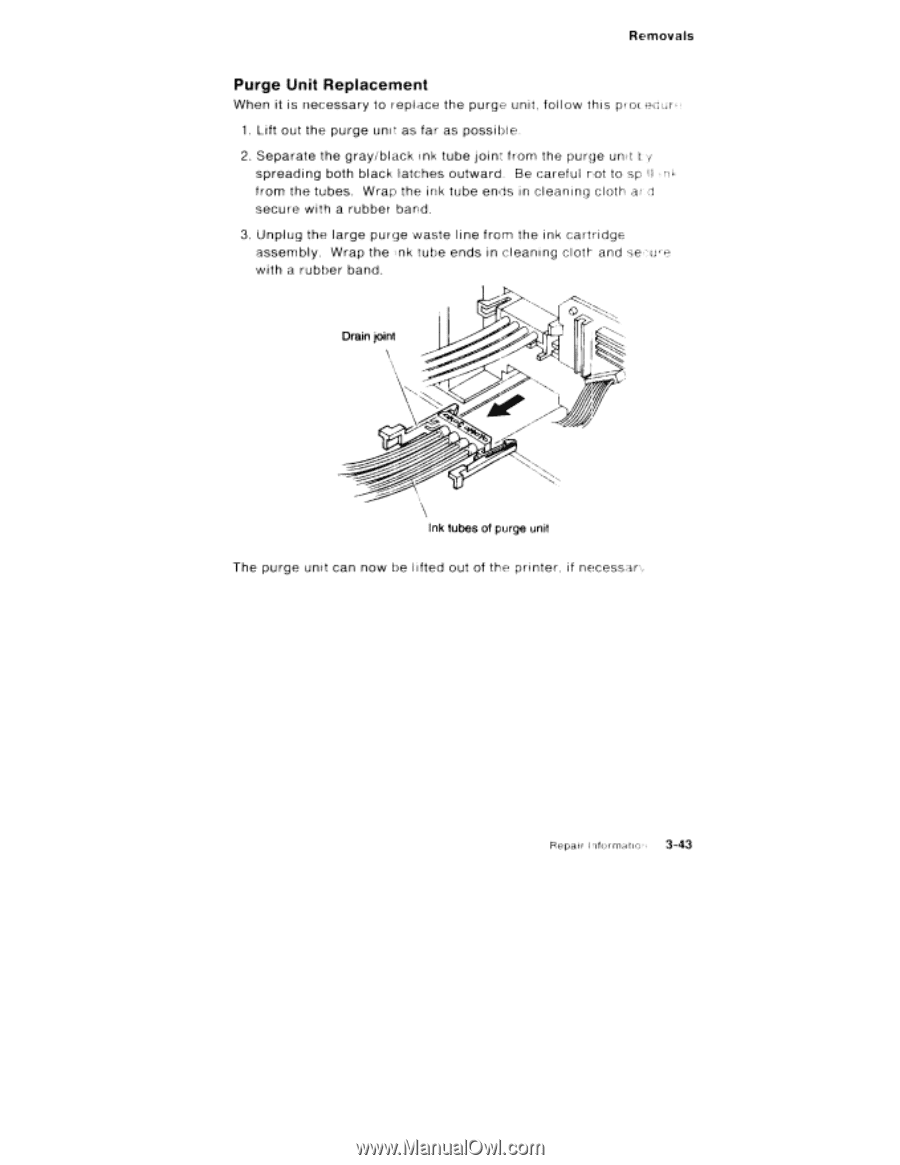
Removals Purge Unit Replacement When it is necessary to replace the purge unit, follow this procedure 1. Lift out the purge unit as far as possible. 2. Separate the gray/black ink tube joint from the purge unit ty spreading both black latches outward. Be careful rot to sp II ,nl< from the tubes. Wrap the ink tube ends in cleaning cloth ar d secure with a rubber band. 3. Unplug the large purge waste line from the ink cartridge assembly. Wrap the nk tube ends in cleaning cloth and se.Tu with a rubber band. FJ Drain joint Ink tubes of purge unit The purge unit can now be l ifted out of the printer, if necessary Repair laformatior 3-43
-
 1
1 -
2
-
3
-
4
-
5
-
6
-
7
-
8
-
9
-
10
-
11
-
12
-
13
-
14
-
15
-
16
-
17
-
18
-
19
-
20
-
21
-
22
-
23
-
24
-
25
-
26
-
27
-
28
-
29
-
30
-
31
-
32
-
33
-
34
-
35
-
36
-
37
-
38
-
39
-
40
-
41
-
42
-
43
-
44
-
45
-
46
-
47
-
48
-
49
-
50
-
51
-
52
-
53
-
54
-
55
-
56
-
57
-
58
-
59
-
60
-
61
-
62
-
63
-
64
-
65
-
66
-
67
-
68
-
69
-
70
-
71
-
72
-
73
-
74
-
75
-
76
-
77
-
78
-
79
-
80
-
81
-
82
-
83
-
84
-
85
-
86
-
87
-
88
-
89
-
90
-
91
-
92
-
93
-
94
-
95
-
96
-
97
-
98
-
99
-
100
-
101
-
102
-
103
-
104
-
105
-
106
-
107
-
108
-
109
-
110
-
111
-
112
-
113
-
114
-
115
-
116
-
117
-
118
-
119
-
120
-
121
-
122
-
123
-
124
-
125
-
126
-
127
-
128
-
129
-
130
-
131
-
132
-
133
-
134
-
135
-
136
-
137
-
138
-
139
-
140
-
141
-
142
-
143
-
 144
144 -
 145
145 -
 146
146 -
 147
147 -
 148
148 -
 149
149 -
 150
150 -
 151
151 -
 152
152 -
 153
153 -
 154
154 -
155
-
156
-
157
-
158
-
159
-
160
-
161
-
162
-
163
-
164
-
165
-
166
-
167
-
168
-
169
-
170
-
171
-
172
-
173
-
174
-
175
-
176
-
177
-
178
-
179
-
180
-
181
-
182
-
183
-
184
-
185
-
186
-
187
-
188
-
189
-
190
-
191
-
192
-
193
-
194
-
195
-
196
-
197
-
198
-
199
-
200
-
201
-
202
-
203
-
204
-
205
-
206
-
207
-
208
-
209
-
210
-
211
-
212
-
213
-
214
-
215
-
216
-
217
-
218
-
219
-
220
-
221
-
222
-
223
-
224
-
225
-
226
-
227
-
228
-
229
-
230
-
231
-
232
 |
 |
Removals
Purge
Unit
Replacement
When
it
is
necessary
to
replace
the
purge
unit,
fol
low
this
procedure
1.
Lift
out
the
purge
unit
as
far
as
possible.
2.
Separate
the
gray/black
ink
tube
joint
from
the
purge
unit
ty
spreading
both
black
latches
outward.
Be
careful
rot
to
sp
I
I
,nl<
from
the
tubes.
Wrap
the
ink
tube
ends
in
cleaning
cloth
ar
d
secure
with
a
rubber
band.
3.
Unplug
the
large
purge
waste
l
ine
from
the
ink
cartridge
assembly.
Wrap
the
nk
tube
ends
in
cleaning
cloth
and
se.Tu
with
a
rubber
band.
FJ
Drain
joint
Ink
tubes
of
purge
unit
The
purge
unit
can
now
be
l
ifted
out
of
the
printer,
if
necessary
Repair
laformatior
3-43