Netgear AC2300 User Manual - Page 105
Set Up and Manage Dynamic DNS, Set Up FTP Access Through the Internet, To set up FTP access
 |
View all Netgear AC2300 manuals
Add to My Manuals
Save this manual to your list of manuals |
Page 105 highlights
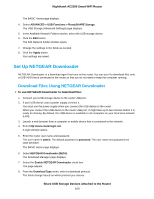
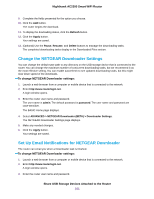
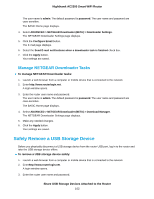
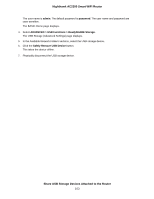
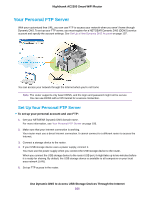
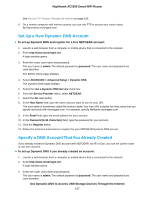
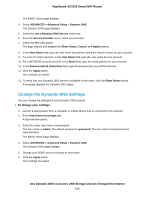
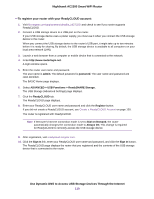
Nighthawk AC2300 Smart WiFi Router Set Up and Manage Dynamic DNS Internet service providers (ISPs) assign numbers called IP addresses to identify each Internet account. Most ISPs use dynamically assigned IP addresses. This means that the IP address can change at any time. You can use the IP address to access your network remotely, but most people don't know what their IP addresses are or when this number changes. To make it easier to connect, you can get a free account with a Dynamic DNS service that lets you use a domain name to access your home network. To use this account, you must set up the router to use Dynamic DNS. Then the router notifies the Dynamic DNS service provider whenever its IP address changes. When you access your Dynamic DNS account, the service finds the current IP address of your home network and automatically connects you. If your ISP assigns a private WAN IP address (such as 192.168.x.x or 10.x.x.x), the Dynamic DNS service does not work because private addresses are not routed on the Internet. Set Up FTP Access Through the Internet To set up FTP access: 1. Launch a web browser from a computer or moblile device that is connected to the network. 2. Enter http://www.routerlogin.net. A login window opens. 3. Enter the router user name and password. The user name is admin. The default password is password. The user name and password are case-sensitive. The BASIC Home page displays. 4. Select ADVANCED > ReadySHARE > ReadySHARE Storage > Advanced Settings. The USB Storage (Advanced Settings) page displays. 5. Select the FTP (via Internet) check box. 6. Click the Apply button. Your settings are saved. 7. To limit access to the admin user, select a device in the Available Network Folder's section. If only one device is connected, it is automatically selected. 8. Click the Edit button. The Edit page displays. 9. In the Read Access list, select admin. 10. In the Write Access list, select admin. 11. Click the Apply button. Your settings are saved. Use Dynamic DNS to Access USB Storage Devices Through the Internet 105
-
 1
1 -
2
-
3
-
4
-
5
-
6
-
7
-
8
-
9
-
10
-
11
-
12
-
13
-
14
-
15
-
16
-
17
-
18
-
19
-
20
-
21
-
22
-
23
-
24
-
25
-
26
-
27
-
28
-
29
-
30
-
31
-
32
-
33
-
34
-
35
-
36
-
37
-
38
-
39
-
40
-
41
-
42
-
43
-
44
-
45
-
46
-
47
-
48
-
49
-
50
-
51
-
52
-
53
-
54
-
55
-
56
-
57
-
58
-
59
-
60
-
61
-
62
-
63
-
64
-
65
-
66
-
67
-
68
-
69
-
70
-
71
-
72
-
73
-
74
-
75
-
76
-
77
-
78
-
79
-
80
-
81
-
82
-
83
-
84
-
85
-
86
-
87
-
88
-
89
-
90
-
91
-
92
-
93
-
94
-
95
-
96
-
97
-
98
-
99
-
 100
100 -
 101
101 -
 102
102 -
 103
103 -
 104
104 -
 105
105 -
 106
106 -
 107
107 -
 108
108 -
 109
109 -
 110
110 -
111
-
112
-
113
-
114
-
115
-
116
-
117
-
118
-
119
-
120
-
121
-
122
-
123
-
124
-
125
-
126
-
127
-
128
-
129
-
130
-
131
-
132
-
133
-
134
-
135
-
136
-
137
-
138
-
139
-
140
-
141
-
142
-
143
-
144
-
145
-
146
-
147
-
148
-
149
-
150
-
151
-
152
-
153
-
154
-
155
 |
 |