Netgear AC2300 User Manual - Page 14
Cable Your Router, Disable or Enable LED Blinking or Turn Off LEDs
 |
View all Netgear AC2300 manuals
Add to My Manuals
Save this manual to your list of manuals |
Page 14 highlights
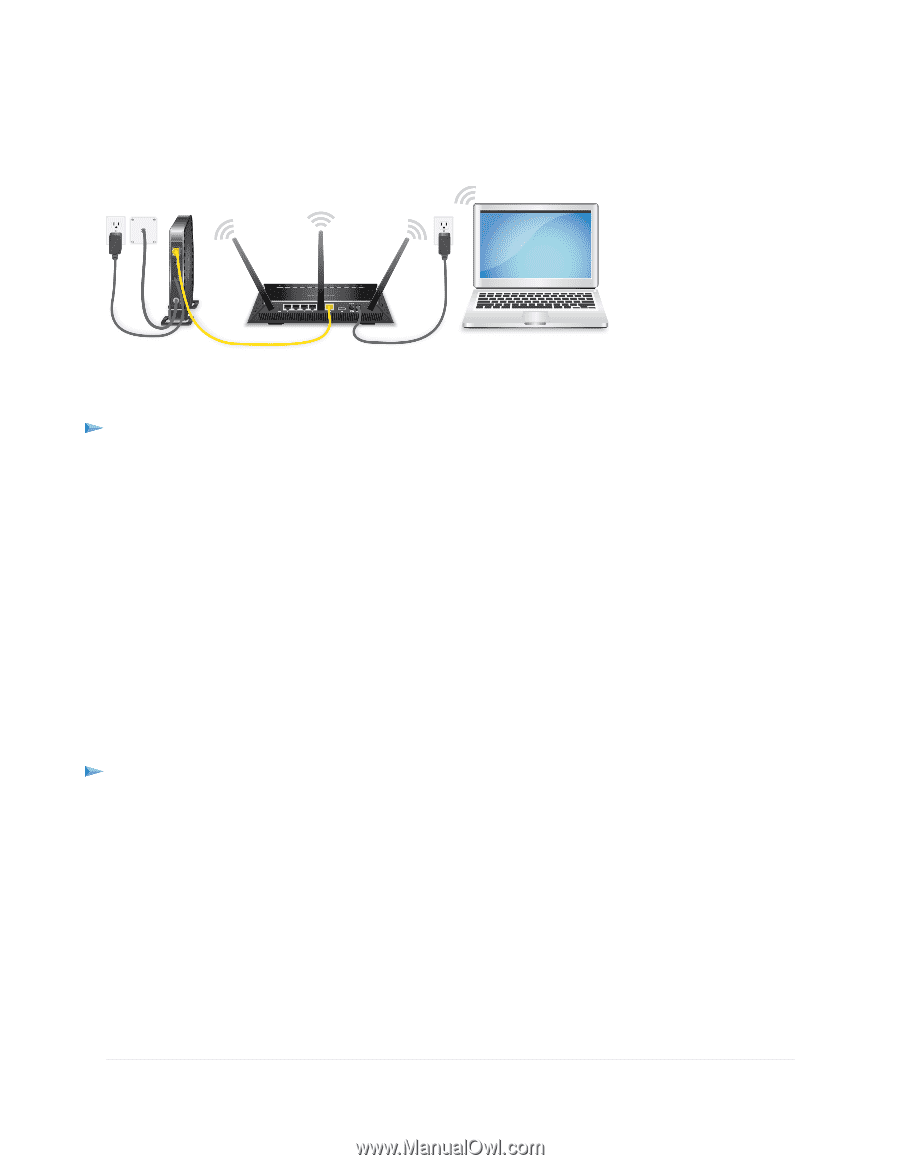
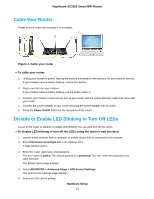
Nighthawk AC2300 Smart WiFi Router Cable Your Router Power on your router and connect it to a modem. Figure 4. Cable your router To cable your router: 1. Unplug your modem's power, leaving the modem connected to the wall jack for your Internet service. If your modem uses a battery backup, remove the battery. 2. Plug in and turn on your modem. If your modem uses a battery backup, put the battery back in. 3. Connect your modem to the Internet port of your router with the yellow Ethernet cable that came with your router. 4. Connect the power adapter to your router and plug the power adapter into an outlet. 5. Press the Power On/Off button on the rear panel of the router. Disable or Enable LED Blinking or Turn Off LEDs Log in to the router to disable or enable LED blinking. You can also turn off the LEDs. To disable LED blinking or turn off the LEDs using the router's web interface: 1. Launch a web browser from a computer or mobile device that is connected to the network. 2. Enter http://www.routerlogin.net in the address field. A login window opens. 3. Enter the router user name and password. The user name is admin. The default password is password. The user name and password are case-sensitive. The BASIC Home page displays. 4. Select ADVANCED > Advanced Setup > LED Control Settings. The LED Control Settings page displays. 5. Select an LED control setting: Hardware Setup 14
-
 1
1 -
2
-
3
-
4
-
5
-
6
-
7
-
8
-
 9
9 -
 10
10 -
 11
11 -
 12
12 -
 13
13 -
 14
14 -
 15
15 -
 16
16 -
 17
17 -
 18
18 -
 19
19 -
20
-
21
-
22
-
23
-
24
-
25
-
26
-
27
-
28
-
29
-
30
-
31
-
32
-
33
-
34
-
35
-
36
-
37
-
38
-
39
-
40
-
41
-
42
-
43
-
44
-
45
-
46
-
47
-
48
-
49
-
50
-
51
-
52
-
53
-
54
-
55
-
56
-
57
-
58
-
59
-
60
-
61
-
62
-
63
-
64
-
65
-
66
-
67
-
68
-
69
-
70
-
71
-
72
-
73
-
74
-
75
-
76
-
77
-
78
-
79
-
80
-
81
-
82
-
83
-
84
-
85
-
86
-
87
-
88
-
89
-
90
-
91
-
92
-
93
-
94
-
95
-
96
-
97
-
98
-
99
-
100
-
101
-
102
-
103
-
104
-
105
-
106
-
107
-
108
-
109
-
110
-
111
-
112
-
113
-
114
-
115
-
116
-
117
-
118
-
119
-
120
-
121
-
122
-
123
-
124
-
125
-
126
-
127
-
128
-
129
-
130
-
131
-
132
-
133
-
134
-
135
-
136
-
137
-
138
-
139
-
140
-
141
-
142
-
143
-
144
-
145
-
146
-
147
-
148
-
149
-
150
-
151
-
152
-
153
-
154
-
155
 |
 |