Netgear AC2300 User Manual - Page 122
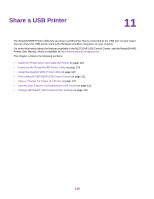
View or Change the Status of a Printer, Use the Scan Feature of a Multifunction USB Printer
 |
View all Netgear AC2300 manuals
Add to My Manuals
Save this manual to your list of manuals |
Page 122 highlights
Nighthawk AC2300 Smart WiFi Router View or Change the Status of a Printer To view or change the status: 1. Click the NETGEAR USB Control Center icon . The NETGEAR USB Control Center page displays. The Status column shows the status for each device: • Available. No print jobs are in progress. You can use the USB printer from any computer in the network. • Connected. Your computer is connected to the printer and will be released when your print job is done. • Manually Connected by. Only the connected computer can use the printer. • Waiting to Connect. Your computer is not connected to the shared printer yet. 2. To print from your computer when the status shows Manually connected by another computer, do the following: a. Click the Connect button on your computer. On the other user's computer, a message displays that another user wants to connect to the printer. b. On the other user's computer, click the Accept button. The printer is released from the connection and the status changes to Available. 3. To print from your computer when the status shows Waiting to Connect, do the following: a. Click the Connect button. The printer status changes to Manually connected by Mycomputer. Now only your computer can use the printer. b. To allow the printer to be shared, click the Disconnect button. The printer is released from the connection and the status changes to Available. Use the Scan Feature of a Multifunction USB Printer If your USB printer supports scanning, you can also use the USB printer for scanning. To use the scan feature of a multifunction USB printer: 1. Click the NETGEAR USB Control Center icon . The NETGEAR USB Control Center page displays. 2. Make sure that the printer status shows as Available. Share a USB Printer 122
-
 1
1 -
2
-
3
-
4
-
5
-
6
-
7
-
8
-
9
-
10
-
11
-
12
-
13
-
14
-
15
-
16
-
17
-
18
-
19
-
20
-
21
-
22
-
23
-
24
-
25
-
26
-
27
-
28
-
29
-
30
-
31
-
32
-
33
-
34
-
35
-
36
-
37
-
38
-
39
-
40
-
41
-
42
-
43
-
44
-
45
-
46
-
47
-
48
-
49
-
50
-
51
-
52
-
53
-
54
-
55
-
56
-
57
-
58
-
59
-
60
-
61
-
62
-
63
-
64
-
65
-
66
-
67
-
68
-
69
-
70
-
71
-
72
-
73
-
74
-
75
-
76
-
77
-
78
-
79
-
80
-
81
-
82
-
83
-
84
-
85
-
86
-
87
-
88
-
89
-
90
-
91
-
92
-
93
-
94
-
95
-
96
-
97
-
98
-
99
-
100
-
101
-
102
-
103
-
104
-
105
-
106
-
107
-
108
-
109
-
110
-
111
-
112
-
113
-
114
-
115
-
116
-
 117
117 -
 118
118 -
 119
119 -
 120
120 -
 121
121 -
 122
122 -
 123
123 -
 124
124 -
 125
125 -
 126
126 -
 127
127 -
128
-
129
-
130
-
131
-
132
-
133
-
134
-
135
-
136
-
137
-
138
-
139
-
140
-
141
-
142
-
143
-
144
-
145
-
146
-
147
-
148
-
149
-
150
-
151
-
152
-
153
-
154
-
155
 |
 |
