Netgear AC2300 User Manual - Page 93
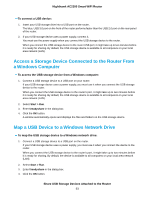
Access a Storage Device Connected to the Router From a Windows Computer
 |
View all Netgear AC2300 manuals
Add to My Manuals
Save this manual to your list of manuals |
Page 93 highlights
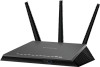
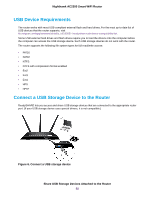
Nighthawk AC2300 Smart WiFi Router To connect a USB device: 1. Insert your USB storage drive into a USB port on the router. The blue, USB 3.0 port on the front of the router performs faster than the USB 2.0 port on the rear panel of the router. 2. If your USB storage device uses a power supply, connect it. You must use the power supply when you connect the USB storage device to the router. When you connect the USB storage device to the router USB port, it might take up to two minutes before it is ready for sharing. By default, the USB storage device is available to all computers on your local area network (LAN). Access a Storage Device Connected to the Router From a Windows Computer To access the USB storage device from a Windows computer: 1. Connect a USB storage device to a USB port on your router. If your USB storage device uses a power supply, you must use it when you connect the USB storage device to the router. When you connect the USB storage device to the router's port, it might take up to two minutes before it is ready for sharing. By default, the USB storage device is available to all computers on your local area network (LAN). 2. Select Start > Run. 3. Enter \\readyshare in the dialog box. 4. Click the OK button. A window automatically opens and displays the files and folders on the USB storage device. Map a USB Device to a Windows Network Drive To map the USB storage device to a Windows network drive: 1. Connect a USB storage device to a USB port on the router. If your USB storage device uses a power supply, you must use it when you connect the device to the router. When you connect the USB storage device to the router's port, it might take up to two minutes before it is ready for sharing. By default, the device is available to all computers on your local area network (LAN). 2. Select Start > Run. 3. Enter \\readyshare in the dialog box. 4. Click the OK button. Share USB Storage Devices Attached to the Router 93
-
 1
1 -
2
-
3
-
4
-
5
-
6
-
7
-
8
-
9
-
10
-
11
-
12
-
13
-
14
-
15
-
16
-
17
-
18
-
19
-
20
-
21
-
22
-
23
-
24
-
25
-
26
-
27
-
28
-
29
-
30
-
31
-
32
-
33
-
34
-
35
-
36
-
37
-
38
-
39
-
40
-
41
-
42
-
43
-
44
-
45
-
46
-
47
-
48
-
49
-
50
-
51
-
52
-
53
-
54
-
55
-
56
-
57
-
58
-
59
-
60
-
61
-
62
-
63
-
64
-
65
-
66
-
67
-
68
-
69
-
70
-
71
-
72
-
73
-
74
-
75
-
76
-
77
-
78
-
79
-
80
-
81
-
82
-
83
-
84
-
85
-
86
-
87
-
 88
88 -
 89
89 -
 90
90 -
 91
91 -
 92
92 -
 93
93 -
 94
94 -
 95
95 -
 96
96 -
 97
97 -
 98
98 -
99
-
100
-
101
-
102
-
103
-
104
-
105
-
106
-
107
-
108
-
109
-
110
-
111
-
112
-
113
-
114
-
115
-
116
-
117
-
118
-
119
-
120
-
121
-
122
-
123
-
124
-
125
-
126
-
127
-
128
-
129
-
130
-
131
-
132
-
133
-
134
-
135
-
136
-
137
-
138
-
139
-
140
-
141
-
142
-
143
-
144
-
145
-
146
-
147
-
148
-
149
-
150
-
151
-
152
-
153
-
154
-
155
 |
 |
