Netgear AC2300 User Manual - Page 45
Manage Network Access Control Lists, To manage devices that are allowed or blocked
 |
View all Netgear AC2300 manuals
Add to My Manuals
Save this manual to your list of manuals |
Page 45 highlights
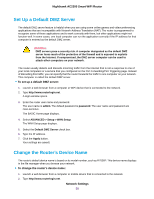
Nighthawk AC2300 Smart WiFi Router • To block the services based on a schedule, select the Per Schedule radio button. For information about how to specify the schedule, see Schedule When to Block Internet Sites and Services on page 46. 6. Click the Add button. The Block Services Setup page displays. 7. To add a service that is in the Service Type menu, select the application or service. The settings for this service automatically display in the fields. 8. To add a service or application that is not in the menu, select User Defined, and do the following: a. If you know that the application uses either TCP or UDP, select the appropriate protocol. Otherwise, select TCP/UDP (both). b. Enter the starting port and ending port numbers. If the service uses a single port number, enter that number in both fields. To find out which port numbers the service or application uses, you can contact the publisher of the application, ask user groups or newsgroups, or search on the Internet. 9. Select a filtering option: • Only This IP Address. Block services for a single computer. • IP Address Range. Block services for a range of computers with consecutive IP addresses on your network. • All lP Addresses. Block services for all computers on your network. 10. Click the Add button. Your settings are saved. Manage Network Access Control Lists You can use access control to block or allow access to your network. To manage devices that are allowed or blocked: 1. Launch a web browser from a computer or mobile device that is connected to the network. 2. Type http://www.routerlogin.net. A login window opens. 3. Enter the router user name and password. The user name is admin. The default password is password. The user name and password are case-sensitive. The BASIC Home page displays. 4. Select ADVANCED > Security > Access Control. The Access Control page displays. 5. Select the Turn on Access Control radio button. Control Access to the Internet 45
-
 1
1 -
2
-
3
-
4
-
5
-
6
-
7
-
8
-
9
-
10
-
11
-
12
-
13
-
14
-
15
-
16
-
17
-
18
-
19
-
20
-
21
-
22
-
23
-
24
-
25
-
26
-
27
-
28
-
29
-
30
-
31
-
32
-
33
-
34
-
35
-
36
-
37
-
38
-
39
-
 40
40 -
 41
41 -
 42
42 -
 43
43 -
 44
44 -
 45
45 -
 46
46 -
 47
47 -
 48
48 -
 49
49 -
 50
50 -
51
-
52
-
53
-
54
-
55
-
56
-
57
-
58
-
59
-
60
-
61
-
62
-
63
-
64
-
65
-
66
-
67
-
68
-
69
-
70
-
71
-
72
-
73
-
74
-
75
-
76
-
77
-
78
-
79
-
80
-
81
-
82
-
83
-
84
-
85
-
86
-
87
-
88
-
89
-
90
-
91
-
92
-
93
-
94
-
95
-
96
-
97
-
98
-
99
-
100
-
101
-
102
-
103
-
104
-
105
-
106
-
107
-
108
-
109
-
110
-
111
-
112
-
113
-
114
-
115
-
116
-
117
-
118
-
119
-
120
-
121
-
122
-
123
-
124
-
125
-
126
-
127
-
128
-
129
-
130
-
131
-
132
-
133
-
134
-
135
-
136
-
137
-
138
-
139
-
140
-
141
-
142
-
143
-
144
-
145
-
146
-
147
-
148
-
149
-
150
-
151
-
152
-
153
-
154
-
155
 |
 |