Panasonic AW-UE100 Operating Instructions - Page 126
Chroma Level [Off, -99% to 99%], Chroma Phase [-31 to +31], Master Pedestal [-200 to +200]
 |
View all Panasonic AW-UE100 manuals
Add to My Manuals
Save this manual to your list of manuals |
Page 126 highlights
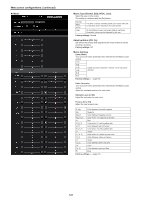
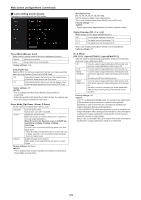
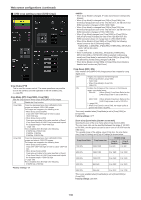
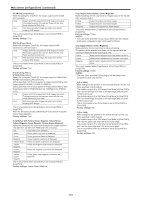
Web screen configurations (continued) ATW Speed [Slow, Normal, Fast] Set the control speed of the ATW function. Slow Tracks at a speed slower than [Normal]. Normal Tracks at normal speed. Fast Tracks at a speed faster than [Normal]. This is only enabled when [White Balance Mode] is set to [ATW]. Factory settings: Normal ATW Target R [-10 to +10] Make fine adjustments to the Rch output when converging with the auto tracking white balance operation. This is only enabled when [White Balance Mode] is set to [ATW]. Factory settings: 0 ATW Target B [-10 to +10] Make fine adjustments to the Bch output when converging with the auto tracking white balance operation. This is only enabled when [White Balance Mode] is set to [ATW]. Factory settings: 0 Chroma Level [Off, -99% to 99%] Set here the color intensity (chroma level) of the images. Factory settings: 0% Chroma Phase [-31 to +31] Make fine adjustments to the hue of the colors in the images. Factory settings: 0 ABB When the [Execute] button is clicked, automatic black balance (ABB) is executed and the black balance is reset. Master Pedestal [-200 to +200] This item is used to adjust the black level (adjust the pedestal). These parts become darker when a negative setting is selected and, conversely, lighter when a positive setting is selected. Factory settings: 0 R Pedestal [-100 to +100] This enables the R pedestal to be adjusted. Factory settings: 0 G Pedestal [-100 to +100] This enables the G pedestal to be adjusted. Factory settings: 0 B Pedestal [-100 to +100] This enables the B pedestal to be adjusted. Factory settings: 0 Pedestal Offset [Off, On] Set the pedestal level of the Rch, Gch, and Bch when the auto black balance has been adjusted. Off Set the pedestal level to [0] for [R Pedestal], [G Pedestal], and [B Pedestal]. On Maintain the values set for each of [R Pedestal], [G Pedestal], and [B Pedestal]. Factory settings: Off Detail [Off, On] Turn on/off the contour (sharpness of images) adjustment of images. Factory settings: On Master Detail [-31 to +31] Adjust the contour correction level (master). This is only enabled when [Detail] is set to [On]. Factory settings: 0 Detail Coring [0 to 60] Set the level of the signal (including noise) which makes the detail effect not work. This is only enabled when [Detail] is set to [On]. Factory settings: 15 V Detail Level [-7 to +7] Adjust the contour correction level in the vertical direction. This is only enabled when [Detail] is set to [On]. Factory settings: 0 Detail Frequency [-7 to +7] Set the boost frequency of detail. -7: Low frequency to +7: High frequency When a high frequency is selected, the detail effect is added to subjects with more definition. This is only enabled when [Detail] is set to [On]. Factory settings: 0 Level Depend. [-7 to +7] When the detail of bright signals are emphasized, the detail of dark parts are compressed. The larger the [Level Depend.] setting, the more detail of bright parts is compressed. This is only enabled when [Detail] is set to [On]. Factory settings: 0 Knee Aperture Level [0 to 5] Set the detail level of very bright parts. This is only enabled when [Detail] is set to [On]. Factory settings: 2 Detail Gain(+) [-31 to +31] Set the detail level of the plus direction (direction to be made brighter). This is only enabled when [Detail] is set to [On]. Factory settings: 0 Detail Gain(-) [-31 to +31] Set the detail level of the minus direction (direction to be made darker). This is only enabled when [Detail] is set to [On]. Factory settings: 0 Skin Detail [Off, On] This function smooths skin and produces a more beautiful image. This is only enabled when [Detail] is set to [On]. Factory settings: Off Skin Detail Effect [0 to 31] The skin of human subjects appears smoother the larger the setting value. This is only enabled when [Detail] is set to [On] and [Skin Detail] is set to [On]. Factory settings: 16 126
-
 1
1 -
2
-
3
-
4
-
5
-
6
-
7
-
8
-
9
-
10
-
11
-
12
-
13
-
14
-
15
-
16
-
17
-
18
-
19
-
20
-
21
-
22
-
23
-
24
-
25
-
26
-
27
-
28
-
29
-
30
-
31
-
32
-
33
-
34
-
35
-
36
-
37
-
38
-
39
-
40
-
41
-
42
-
43
-
44
-
45
-
46
-
47
-
48
-
49
-
50
-
51
-
52
-
53
-
54
-
55
-
56
-
57
-
58
-
59
-
60
-
61
-
62
-
63
-
64
-
65
-
66
-
67
-
68
-
69
-
70
-
71
-
72
-
73
-
74
-
75
-
76
-
77
-
78
-
79
-
80
-
81
-
82
-
83
-
84
-
85
-
86
-
87
-
88
-
89
-
90
-
91
-
92
-
93
-
94
-
95
-
96
-
97
-
98
-
99
-
100
-
101
-
102
-
103
-
104
-
105
-
106
-
107
-
108
-
109
-
110
-
111
-
112
-
113
-
114
-
115
-
116
-
117
-
118
-
119
-
120
-
 121
121 -
 122
122 -
 123
123 -
 124
124 -
 125
125 -
 126
126 -
 127
127 -
 128
128 -
 129
129 -
 130
130 -
 131
131 -
132
-
133
-
134
-
135
-
136
-
137
-
138
-
139
-
140
-
141
-
142
-
143
-
144
-
145
-
146
-
147
-
148
-
149
-
150
-
151
-
152
-
153
-
154
-
155
-
156
-
157
-
158
-
159
-
160
-
161
-
162
-
163
-
164
-
165
-
166
-
167
-
168
-
169
-
170
-
171
-
172
-
173
-
174
-
175
-
176
-
177
-
178
-
179
-
180
 |
 |
