Panasonic AW-UE100 Operating Instructions - Page 157
Back up screen [Backup], Web screen configurations continued, Download, Upload
 |
View all Panasonic AW-UE100 manuals
Add to My Manuals
Save this manual to your list of manuals |
Page 157 highlights
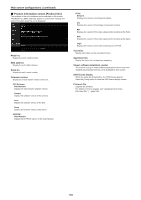
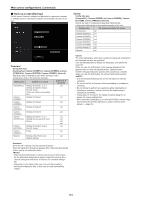
Web screen configurations (continued) „„Back up screen [Backup] On this screen, the unit's settings can be saved to a personal computer or settings saved in a personal computer can be loaded into the unit for use. Download Config data type [Camera(ALL), Camera (SCENE1) to Camera (SCENE4), Camera (SCENE ALL), Camera (SYSTEM), Camera (PRESET), Network] Specify the type of settings to save when saving the unit's configuration data on the personal computer. Setting value Content to be saved Extension of saving file Camera(ALL) Settings for Scene1, 2, 3, 4 .cal Settings for System, Output, Pan/Tilt, Preset (These are saved as one setting file.) Camera Settings for Scene1 .cs1 (SCENE1) Camera Settings for Scene2 .cs2 (SCENE2) Camera Settings for Scene3 .cs3 (SCENE3) Camera Settings for Scene4 .cs4 (SCENE4) Camera Settings for Scene1, 2, 3, 4 .cs1 (SCENE ALL) (Setting files are saved for each .cs2 Scene.) .cs3 .cs4 Camera Settings for System, Output, .csy (SYSTEM) Pan/Tilt, Preset Camera Preset .cpr (PRESET) Network Settings of the Web screen .nal Network settings Download Save the unit's settings onto the personal computer. When the destination dialog box appears after clicking the [Download] button, specify the destination folder. • After the [Download] button is clicked, the amount of time it takes for the destination dialog box to appear is about 50 seconds for a camera settings file and about 10 seconds for a network settings file. • Depending on the status of the unit, it may not be possible to download configuration files. In this case, the unit automatically restarts. Upload Config data type [Camera(ALL), Camera (SCENE1) to Camera (SCENE4), Camera (SYSTEM), Camera (PRESET), Network] Specify the type of configuration data when reflecting the configuration data saved on a personal computer to this unit. Setting value File extension suitable for upload Camera(ALL) .cal Camera (SCENE1) .cs1 Camera (SCENE2) .cs2 Camera (SCENE3) .cs3 Camera (SCENE4) .cs4 Camera (SYSTEM) .csy Camera (PRESET) .cpr Network .nal Upload The unit's setting files, which were saved in the personal computer by the download function, are uploaded. Click the [Select] button to display the dialog box, and specify the saved file. When you click the [OK] button in the message dialog box that appears after you click the [Upload] button, uploading starts. Another message dialog box appears after uploading is complete. When you click the [OK] button, the unit will restart automatically. • Use the files downloaded by the unit as the data to be used for uploading. • Do not turn off the unit's power while downloading or uploading is underway. • Do not attempt to perform any operations while downloading or uploading is underway. Instead, wait until the downloading or uploading is completed. • It takes about 3 minutes for the upload complete dialog box to appear for camera settings files. • When uploading Camera(ALL) or Camera(SYSTEM), the still image (thumbnail) that has been registered in preset memory will be erased. (→ page 76) 157
-
 1
1 -
2
-
3
-
4
-
5
-
6
-
7
-
8
-
9
-
10
-
11
-
12
-
13
-
14
-
15
-
16
-
17
-
18
-
19
-
20
-
21
-
22
-
23
-
24
-
25
-
26
-
27
-
28
-
29
-
30
-
31
-
32
-
33
-
34
-
35
-
36
-
37
-
38
-
39
-
40
-
41
-
42
-
43
-
44
-
45
-
46
-
47
-
48
-
49
-
50
-
51
-
52
-
53
-
54
-
55
-
56
-
57
-
58
-
59
-
60
-
61
-
62
-
63
-
64
-
65
-
66
-
67
-
68
-
69
-
70
-
71
-
72
-
73
-
74
-
75
-
76
-
77
-
78
-
79
-
80
-
81
-
82
-
83
-
84
-
85
-
86
-
87
-
88
-
89
-
90
-
91
-
92
-
93
-
94
-
95
-
96
-
97
-
98
-
99
-
100
-
101
-
102
-
103
-
104
-
105
-
106
-
107
-
108
-
109
-
110
-
111
-
112
-
113
-
114
-
115
-
116
-
117
-
118
-
119
-
120
-
121
-
122
-
123
-
124
-
125
-
126
-
127
-
128
-
129
-
130
-
131
-
132
-
133
-
134
-
135
-
136
-
137
-
138
-
139
-
140
-
141
-
142
-
143
-
144
-
145
-
146
-
147
-
148
-
149
-
150
-
151
-
 152
152 -
 153
153 -
 154
154 -
 155
155 -
 156
156 -
 157
157 -
 158
158 -
 159
159 -
 160
160 -
 161
161 -
 162
162 -
163
-
164
-
165
-
166
-
167
-
168
-
169
-
170
-
171
-
172
-
173
-
174
-
175
-
176
-
177
-
178
-
179
-
180
 |
 |
