Sony PDWHD1500 User Manual (PDW-HD1500 / PDW-F1600 Operation Manual for Firmwa - Page 113
File Operations in File Access Mode (for Windows), Making FAM connections
 |
View all Sony PDWHD1500 manuals
Add to My Manuals
Save this manual to your list of manuals |
Page 113 highlights
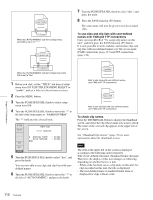
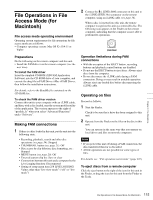
File Operations in File Access Mode (for Windows) File access mode operating environment Operating system requirements for file operations by file access mode (called FAM below) are as follows. • Computer operating system: Microsoft Windows XP Professional SP3 or higher, Microsoft Windows Vista Business/Ultimate (32 bit/64 bit) SP2 or higher, or Microsoft Windows 7 Professional/Ultimate (32 bit/64 bit) Preparations Install the FAM driver on the remote computer (see the next section). To install the FAM driver Insert the supplied CD-ROM (XDCAM Application Software) into the CD-ROM drive of your computer, navigate to the FAM Driver directory, and run the installer in the directory for your operating system, then follow the installation instructions. For details, refer to the ReadMe file contained on the CDROM disc. Note Use Version 2.10 or higher of the FAM driver. The FAM driver on the supplied CD-ROM is Version 2.10 or higher. If a FAM driver is already installed on your computer, check the version. To check the version For Windows XP: Select "ProDisc" from "Add or Remove Programs" in the control panel, and then click "Click here for support information". For Windows Vista: (1) Open "Programs" >"Programs and Functions" in the control panel, and then right click the header (where "Name" and "Supplier" are displayed) and select "Other...". (2) In the Advanced Settings dialog, check "Version" and click "OK". The version column appears. Check the version of "ProDisc". For Windows 7: Open "Programs and Features" in the control panel, and then check the version of "ProDisc". Making FAM connections 1 If there is a disc loaded in this unit, put the unit into the following state. • Recording, playback, search and other disc operations (see page 54): Stopped • THUMBNAIL button (see page 21): Off • Disc access by Lock or Delete All Clips, Format Disc, and so on in the Disc Menu (see page 74): Stopped • Unsaved current clip list: Save or clear • Connections between this unit and a computer by the Live Logging function: Disconnected • Setting of setup menu item 258 LIVE LOGGING: Values other than "live view mode" ("off" or "live mode") 2 If this unit is connected to a remote computer by FTP, log out from the FTP session (see page 117). 3 Connect the (i.LINK) S400connector on this unit to the i.LINK (IEEE1394) connector on the remote computer, using an i.LINK cable (see connections illustration on page 36). Windows recognizes this unit as a removable disc, and displays one of the following icons on the remote computer's task bar: • Windows XP: • Windows Vista or Windows 7: The remote computer is now able to perform file operations when a disc is inserted into this unit. Note You will not be able to log in if you put the unit into the state described in step 1 after connecting the cable. To log in, disconnect the cable, put the unit into the state described in step 1, and connect it again. When you make your first FAM connection The Found New Hardware Wizard dialog appears when you connect this unit to your computer. Select "Install the software automatically (Recommended)", and then click the Next button. Click the Finish button when the software installation finishes. Operation limitations during FAM connections • Front panel operations are disabled, except for operations with the EJECT button. • This unit cannot be controlled from devices connected to the REMOTE(9P) connector (D-sub 9-pin) and (i.LINK) S400 connector. • Signal input to this unit and signal output from this unit are stopped. Chapter 6 File Operations 113 File Operations in File Access Mode (for Windows)
-
 1
1 -
2
-
3
-
4
-
5
-
6
-
7
-
8
-
9
-
10
-
11
-
12
-
13
-
14
-
15
-
16
-
17
-
18
-
19
-
20
-
21
-
22
-
23
-
24
-
25
-
26
-
27
-
28
-
29
-
30
-
31
-
32
-
33
-
34
-
35
-
36
-
37
-
38
-
39
-
40
-
41
-
42
-
43
-
44
-
45
-
46
-
47
-
48
-
49
-
50
-
51
-
52
-
53
-
54
-
55
-
56
-
57
-
58
-
59
-
60
-
61
-
62
-
63
-
64
-
65
-
66
-
67
-
68
-
69
-
70
-
71
-
72
-
73
-
74
-
75
-
76
-
77
-
78
-
79
-
80
-
81
-
82
-
83
-
84
-
85
-
86
-
87
-
88
-
89
-
90
-
91
-
92
-
93
-
94
-
95
-
96
-
97
-
98
-
99
-
100
-
101
-
102
-
103
-
104
-
105
-
106
-
107
-
 108
108 -
 109
109 -
 110
110 -
 111
111 -
 112
112 -
 113
113 -
 114
114 -
 115
115 -
 116
116 -
 117
117 -
 118
118 -
119
-
120
-
121
-
122
-
123
-
124
-
125
-
126
-
127
-
128
-
129
-
130
-
131
-
132
-
133
-
134
-
135
-
136
-
137
-
138
-
139
-
140
-
141
-
142
-
143
-
144
-
145
-
146
-
147
-
148
-
149
-
150
-
151
-
152
-
153
-
154
-
155
-
156
-
157
-
158
-
159
-
160
-
161
-
162
-
163
-
164
-
165
-
166
-
167
-
168
-
169
-
170
-
171
-
172
-
173
-
174
-
175
-
176
-
177
-
178
-
179
-
180
-
181
-
182
-
183
-
184
-
185
-
186
-
187
-
188
-
189
-
190
-
191
-
192
-
193
-
194
-
195
-
196
-
197
-
198
 |
 |