Sony PDWHD1500 User Manual (PDW-HD1500 / PDW-F1600 Operation Manual for Firmwa - Page 58
Using the Live Logging function
 |
View all Sony PDWHD1500 manuals
Add to My Manuals
Save this manual to your list of manuals |
Page 58 highlights
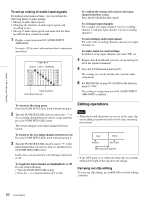
Chapter 4 Recording and Playback Do one of the following to stop the Clip Continuous Rec function. (A new clip will be generated the next time you start recording.) • Perform a clip operation (lock, delete, or rename a clip) • Make a network or FAM connection • Eject the disc • Change the recording format (change the setting of setup menu item 031 RECORDING FORMAT) • Power the unit off To turn the function off Set setup menu item 150 REC MODE to "normal". Using the Live Logging function Live Logging allows you to transfer planning metadata and proxy AV data between this unit and a computer as you are recording. Live Logging has the following two operation modes. Operation mode Live Live View Main functions as seen from this unit • Receive planning metadata • Send clip metadata recorded on the basis of planning metadata • Write edited clip metadata back to disc • Same functions as above • Send proxy AV data To record with the Live Logging function enabled Connect this unit and a computer to a network (see page 153), and then set setup menu item 258 LIVE LOGGING MODE to one of the following. live mode: Live mode live view mode: Live View mode Notes • In Live View mode, the run mode is always Free Run, regardless of the setting of RUN MODE on page P5 TC of the function menu. It is not possible to preset the timecode to be recorded. • The Disc Exchange Cache function and Clip Continuous Rec function cannot be enabled in Live View mode. • FAM or FTP connections cannot be established during a Live View mode connection. Live view mode connections cannot be established during a FAM or FTP connection. Operations on the computer side Use the PDZ-1 Proxy Browsing Software supplied with this unit (see page 175). (To use the PDZ-1 software, set the operation mode to Live View mode.) In PDZ-1, you can do the following during Live Logging. • Display logging AV data (only in Live View mode) • Add clip metadata (XML files) and write it back to the disc • Create clip lists and write them back to the disc • Set essence marks and write them back to the disc Handling of discs when recording does not end normally (salvage functions) Recording processing does not end normally if, for example, the POWER switch on the rear panel is turned off during recording, or if the power cord is disconnected during recording. Because the file system is not updated, video and audio data recorded in real time is not recognized as files and clip contents recorded up to that point are lost. However, this unit has salvage functions which can hold losses to the minimum by reconstructing clips on such discs. There is a quick salvage function which executes automatically and a full salvage function which you can execute as required. Quick salvage: Clips are reconstructed on the basis of backup data stored in nonvolatile memory and markers recorded on the disc. Processing time is about 5 seconds. Quick salvage executes automatically if the unit is powered on with a disc still loaded after recording was interrupted by power off. Full salvage: Clips are reconstructed on the basis of markers recorded on the disc. Nonvolatile memory cannot be used, so processing takes longer than for a quick salvage (about 30 seconds, although it depends on the state of the disc). You are prompted to execute a full salvage whenever you insert a disc that was removed manually from a powered off device after interruption of recording by power off. Note that no recorded clip contents are lost when the on/ standby button on the front panel is set to standby during recording, because the unit does not enter standby mode until after the end of recording processing. Notes • Even after recording finishes, do not set the POWER switch on the rear panel to off until the ACCESS indicator has gone out. • These functions salvage as much recorded material as possible after an unforeseen accident, but 100% restoration cannot be guaranteed. • When recording on the PDW-F1600 or PDW-HD1500 does not end successfully, you can use another XDCAM 58 Recording
-
 1
1 -
2
-
3
-
4
-
5
-
6
-
7
-
8
-
9
-
10
-
11
-
12
-
13
-
14
-
15
-
16
-
17
-
18
-
19
-
20
-
21
-
22
-
23
-
24
-
25
-
26
-
27
-
28
-
29
-
30
-
31
-
32
-
33
-
34
-
35
-
36
-
37
-
38
-
39
-
40
-
41
-
42
-
43
-
44
-
45
-
46
-
47
-
48
-
49
-
50
-
51
-
52
-
 53
53 -
 54
54 -
 55
55 -
 56
56 -
 57
57 -
 58
58 -
 59
59 -
 60
60 -
 61
61 -
 62
62 -
 63
63 -
64
-
65
-
66
-
67
-
68
-
69
-
70
-
71
-
72
-
73
-
74
-
75
-
76
-
77
-
78
-
79
-
80
-
81
-
82
-
83
-
84
-
85
-
86
-
87
-
88
-
89
-
90
-
91
-
92
-
93
-
94
-
95
-
96
-
97
-
98
-
99
-
100
-
101
-
102
-
103
-
104
-
105
-
106
-
107
-
108
-
109
-
110
-
111
-
112
-
113
-
114
-
115
-
116
-
117
-
118
-
119
-
120
-
121
-
122
-
123
-
124
-
125
-
126
-
127
-
128
-
129
-
130
-
131
-
132
-
133
-
134
-
135
-
136
-
137
-
138
-
139
-
140
-
141
-
142
-
143
-
144
-
145
-
146
-
147
-
148
-
149
-
150
-
151
-
152
-
153
-
154
-
155
-
156
-
157
-
158
-
159
-
160
-
161
-
162
-
163
-
164
-
165
-
166
-
167
-
168
-
169
-
170
-
171
-
172
-
173
-
174
-
175
-
176
-
177
-
178
-
179
-
180
-
181
-
182
-
183
-
184
-
185
-
186
-
187
-
188
-
189
-
190
-
191
-
192
-
193
-
194
-
195
-
196
-
197
-
198
 |
 |