Brother International DreamWeaver„ VQ3000 Users Manual - English - Page 121
Shelltuck Stitches
 |
View all Brother International DreamWeaver„ VQ3000 manuals
Add to My Manuals
Save this manual to your list of manuals |
Page 121 highlights
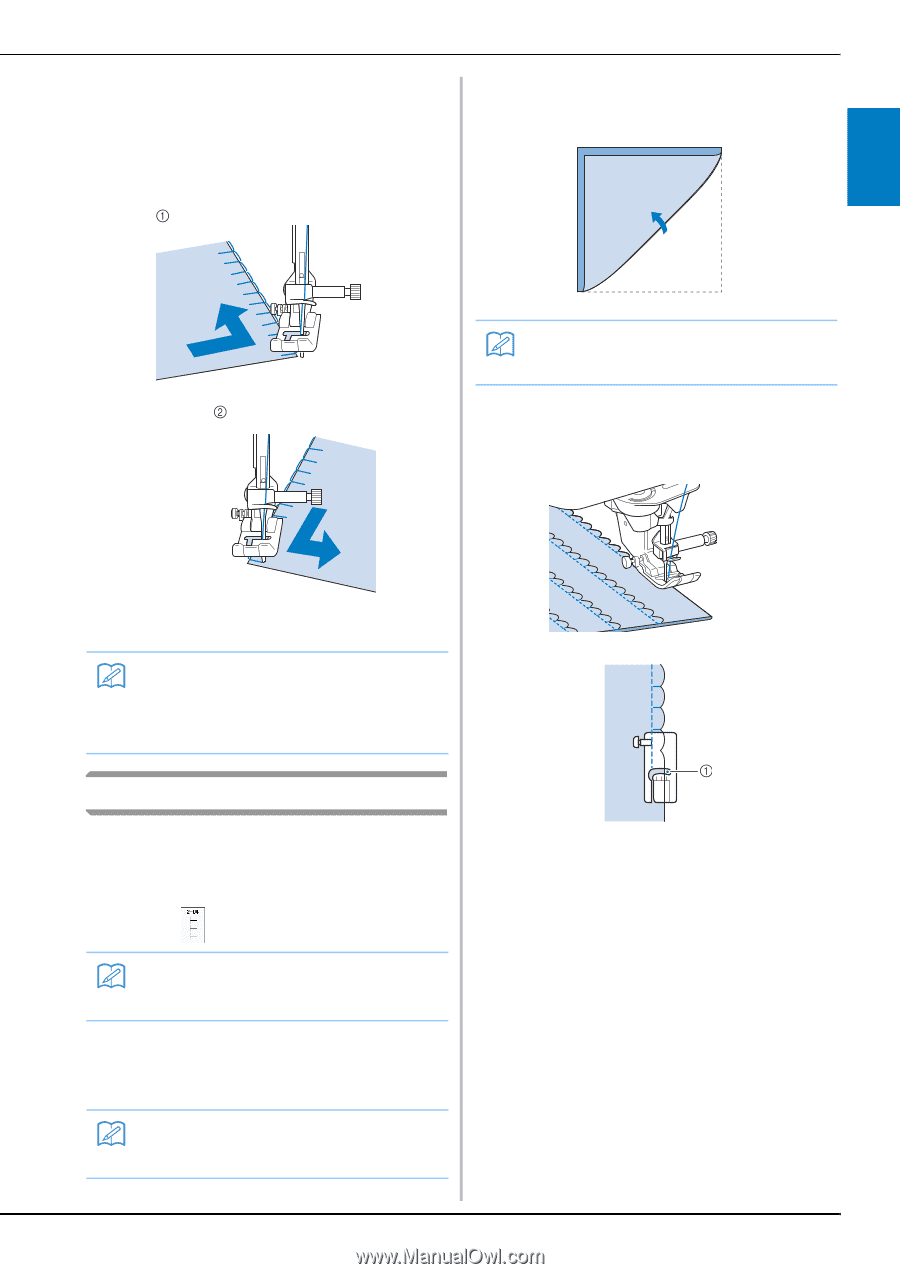
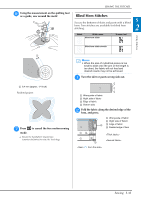
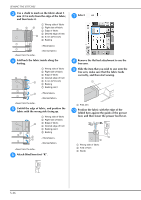
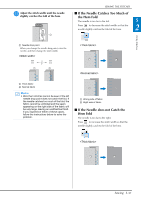
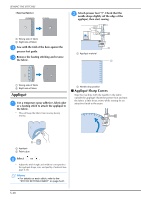
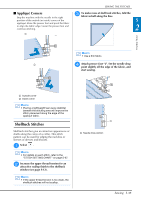
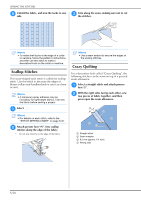
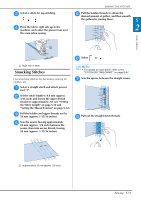
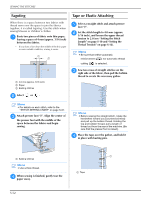
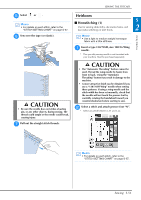
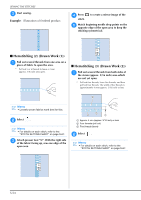
■ Appliqué Corners Stop the machine with the needle in the right position of the outside (or inside) corner of the appliqué. Raise the presser foot and pivot the fabric to align the fabric edge. Lower the presser foot and continue stitching. SEWING THE STITCHES c To make fabric in rows of shell tuck stitches, half along the bias. fold the S 2 Utility Stitches Memo • Use a thin fabric. d Attach presser foot "J". Set the needle drop point slightly off the edge of the fabric, and start sewing. a Outside corner b Inside corner Memo • Placing a lightweight tear away stabilizer beneath the stitching area will improve the stitch placement along the edge of the appliqué fabric. Shelltuck Stitches Shelltuck stitches give an attractive appearance of shells along the curve of a collar. This stitch pattern can be used for edging the neckline or sleeves of dresses and blouses. a Select . Memo • For details on each stitch, refer to the "STITCH SETTING CHART" on page S-67. b Increase the upper thread attractive scallop finish to tension for an the shelltuck stitches (see page S-12). Memo • If the upper thread tension is too weak, the shelltuck stitches will not scallop. a Needle drop position Sewing S-49
-
 1
1 -
2
-
3
-
4
-
5
-
6
-
7
-
8
-
9
-
10
-
11
-
12
-
13
-
14
-
15
-
16
-
17
-
18
-
19
-
20
-
21
-
22
-
23
-
24
-
25
-
26
-
27
-
28
-
29
-
30
-
31
-
32
-
33
-
34
-
35
-
36
-
37
-
38
-
39
-
40
-
41
-
42
-
43
-
44
-
45
-
46
-
47
-
48
-
49
-
50
-
51
-
52
-
53
-
54
-
55
-
56
-
57
-
58
-
59
-
60
-
61
-
62
-
63
-
64
-
65
-
66
-
67
-
68
-
69
-
70
-
71
-
72
-
73
-
74
-
75
-
76
-
77
-
78
-
79
-
80
-
81
-
82
-
83
-
84
-
85
-
86
-
87
-
88
-
89
-
90
-
91
-
92
-
93
-
94
-
95
-
96
-
97
-
98
-
99
-
100
-
101
-
102
-
103
-
104
-
105
-
106
-
107
-
108
-
109
-
110
-
111
-
112
-
113
-
114
-
115
-
 116
116 -
 117
117 -
 118
118 -
 119
119 -
 120
120 -
 121
121 -
 122
122 -
 123
123 -
 124
124 -
 125
125 -
 126
126 -
127
-
128
-
129
-
130
-
131
-
132
-
133
-
134
-
135
-
136
-
137
-
138
-
139
-
140
-
141
-
142
-
143
-
144
-
145
-
146
-
147
-
148
-
149
-
150
-
151
-
152
-
153
-
154
-
155
-
156
-
157
-
158
-
159
-
160
-
161
-
162
-
163
-
164
-
165
-
166
-
167
-
168
-
169
-
170
-
171
-
172
-
173
-
174
-
175
-
176
-
177
-
178
-
179
-
180
-
181
-
182
-
183
-
184
-
185
-
186
-
187
-
188
-
189
-
190
-
191
-
192
-
193
-
194
-
195
-
196
-
197
-
198
-
199
-
200
-
201
-
202
-
203
-
204
-
205
-
206
-
207
-
208
-
209
-
210
-
211
-
212
-
213
-
214
-
215
-
216
-
217
-
218
-
219
-
220
-
221
-
222
-
223
-
224
 |
 |